Chargebee provides an efficient portal for your customers to manage their account and subscription information.
Using the Self-Serve Portal, customers can modify subscriptions (add, edit, pause, resume, cancel or reactivate), download previous invoices, manage payment methods, and add or update shipping and billing addresses. Customers can also update their first name, last name, email address and phone number (if collected).
To enable Self-Serve Portal, click Settings > Configure Chargebee > Checkout and Self Serve Portal > Portal > Enable.

You can configure to display specific settings for your customers to access using the Self-Serve Portal. To set up the same, click Settings > Configure Chargebee > Checkout and Self Serve Portal > Portal.
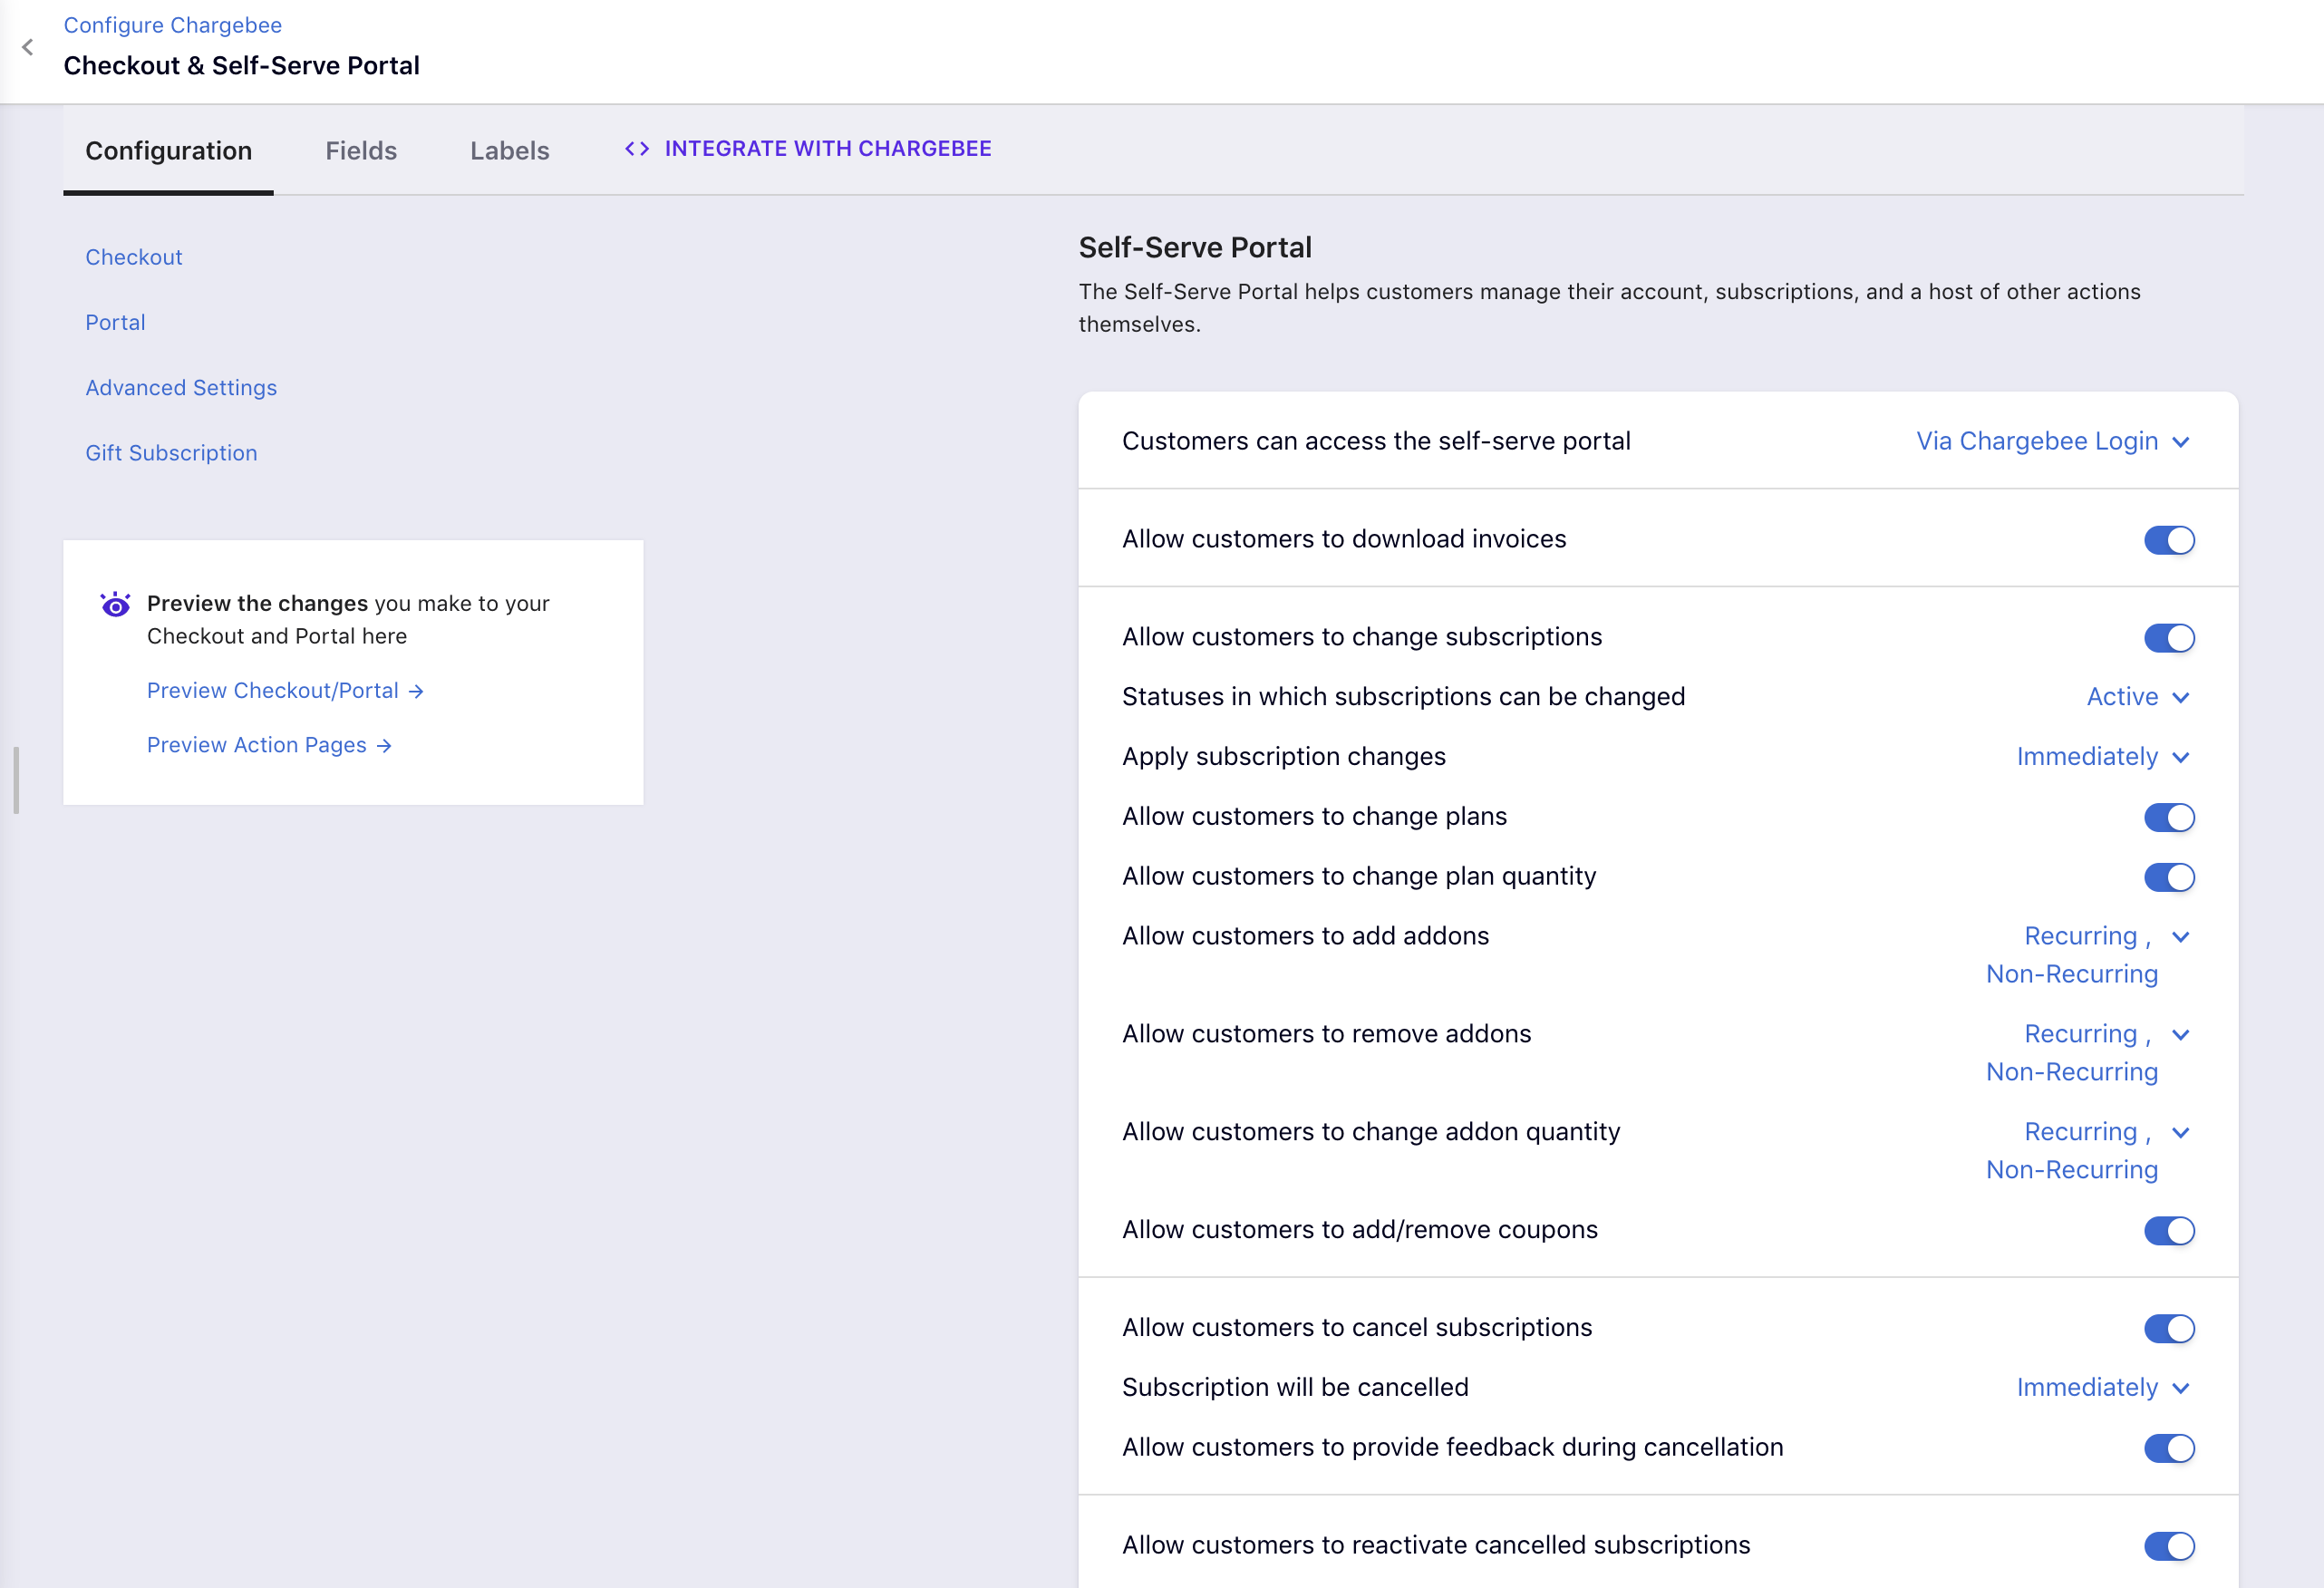
Given below are the configurations for In-app Self-Serve portal:
Customers can access the self-serve portal: There are two ways for customers to access the self-serve portal.
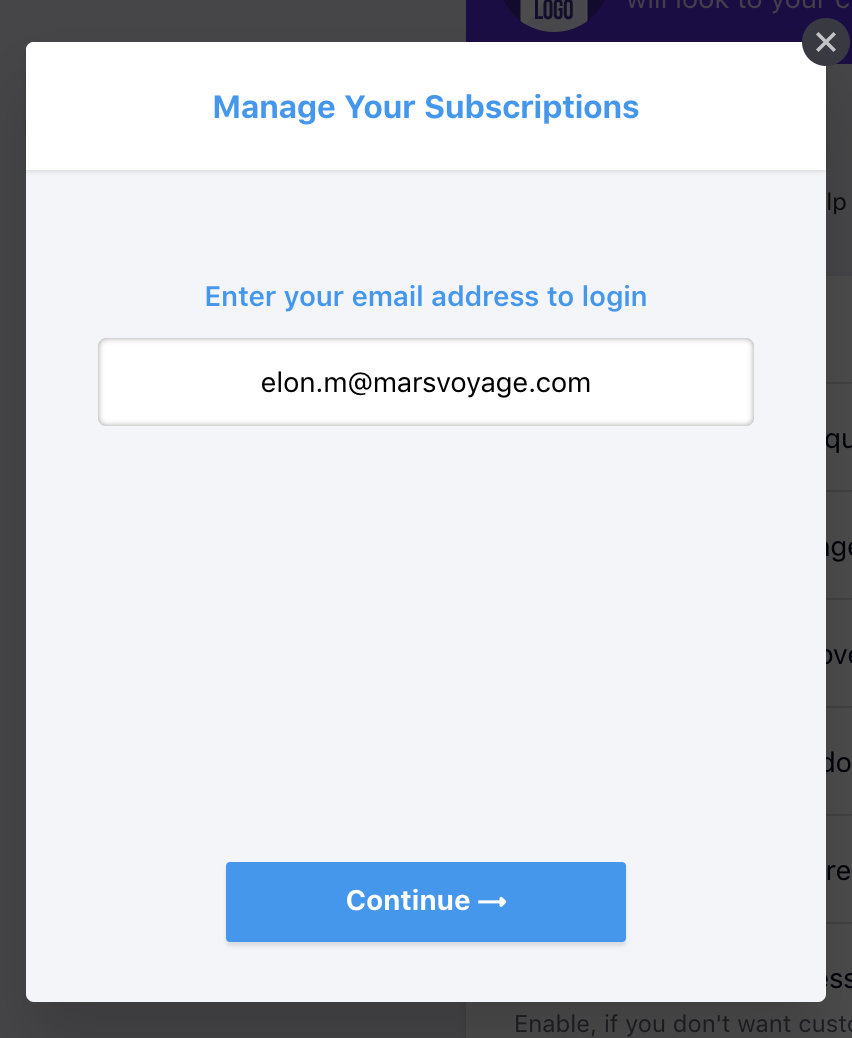
Via Chargebee Login: This is the default portal built by Chargebee. Users can login to the portal by entering the email ID and a one-time password (OTP) sent via email. After the first login, they can also set up a password for subsequent logins.
Using single sign on API: This is the recommended approach if you are handling user-authentication at your end. Integrating portal via API allows you to use your app or website's user authentication to grant access to the self-serve portal. This improves your customer experience as they do not need to sign in again if they have signed into your app or website already. Learn more .
Setting |
Functionality |
Statuses in which subscriptions can be changed |
Select the subscription states for which change subscription is allowed - active, non-renewing and trial. |
| Apply subscription changes | Select when the changes made should be effective - immediately or at the end of term. |
| Allow customers to change plans | Enable to allow your customers to change their plan. Proration applies as per site setting. |
| Allow customers to change plan quantity | Enable to allow your customers to change plan quantity. |
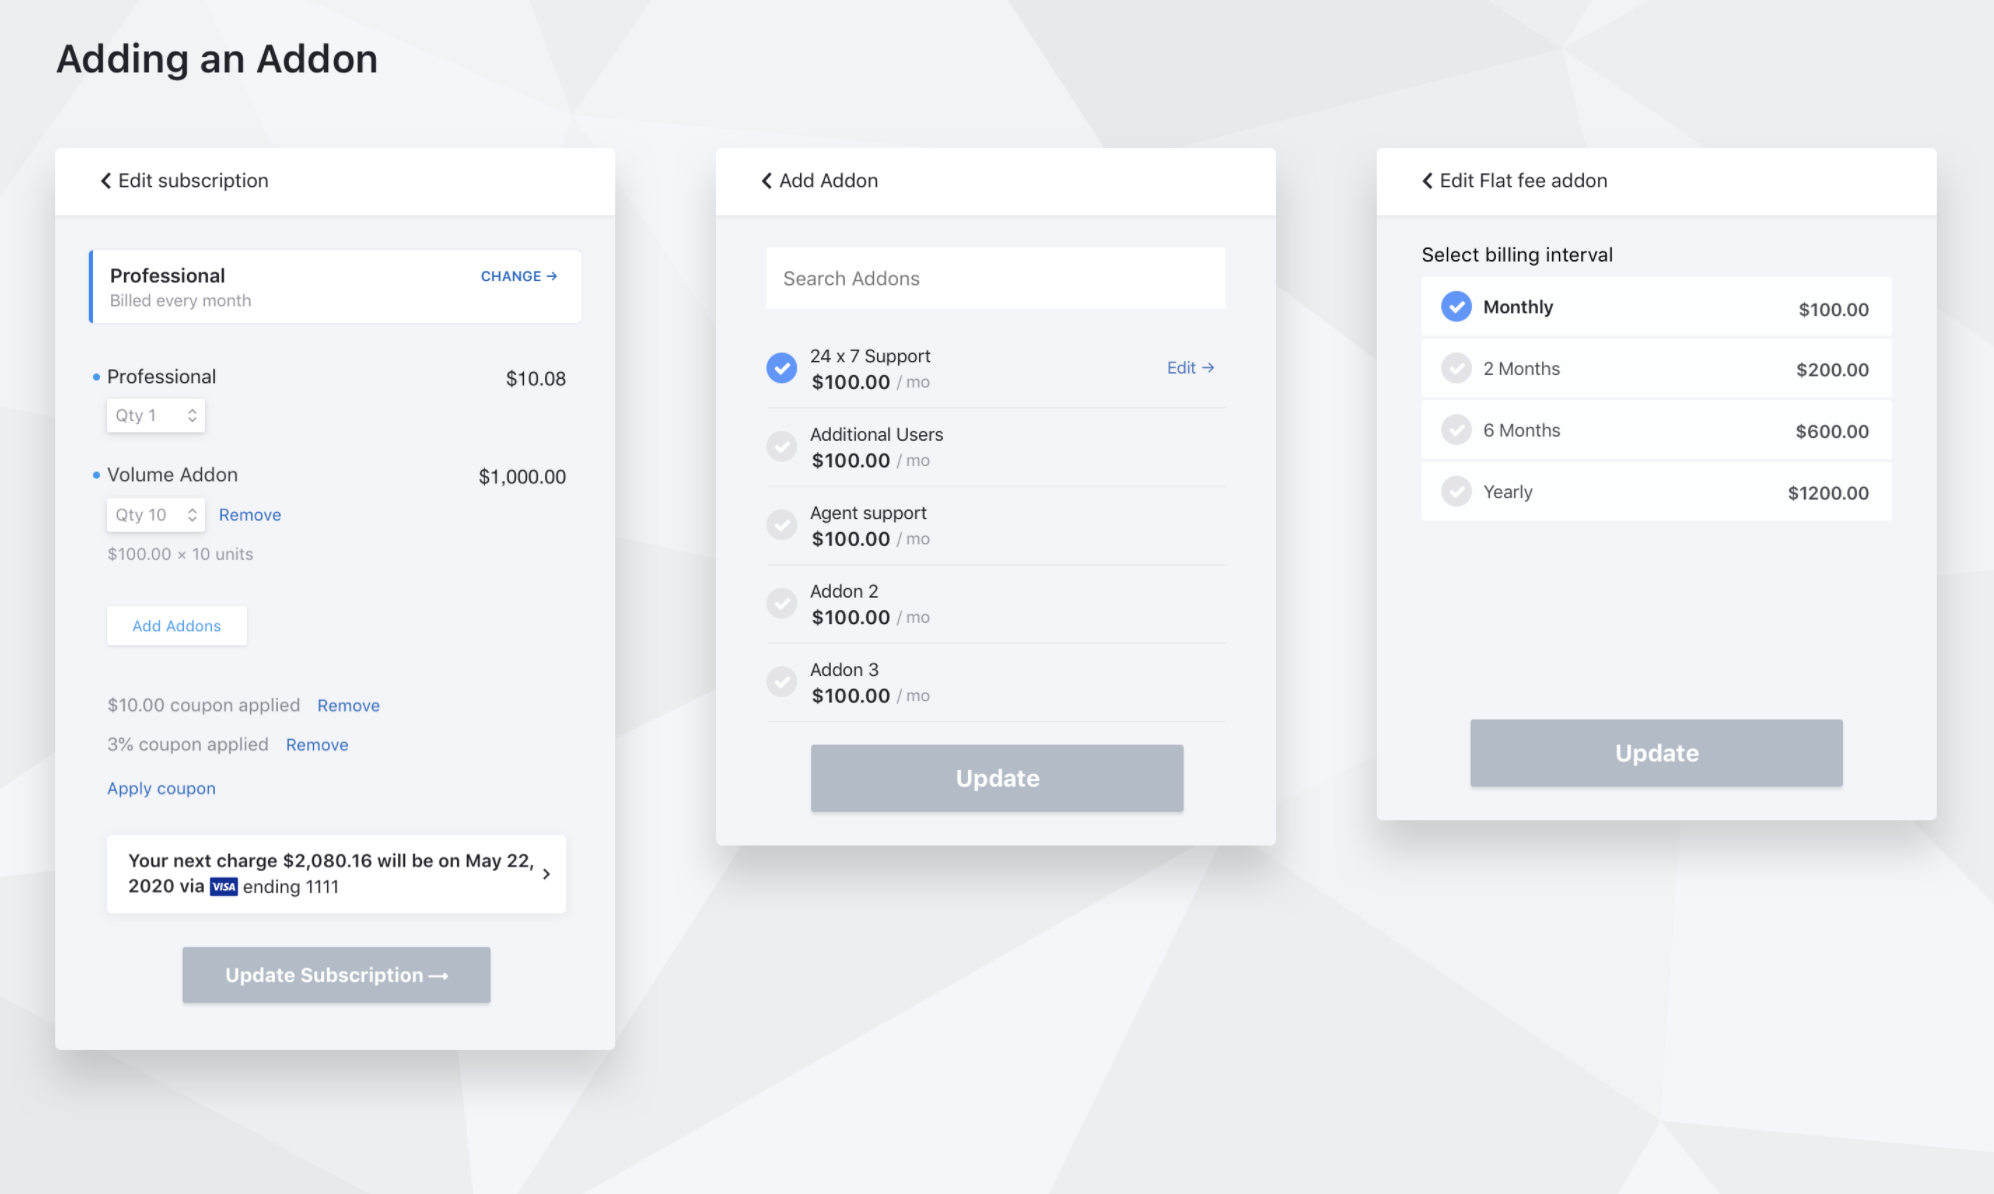
| Allow customers to add addons | Select to allow your customers to add addons to the existing plan. You can select to allow non-recurring addons, recurring addons or both. The Add Addons option is found under Edit Subscription in the portal. Recommended addons mapped to a plan are shown with a "recommended" tag. |
| Allow customers to remove addons | Select to allow your customers to remove the addons added to their subscription. You can select to allow non-recurring or recurring addons or both. |
| Allow customers to change addon quantity | Enable to allow your customers to change the quantity of each addon added to their subscription. You can select to allow non-recurring or recurring addons or both. |
| Allow customers to add/remove coupons | Enable to allow your customers to add coupons or remove added coupons. |
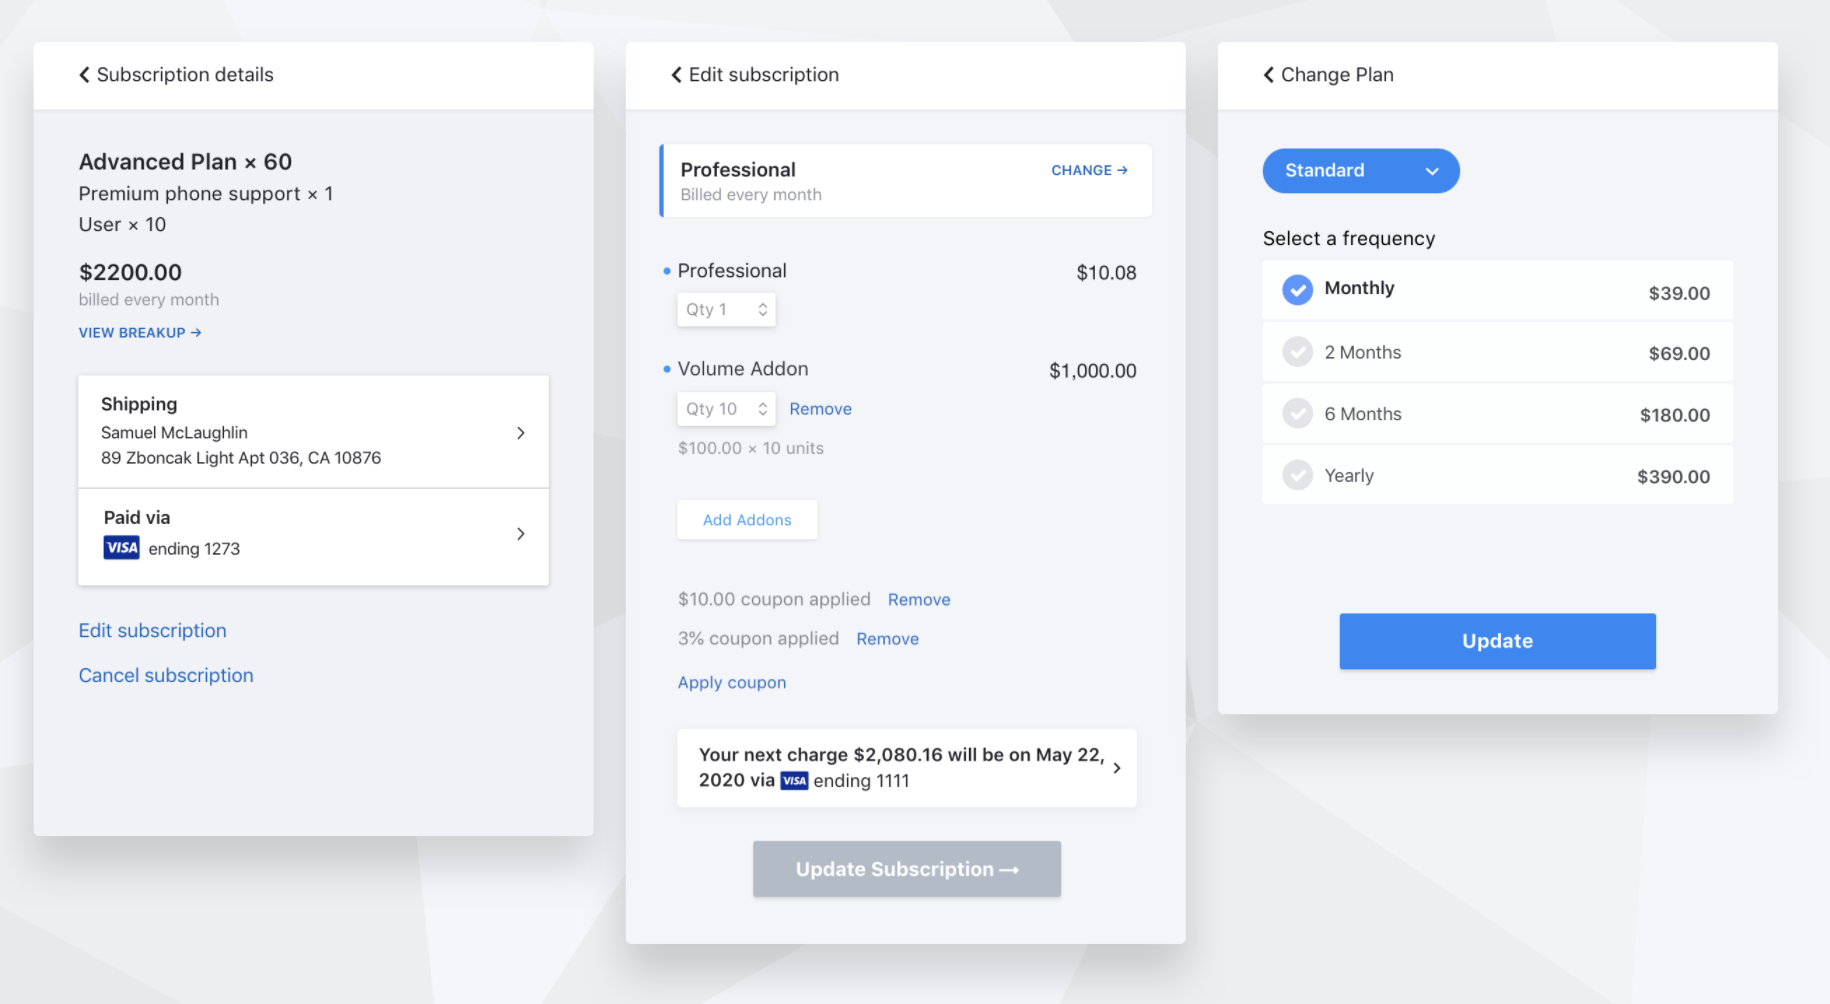
Sample of change subscription in Self-Serve Portal:
Sample of adding an addon in Self-Serve Portal:
For addons and charges to appear in the Self-Serve Portal, you must enable the option Display in Self-Serve Portal while creating addons and charges.

If not enabled already, you can use the Edit action to enable it.
To enable it, click Product catalog > Addon (or) Charge and select the addon or charge which needs to be displayed in the portal. Under the Customer-Facing Info section, enable Display in Self-Serve Portal.
Allow customers to cancel subscription: Enable to allow customers to cancel their subscription using the Self-Serve Portal. On enabling, you can choose to control the behavior of cancel subscription using the following sub-settings:
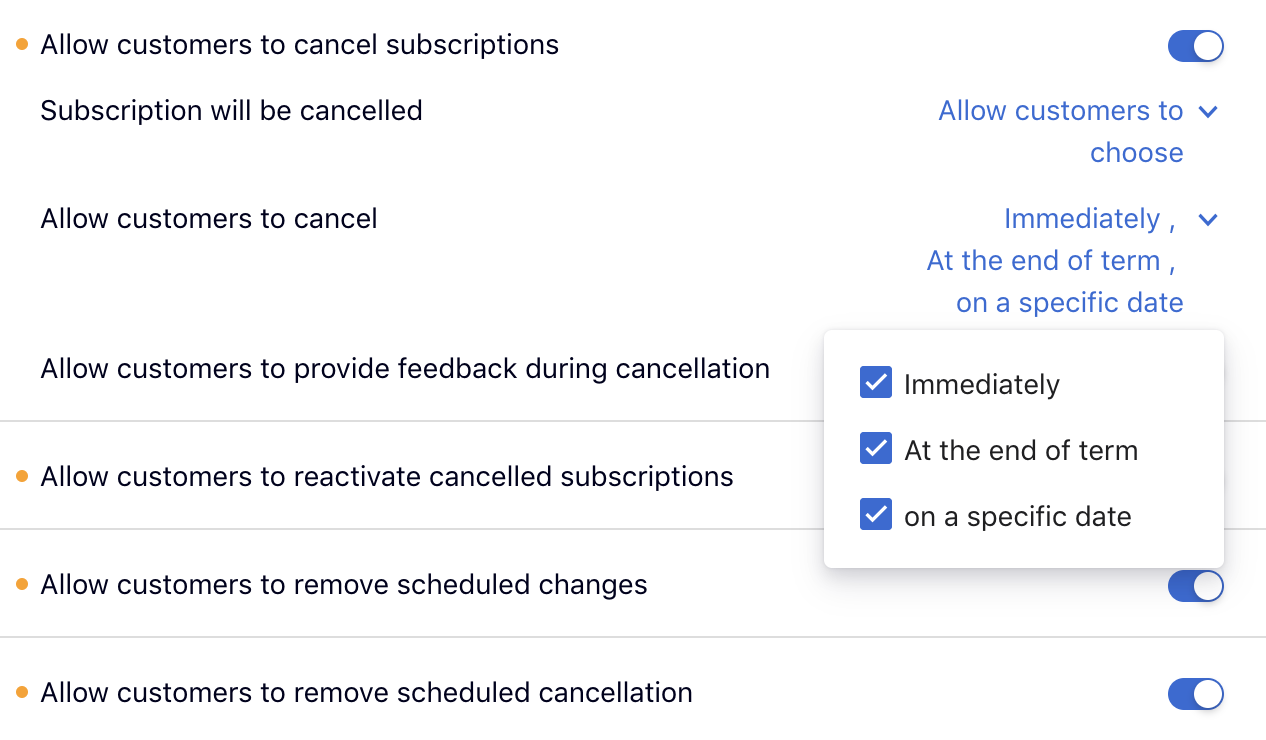
When the subscription will get cancelled - Immediately/At the end of the term/Allow customers to choose
When you select Allow Customers to choose, you can also specify when customers can cancel their subscriptions - Immediately/At the end of term/On a specific date. By choosing "On a specific date", your customers can schedule the cancellation to happen on a particular date within the subscription period.
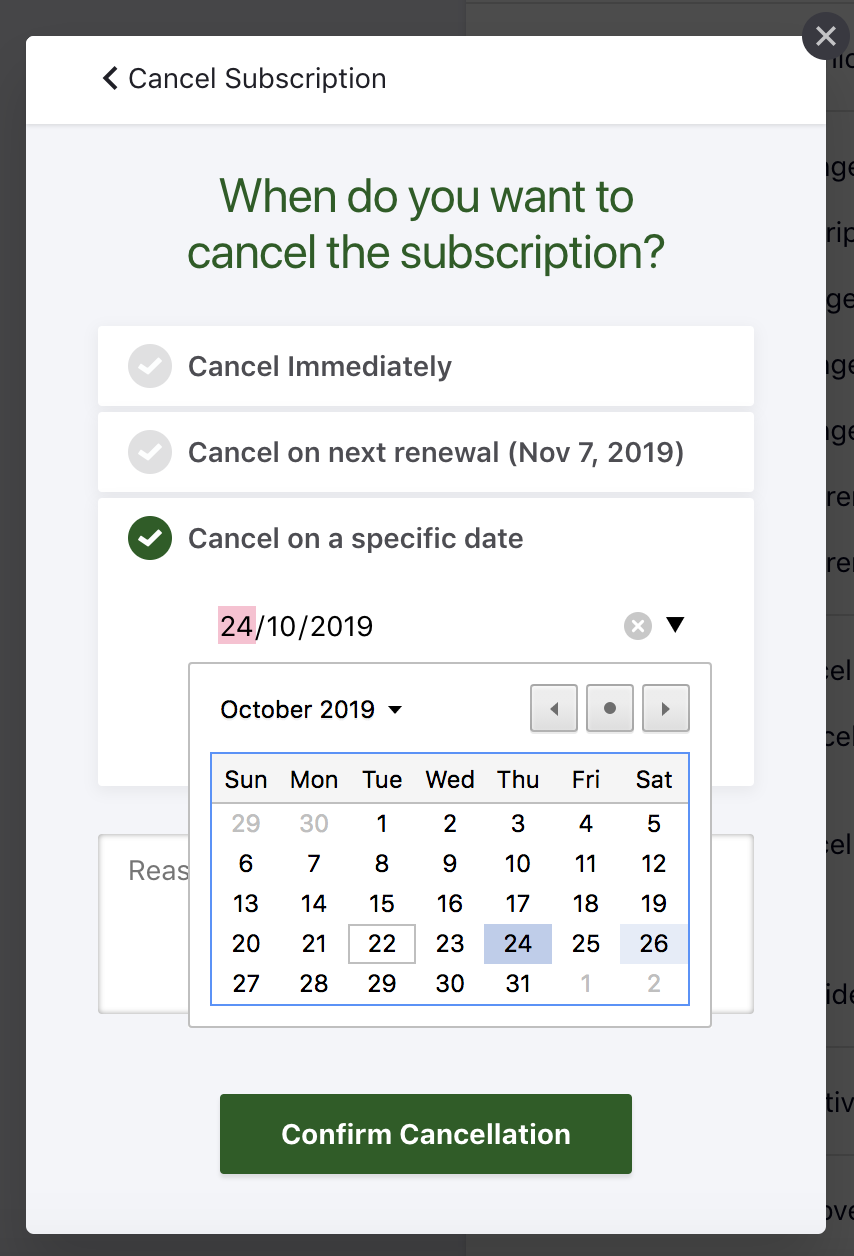
Allow customers to provide feedback during cancellation: Enable to collect feedback from customers while cancelling.
Allow customers to reactivate cancelled subscriptions: Enable to allow customers to reactivate their subscription. Learn more.
Allow customers to remove scheduled changes: Enable to allow customers to cancel any changes they have scheduled, such as a subscription pause.
Allow customers to remove scheduled cancellation: Enable to allow your customers to remove any subscription cancellations they have scheduled.
Allow customers to remove their primary payment method: Enable to allow customers to remove their primary payment method.
Allow customers to pause subscriptions: Enable to allow your customers to pause their subscriptions. Do note that for this to work, you must have enabled pause subscription for your site. Learn more.
Subscriptions will be paused: Select to allow your customers to pause the subscription at the end of the term or immediately.
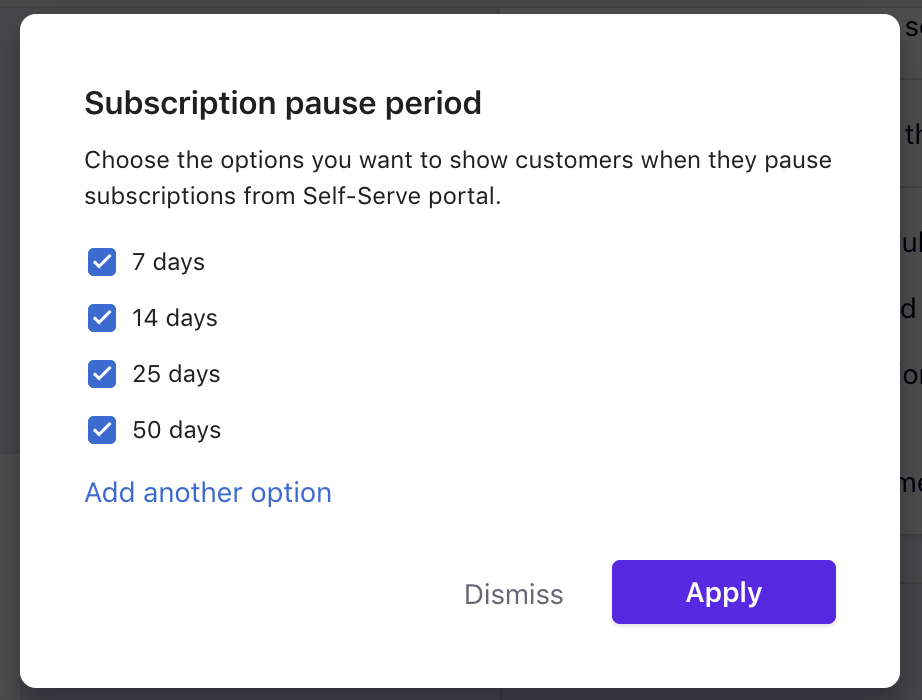
How long will subscriptions be paused: Available options are:
Allow customers to choose duration has two subsettings:
Here's a screenshot of the Manage Pause Interval window:
Take a look at our detailed doc on Checkout and Portal Advanced Settings to know more.
Chargebee's In-app Customer Portal supports 3DS transactions. Complete our SCA checklist, and Chargebee will seamlessly start handling 3DS payments via In-app Customer Portal.
Since no payment is involved during portal actions such as Update Payment Method and Add Payment Method, we will trigger a minimum amount 3DS authorization during those operations. The amount deducted for authorization would be voided automatically.
If there is any immediate charge involved during actions such as Change Subscription and Resume Subscription, 3DS verification will be triggered accordingly.
To preview the Self-Serve Portal, click Preview Checkout/Portal in the Checkout and Self Serve Portal settings page.
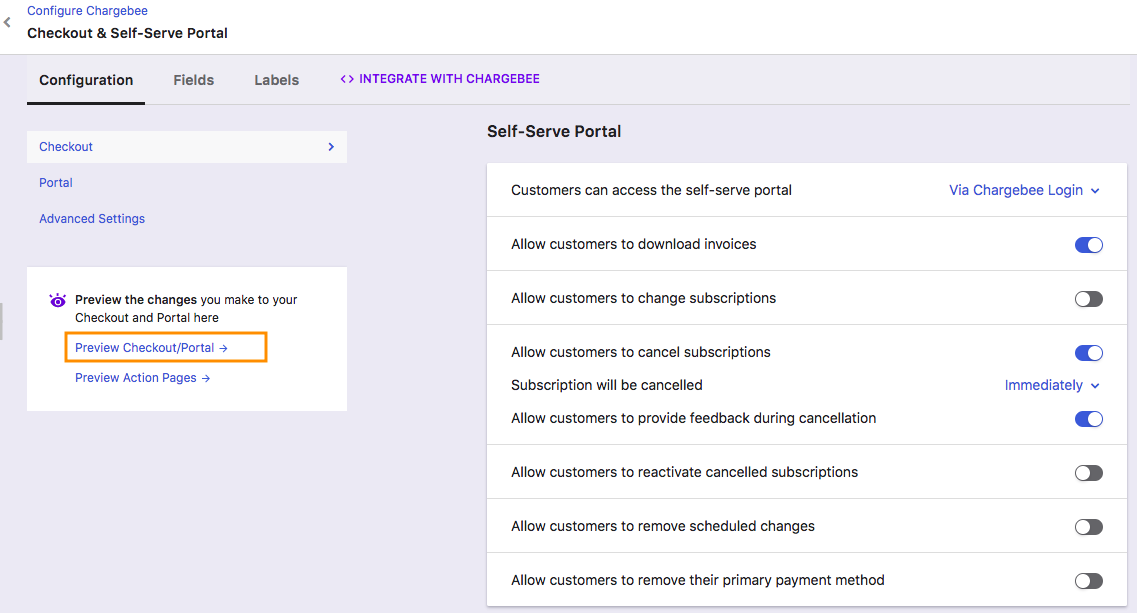
The preview checkout in live site uses the configuration from test site's checkout.
Click the Disable button under the Portal settings to disable it. Disabling the Self-Serve Portal renders it inaccessible to your customers.
