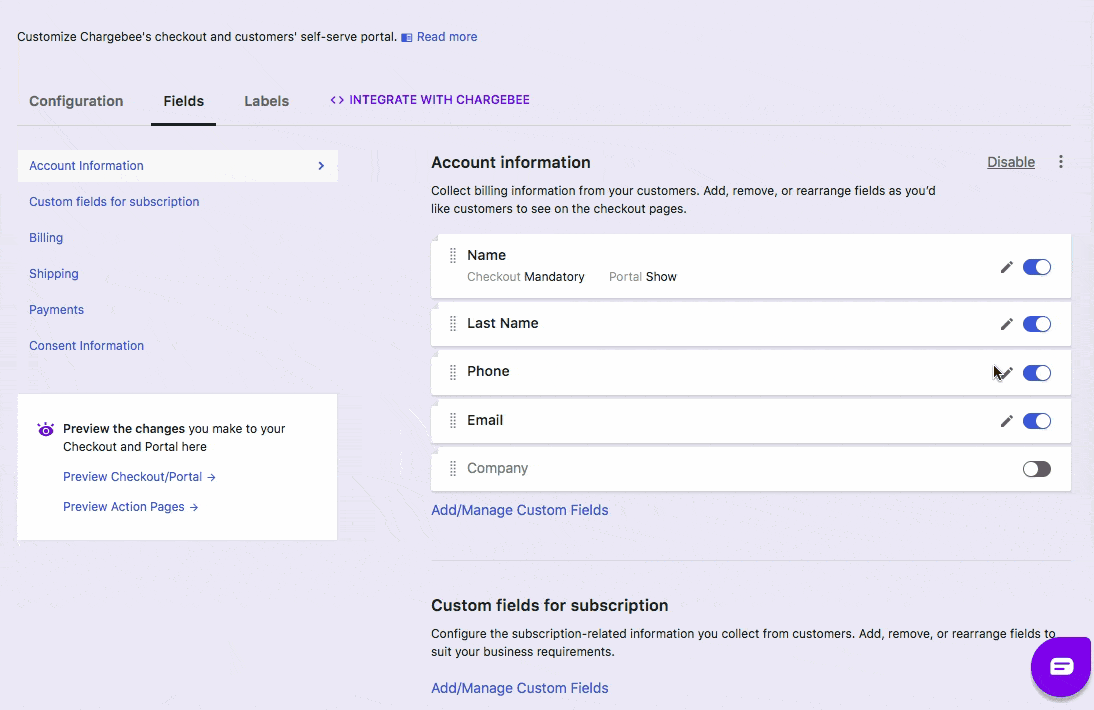
As a merchant you can choose the fields that you want to display during checkout. This allows you to collect the necessary information from your customers. You can also set custom fields to collect business specific information.
Navigate to the Settings > Configure Chargebee > Checkout and Self serve portal > Fields tab in Chargebee to configure them.
Enable the fields that you want to show in the checkout. Chargebee allows you to configure the following field information:
Account Information, Billing and Shipping sections need to be enabled from your end. You can enable them by clicking the Enable link next to the section.
Enabling a Field: You can enable/disable a field by moving the toggle next to the field.

Reordering: You can reorder the fields based on how you'd like it to be displayed in checkout.
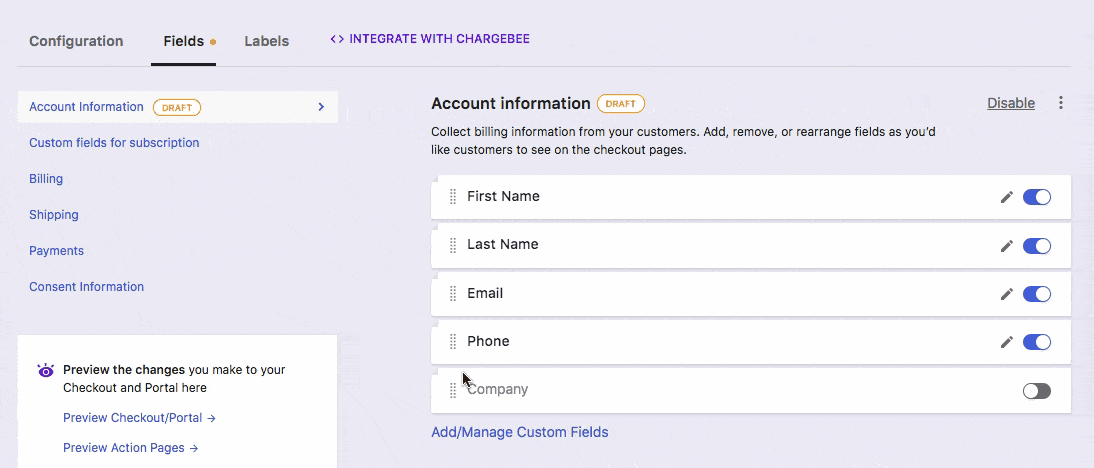
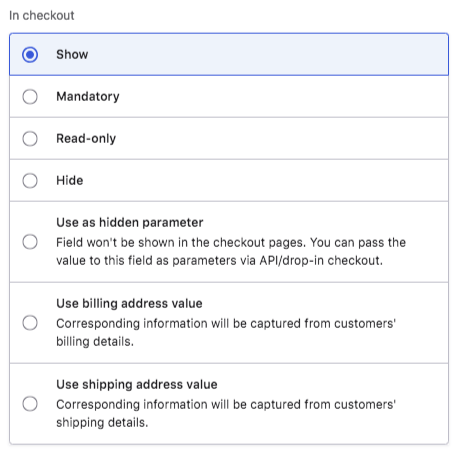
Editing a field: You can edit the name of the field, choose to show or hide during checkout.
Available properties are:
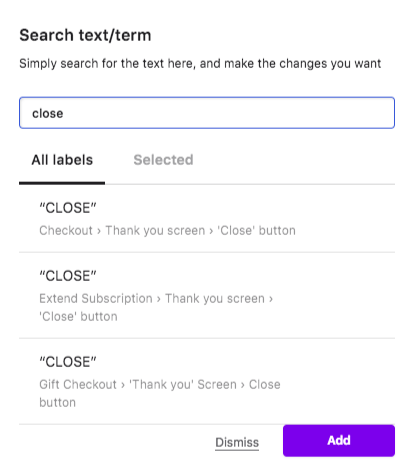
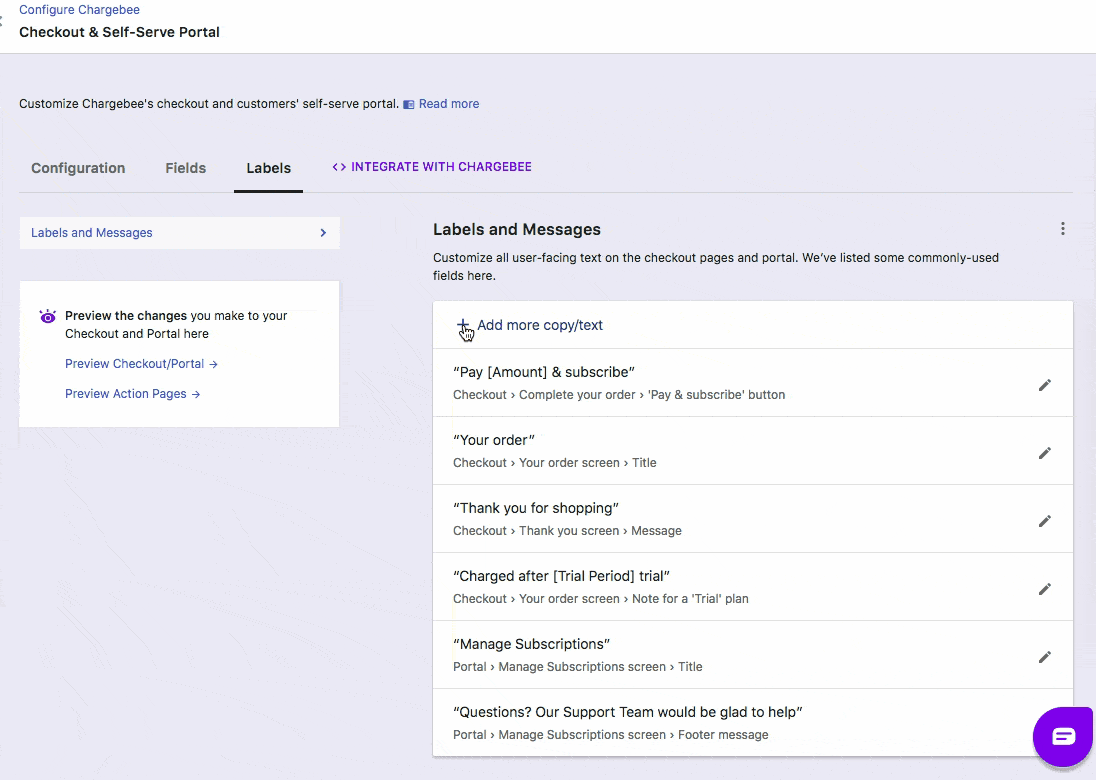
You can customize the field labels and messages displayed in the Checkout Pages and Self-Serve Portal.
To set/customize the labels, navigate to the Labels section.
You can add the labels by clicking the +Add more copy/text and selecting the copy.
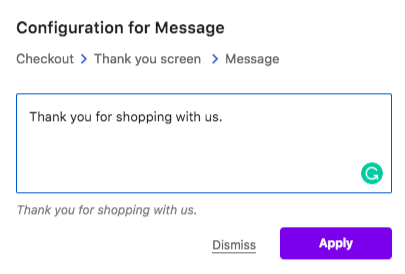
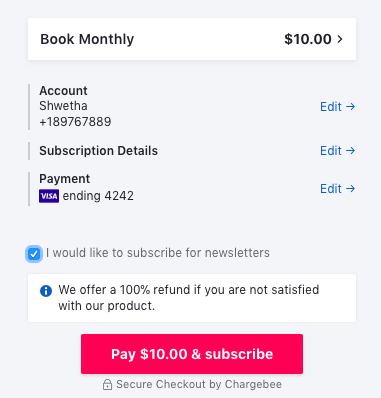
In the below example, we are going to add notes that will be displayed during checkout. This note will be displayed for all the users (except trial users) in the Complete order screen during checkout.
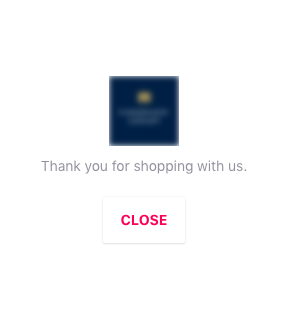
This is how it will look during checkout.
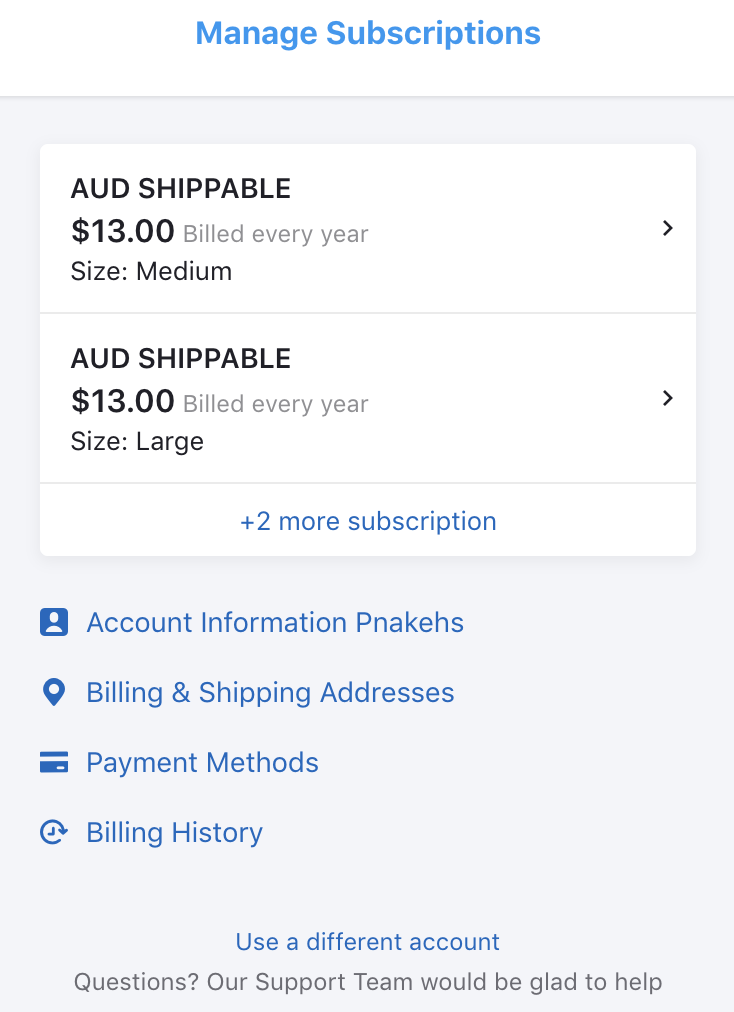
Similarly, you can customize labels even in your portal. You can add custom labels to differentiate between various items in the accounts or subscriptions list page in customer portal.
Let's say some of your customers have multiple subscriptions for the same plan. When they visit their portal to make changes to one of their subscriptions, it's not easy to find the exact one when all the subscription items look alike. With custom labels, you can call out some additional information that is unique for each subscription.
For example, you can add a custom "size" label in the subscription summary. This will help your customers identify a specific subscription easily.
Chargebee's powerful preview functionality allows you to view how the checkout and self serve portal will look for your customers.
To preview checkout and self serve portal,
Click the Preview checkout/self serve portal link in the Checkout & Self-Serve Portal page.
In the preview screen that opens, select Checkout to preview checkout and Portal to preview portal.
Select the scenario that you'd like to view under Preview settings.
Checkout: You can view the checkout flow for new users and existing users.
Portal: Select a customer from the drop down to view how the portal would like for them.
Saying thank you is an integral part in every customer interaction. Chargebee allows you to either pass a small thank you note at the end of the transaction or redirect them to a custom URL.
Adding thank you note: