Your Apple Store app is now connected to Chargebee. This document guides you through the process of configuring prerequisite settings within Chargebee, import of products and upload receipts from the App Store. During this process you will complete the following steps:
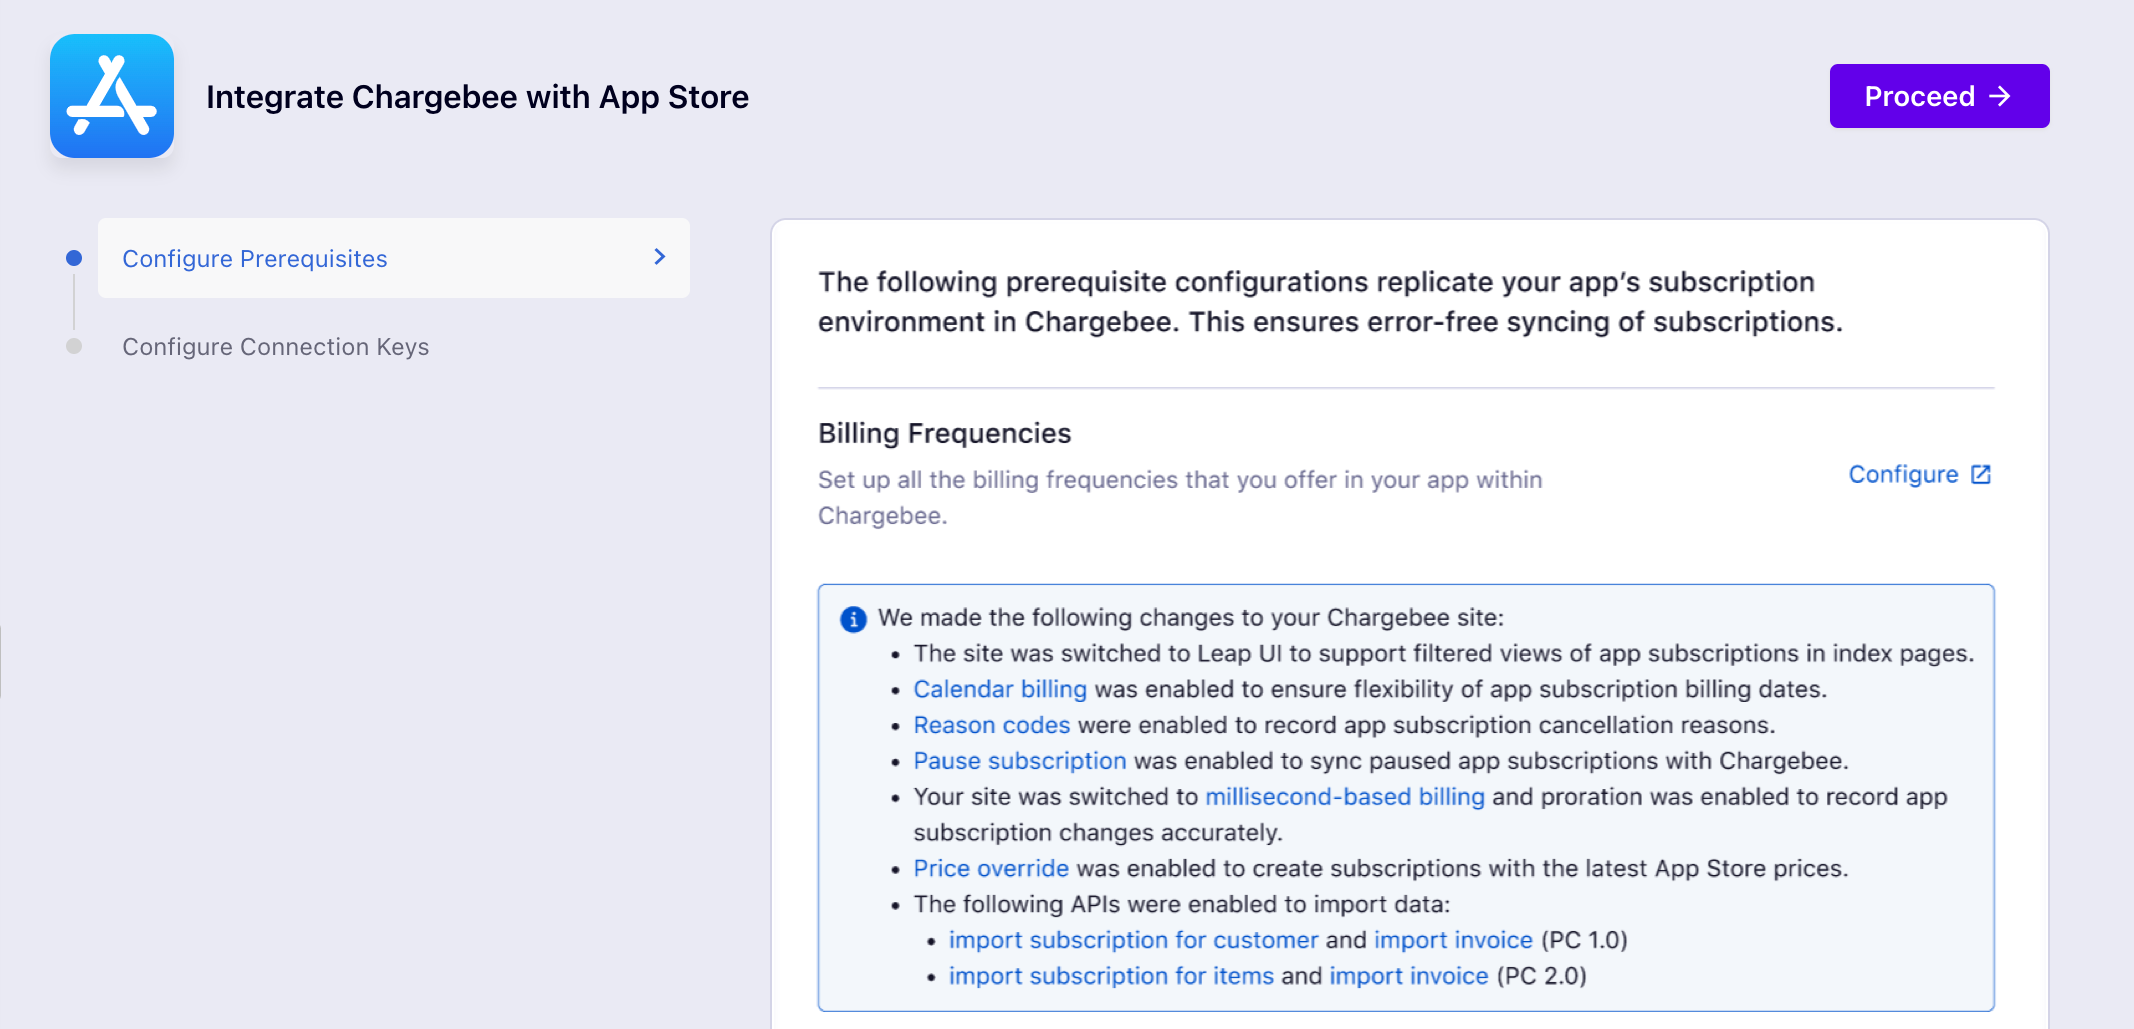
As part of the integration you must configure prerequisites within your Chargebee site.
You must configure all of the currencies associated with your App Store app.
Click Configure to set up your currencies. Read more here.
The App store uses Proration and millisecond-based billing, hence, you must model the accountable duration for your billing to include milli-second based billing and enable proration for your app in Chargebee too.
Click Configure to set up your Billing mode. Read more here.
You must configure the billing frequency options associated with your product catalog when creating Plans, Addons, or Charges. The pre-configured options include Daily, Weekly, Monthly, and Yearly. However, you can also create custom billing frequencies.
Click Manage to view the Billing frequency options.
Select the applicable options or click Add custom frequency to create billing frequencies.
Enter the frequency, select the applicable duration and click Add.
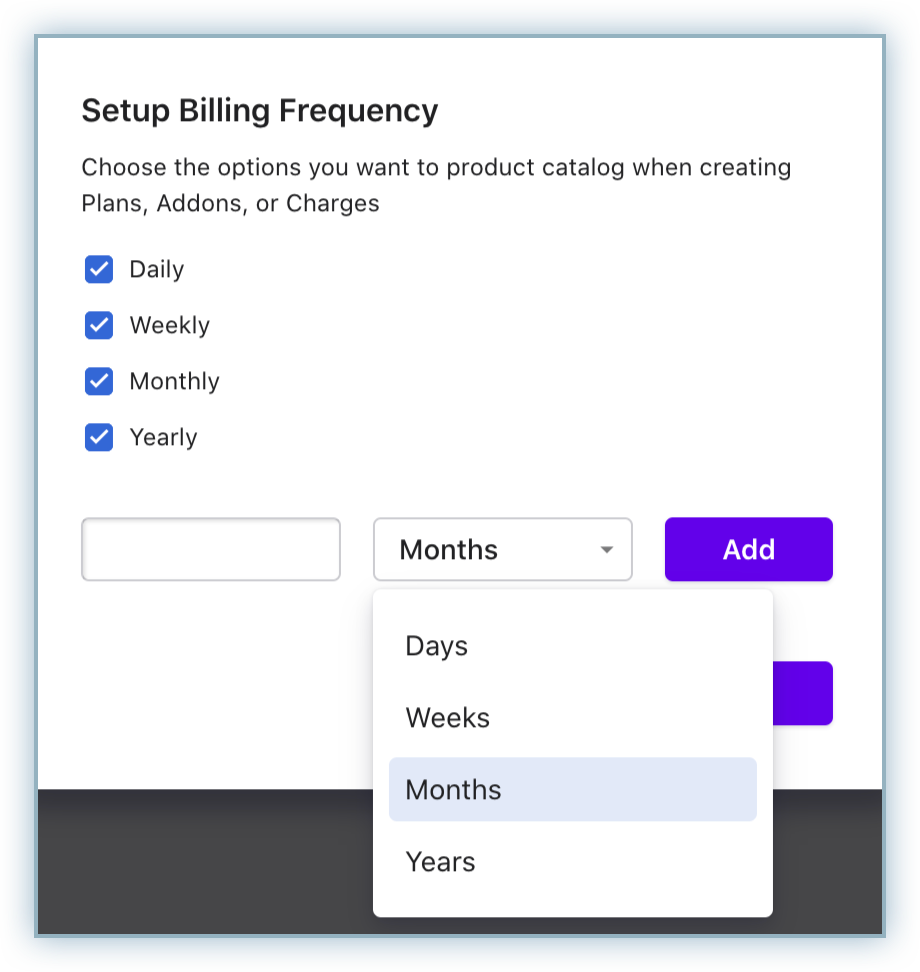
Click Apply to complete setting up your Billing Frequency.
Enable Calendar Billing for your Chargebee site.
Enable Reason Codes for your Chargebee site.
Enable Pause/Resume Subscription for your Chargebee site.
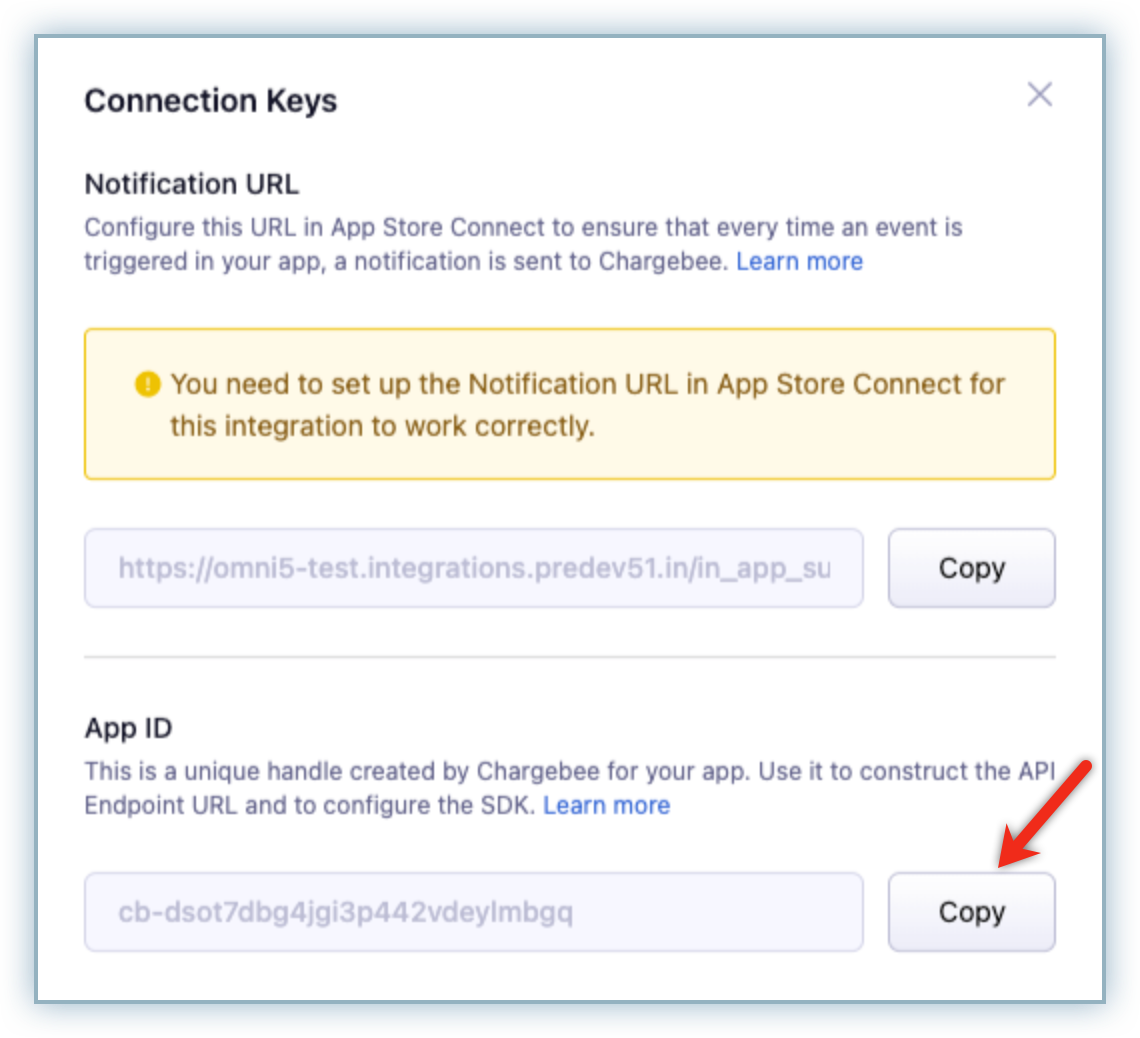
After the import of Products and In-App Purchase receipts to your Chargebee site, you must configure the following connection keys:
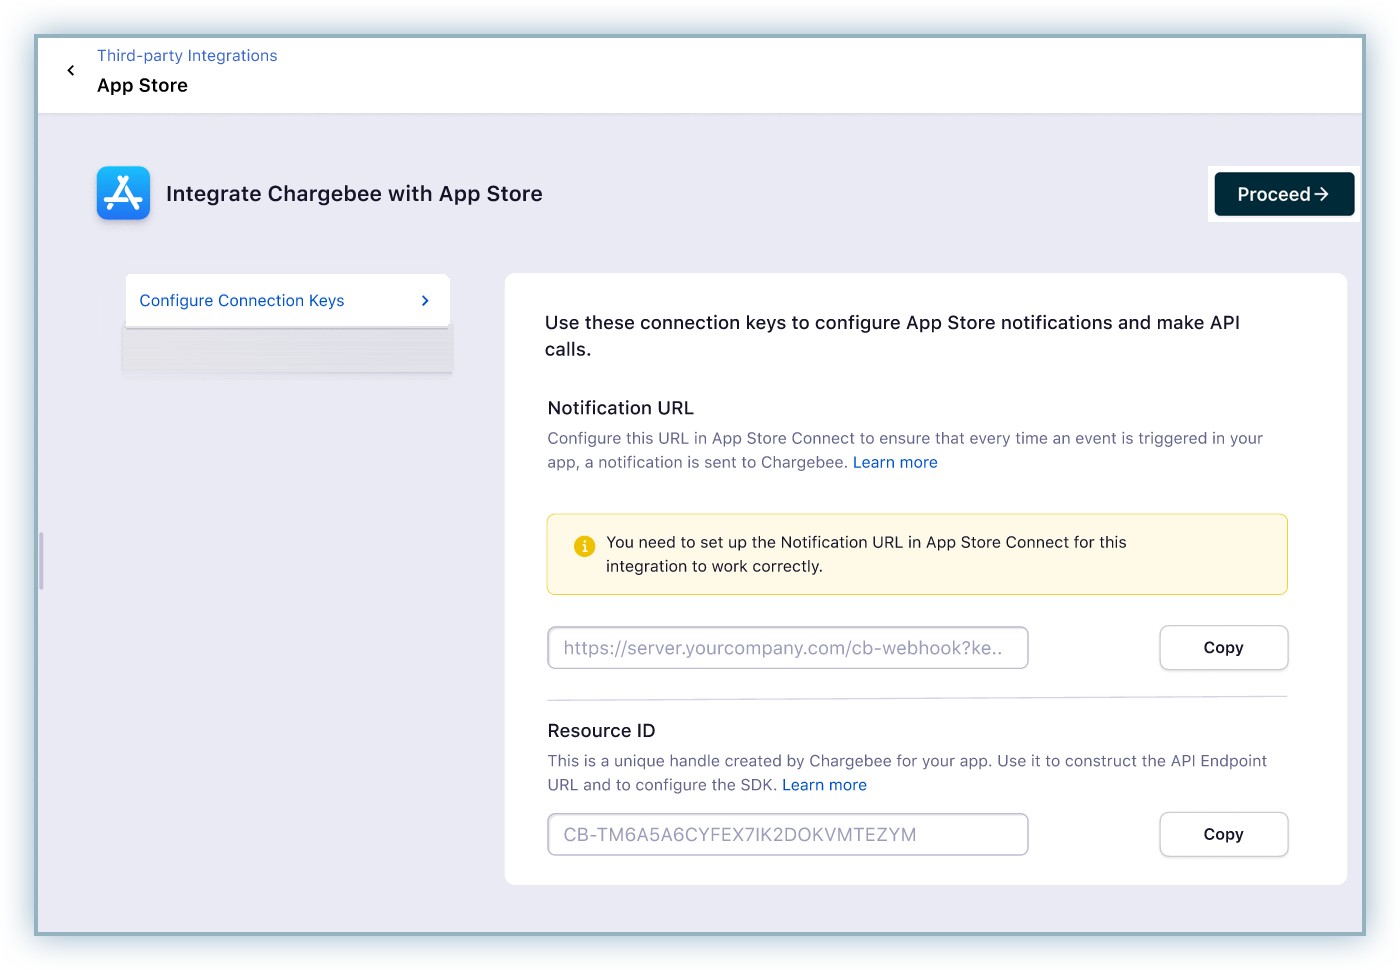
Your Chargebee site must be updated with the most recent changes associated with subscriptions on App Store. This can be accomplished with the use of Notification URLs wherein App Store sends notifications to your server of real-time changes in a subscription's status.
Follow the steps below to configure the Notification URL
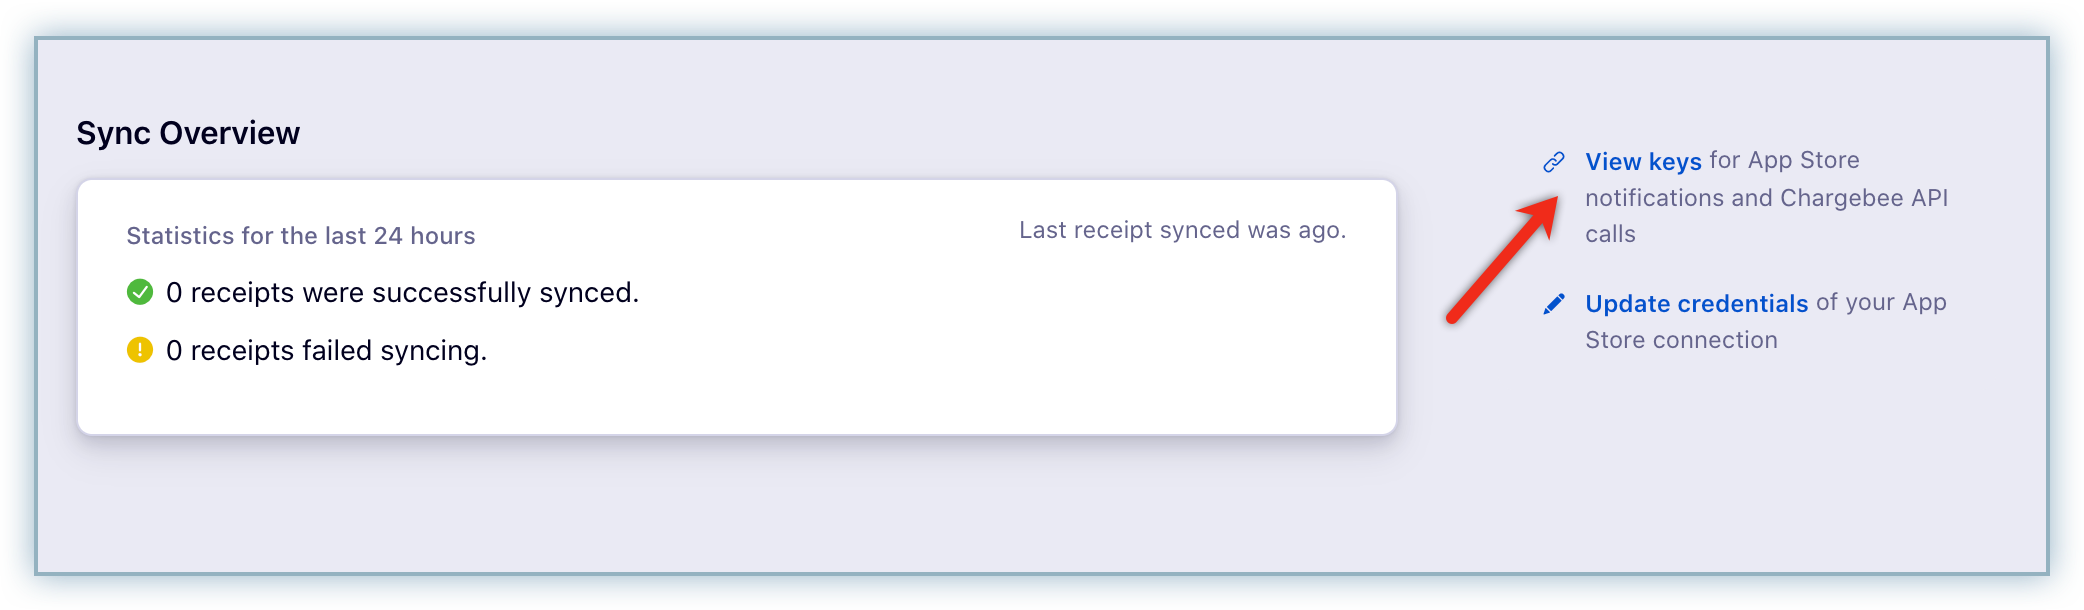
Click View Keys in the Sync Overview page.
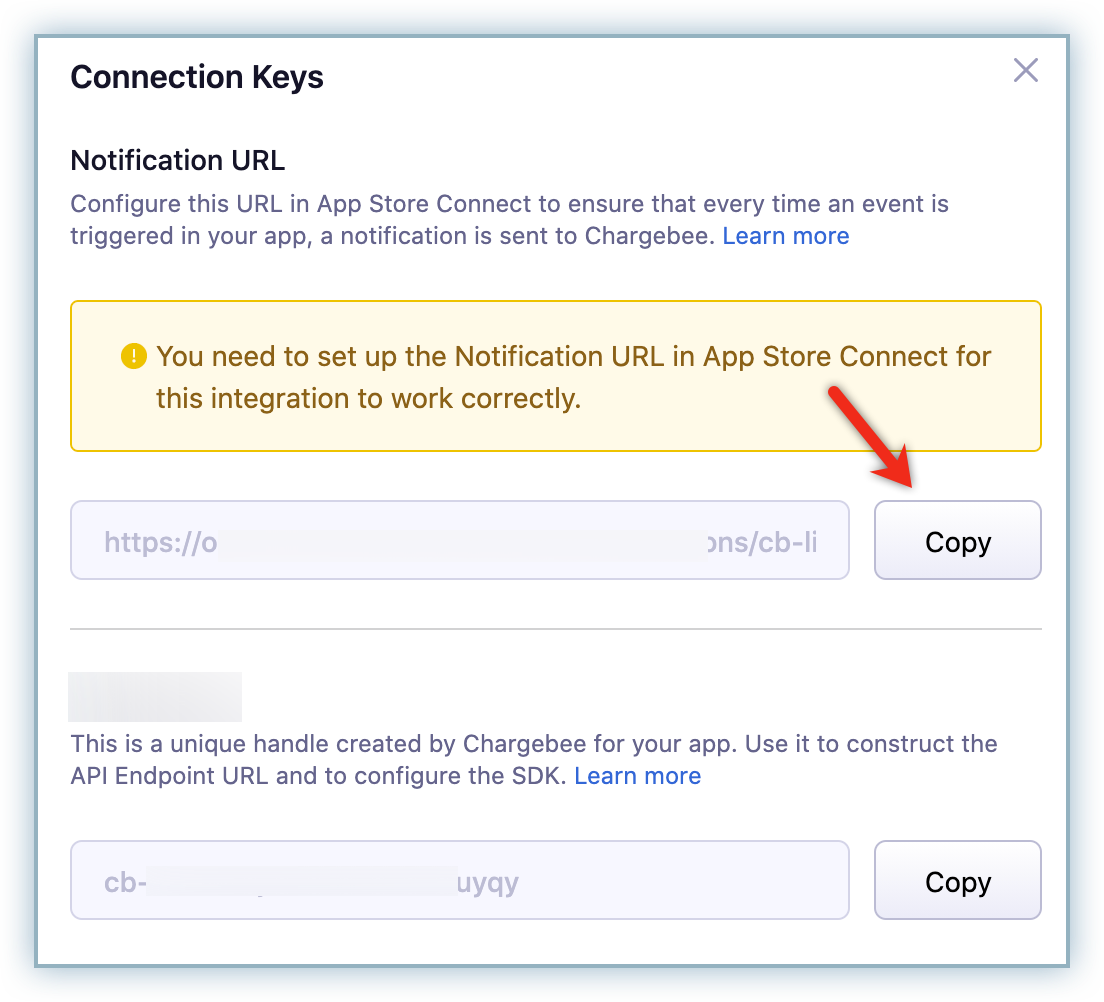
Click Copy to copy the Notification URL to your clipboard.
Login to your App Store Connect account.
Select applicable app from My Apps.
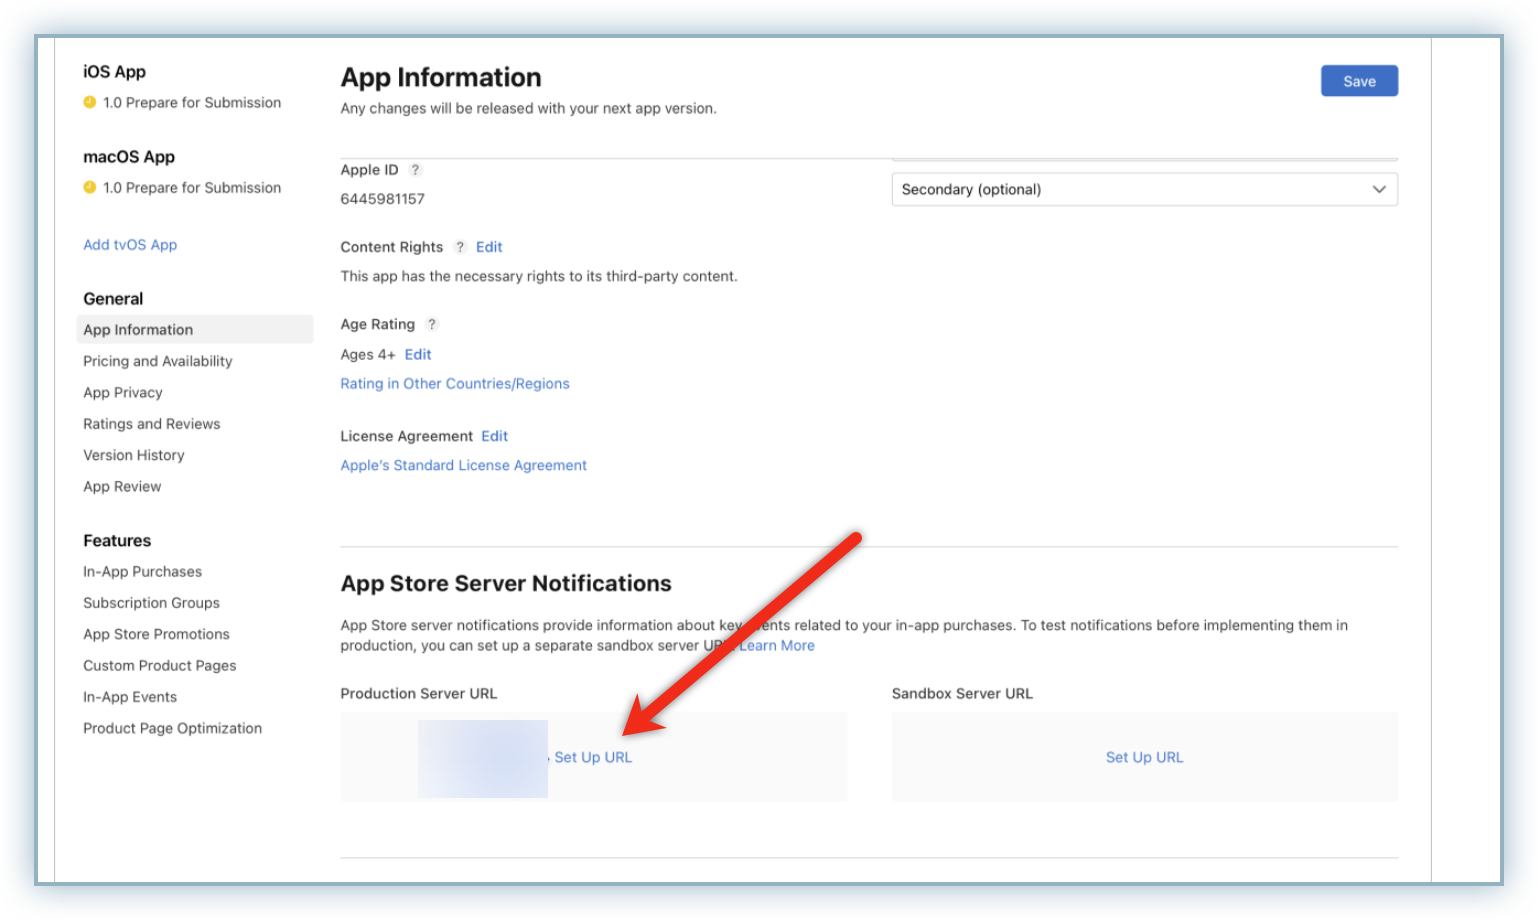
Click App Information from the General left menu.
Navigate to the App Store Server Notifications section.
Click Setup URL in the Production Server URL/Sandbox Server URL as applicable.
Enter the copied URL to the Server URL field.
Select the Version 1 Notifications radio button.
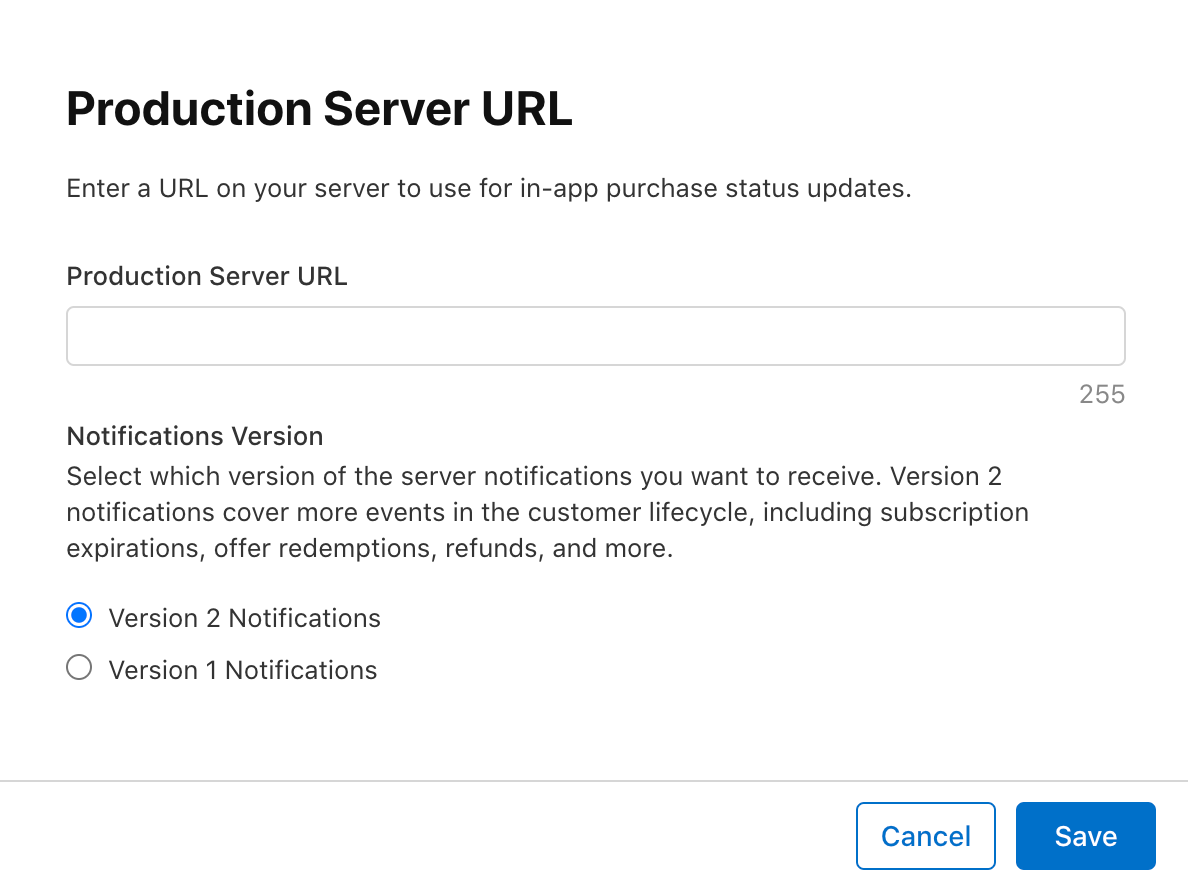
Click Save.
Note: Chargebee does not currently support Version 2 Notifications hence it is essential that you choose Version 1 Notifications while configuring the Notification URL.
The App ID is a unique identifier created for your Apple app within Chargebee. This identifer is configured within the backend server of your app to create unique API endpoints, which can be used extensively for completing API actions.
Follow the steps below to retrieve this information.
Click View Keys in the Sync Overview page.
Click Copy to copy the App ID to your clipboard.
Click here to view the API docs associated with App ID.
You can choose to bulk import your product details including plan name, billing frequency, and price from your app.
Follow the steps below to import your product details to Chargebee:
Click Product Import.
Click Upload CSV.
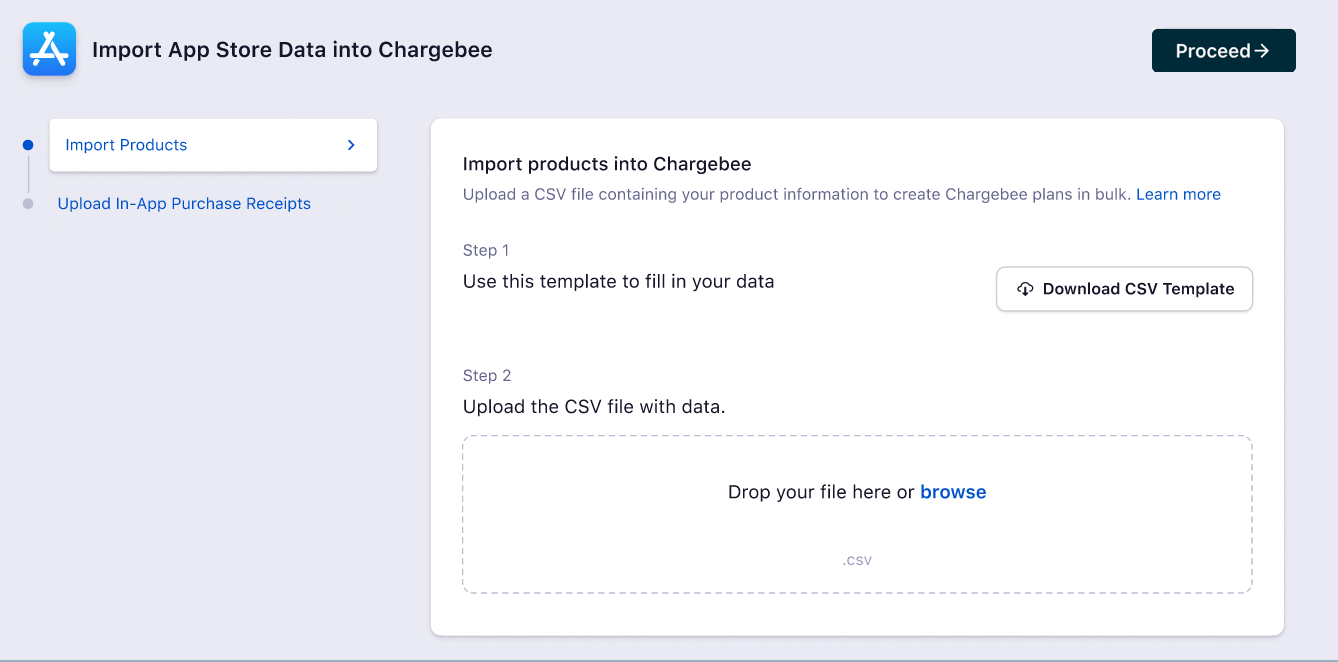
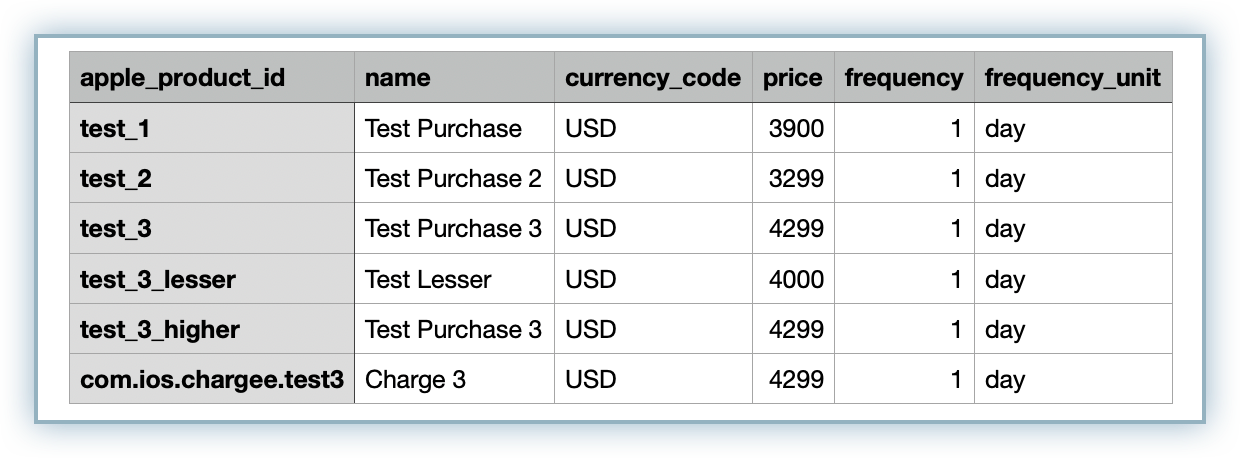
Prepare the bulk import file. Click Sample file and create entries for each product. Ensure the file is saved in csv format.
Note: Ensure you have unique entries for each of the products in the name field. The example will result in an error due to Test Purchase 3 being used twice in the name field.
Drag the updated file to the field or click Browse to upload the import file.
Click Proceed after the successful upload of your bulk import file.
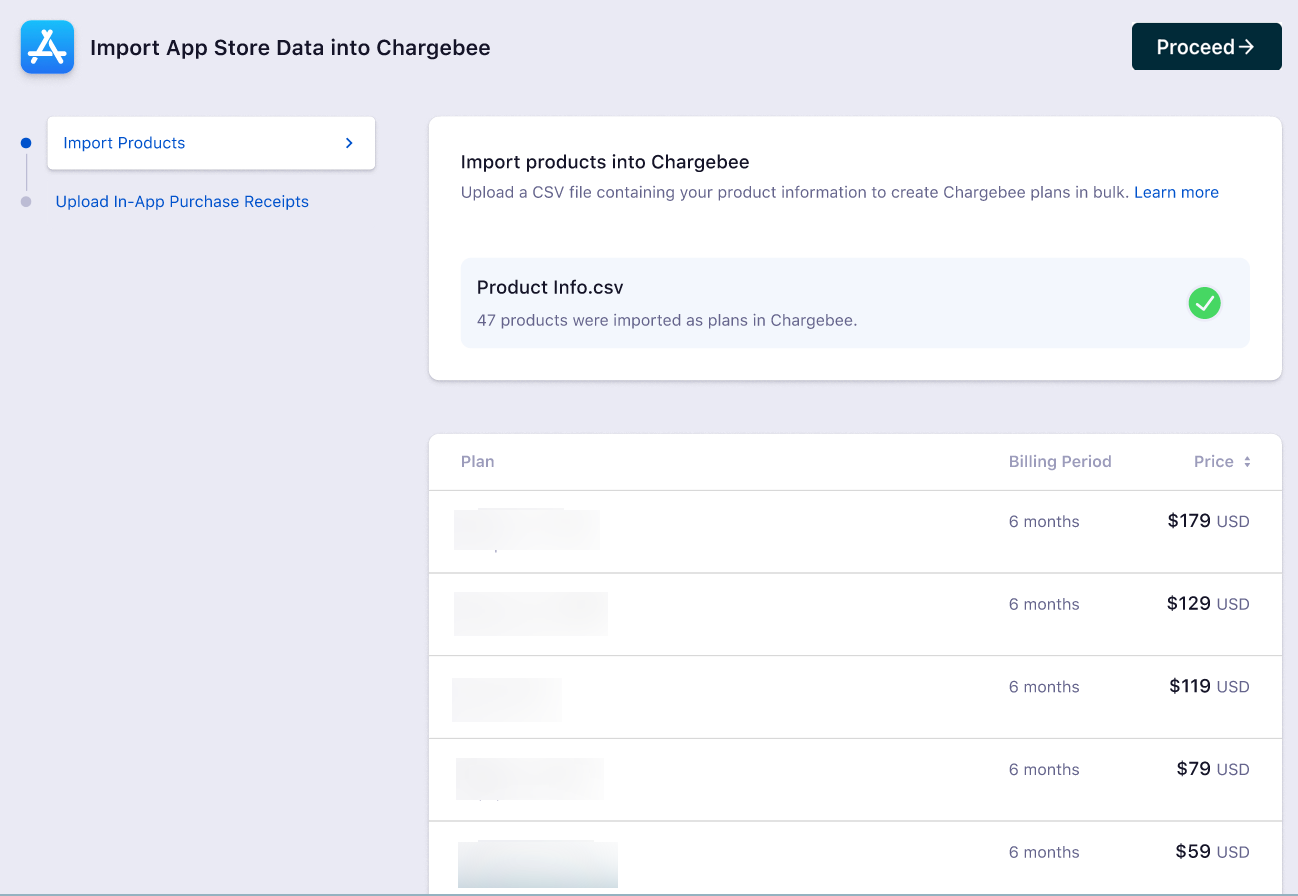
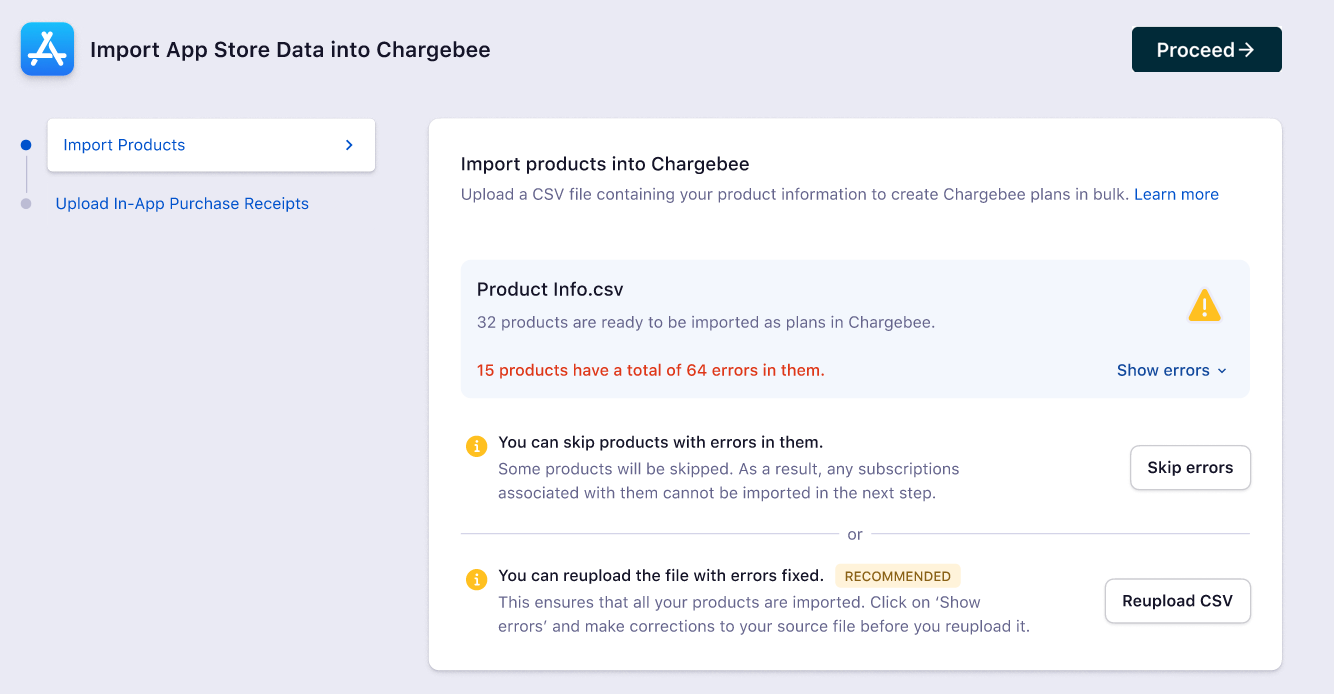
After successful upload, the data within the bulk import file is validated and associated plans are created within your Chargebee site.
Click Proceed to upload your product offerings to Chargebee.
Any errors identified during the data validation process will result in the plan associated with that product information not being created. Such errors can be attributed to various reasons such as incorrect currency, frequency, or product ID.
Ensure that each of the products added to the csv file have a unique entry in the name field. Any instances of a repetition will result in the error while creating a plan based on your Apple products.
The data validation functionality assists in identifying the errors allowing you to resolve them more effectively or skipping the upload of products with errors. Determine your course of action based on the options below:
Skip Products with Errors
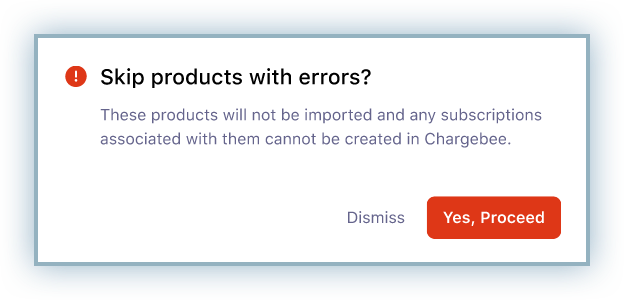
Click Skip errors to skip products with errors.
Click Yes, Proceed in the confirmation pop-up box to continue the upload process.
Click Yes, Proceed to upload In-App Purchase Receipts.
Fix Errors in Bulk Upload file
Click Show errors to expand the list of errors.
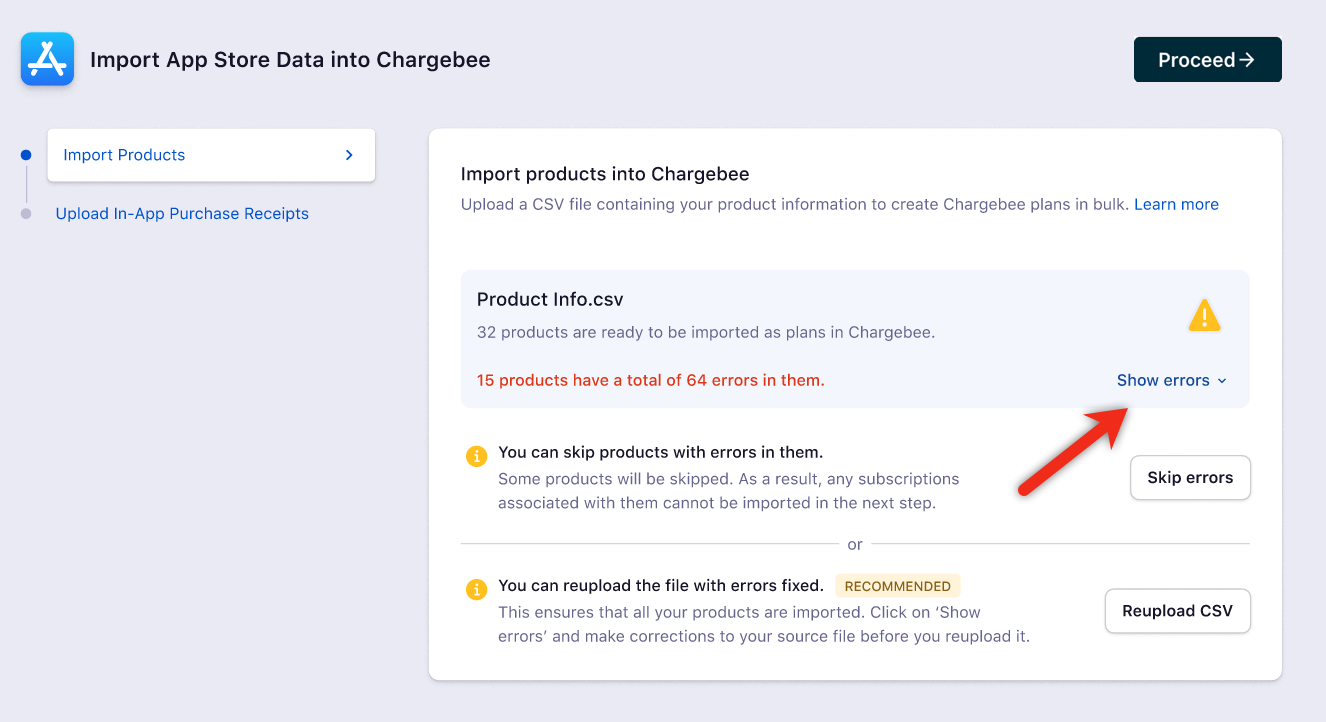
Click Download all errors if you wish to save the error log for future reference.
Click Reupload CSV to access the bulk import file and make the corrections necessary from the error log.
Review the Import Product document for assistance with uploading the import file.
You can choose to import your historical subscriptions associated IAP for the product offerings available on your app using this functionality. Addtionally, if you choose to use API's, only the latest transaction of the in-app receipts will be processed.
The following guidelines apply to In-App Receipts:
Follow the steps below to import your In-App Purchase Receipts to Chargebee:
Ensure that all your Apple products are uploaded to Chargebee previously.
Click Upload In-App Purchase Receipts.
Click Upload CSV.
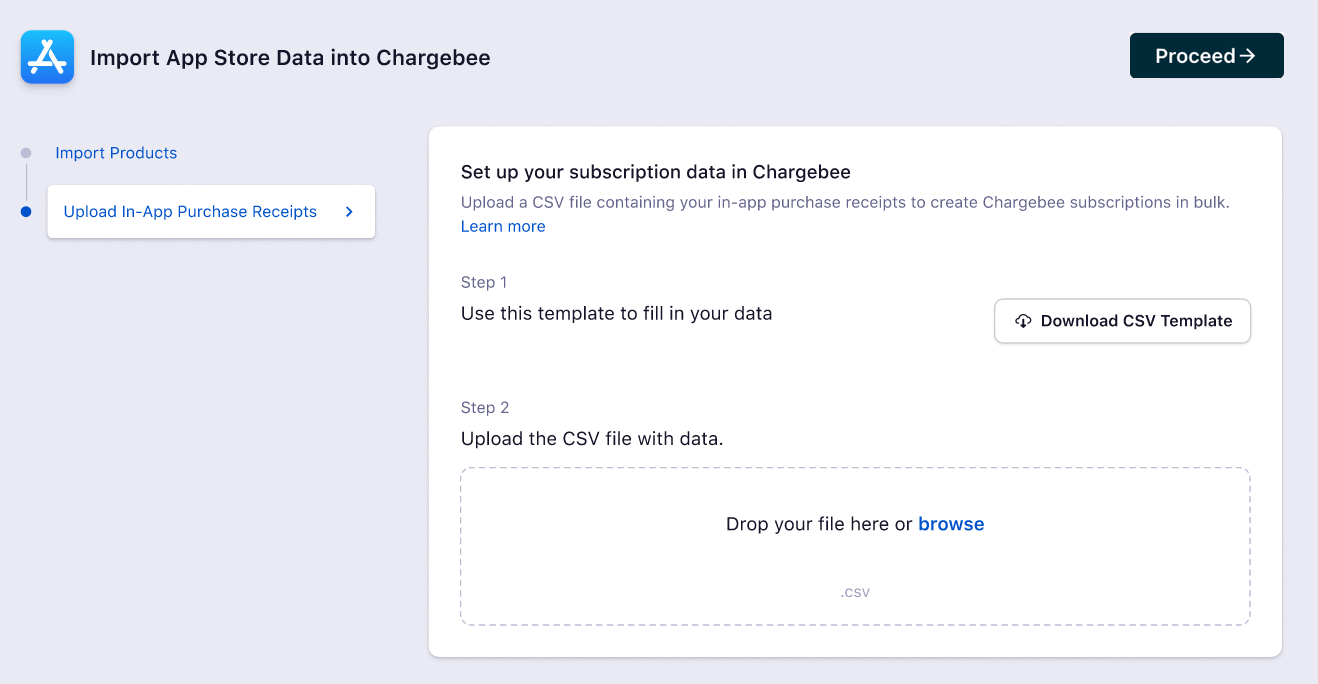
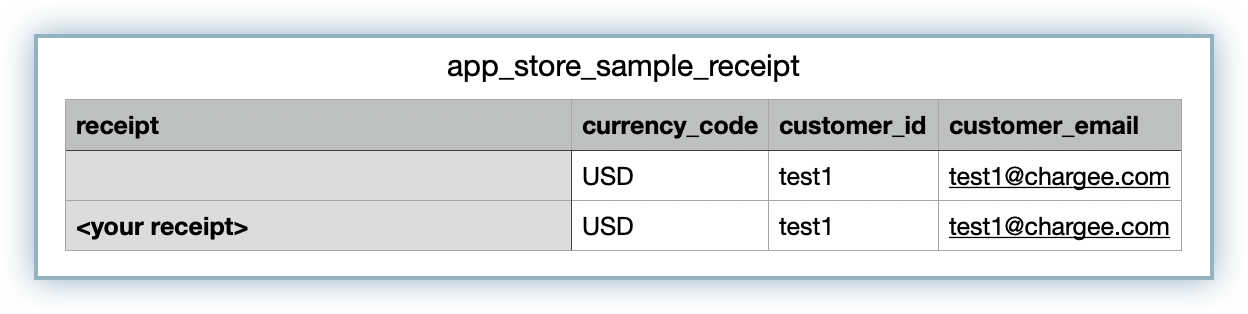
Prepare the bulk import file. Click Sample file and create entries for each of the historical subscriptions. Ensure that the file is saved in CSV format after your changes are made.
Drag the updated file to the field or click Browse to upload the import file.
Click Proceed after the successful upload of your bulk import file.
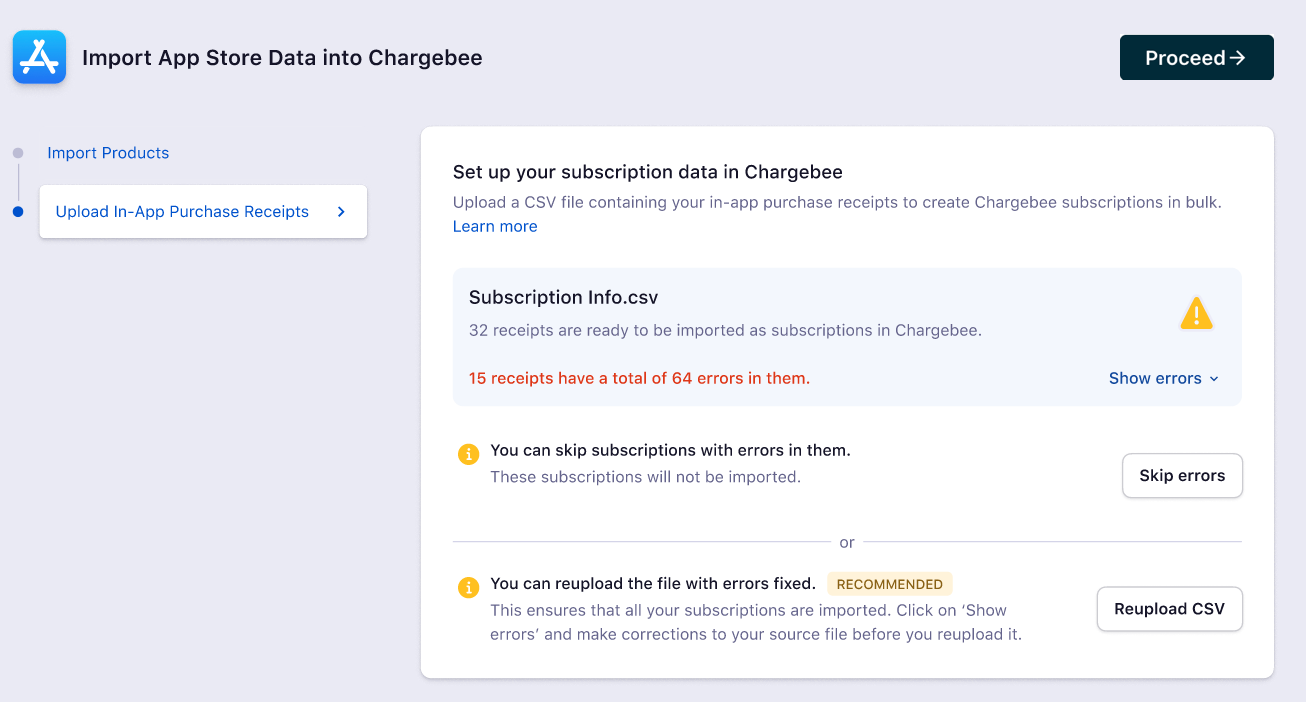
After successful upload, the data within the bulk import file is validated and associated historical subscriptions are created within your Chargebee site.
Any errors identified during the data validation process will result in the historical subscriptions associated with that product information not being created. Such errors can be attributed to various reasons such as incorrect currency, frequency, or product ID.
The data validation functionality assists in identifying the errors allowing you to resolve them more effectively or skipping the upload of products with errors. Determine your course of action based on the options below:
If you chose to Skip, all subscription data associated with the product will not be available within Chargebee.
Skip Records with Errors
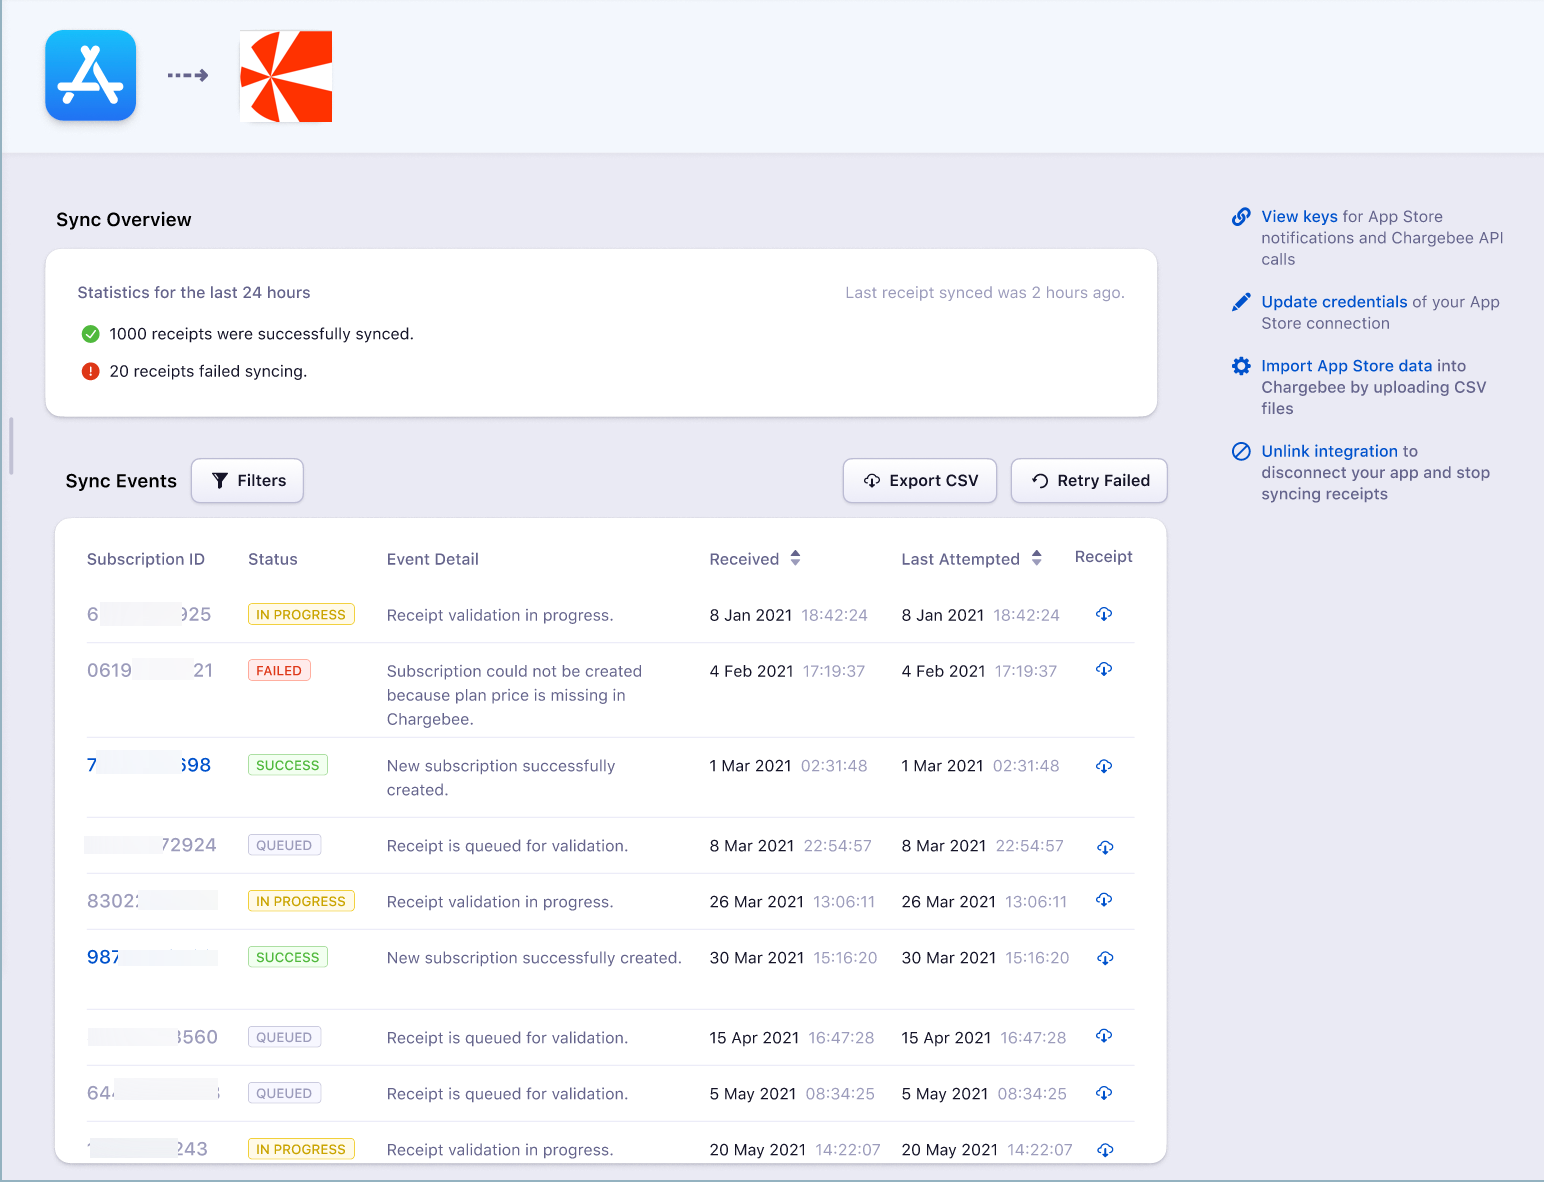
The Sync Overview acts as the landing page for your integration with App Store. This view lists all of the subscriptions details including status of the subscription and sync statistics for the last 24 hours.