Early Access
The Full page checkout feature is currently in early access. Contact [email protected] to join the Early Adopter Program.
The Full page checkout is an all-in-one checkout page where your customers can see their order details, add contact information, and make payments within a single page. You can customize the checkout page to display your brand elements and fields as per your business needs. The below illustration displays how the Full page checkout appears to customers.
Before configuring Full page checkout, you must follow the steps below to create the required records in Chargebee:
Chargebee offers the following methods to integrate the Full page checkout depending on your application/website's framework and business model.
Drop-in Script is a plug-in feature that requires minimal developer help. You can easily create a checkout page by adding a script generated for the plan-item on your HTML page.
As Full page checkout integrated using Drop-in script is Level 1 PCI compliant, you must fill this questionnaire before setting up the integration.
Follow these steps to use the Drop-in Script to integrate the Full page checkout:
head element of your website's HTML.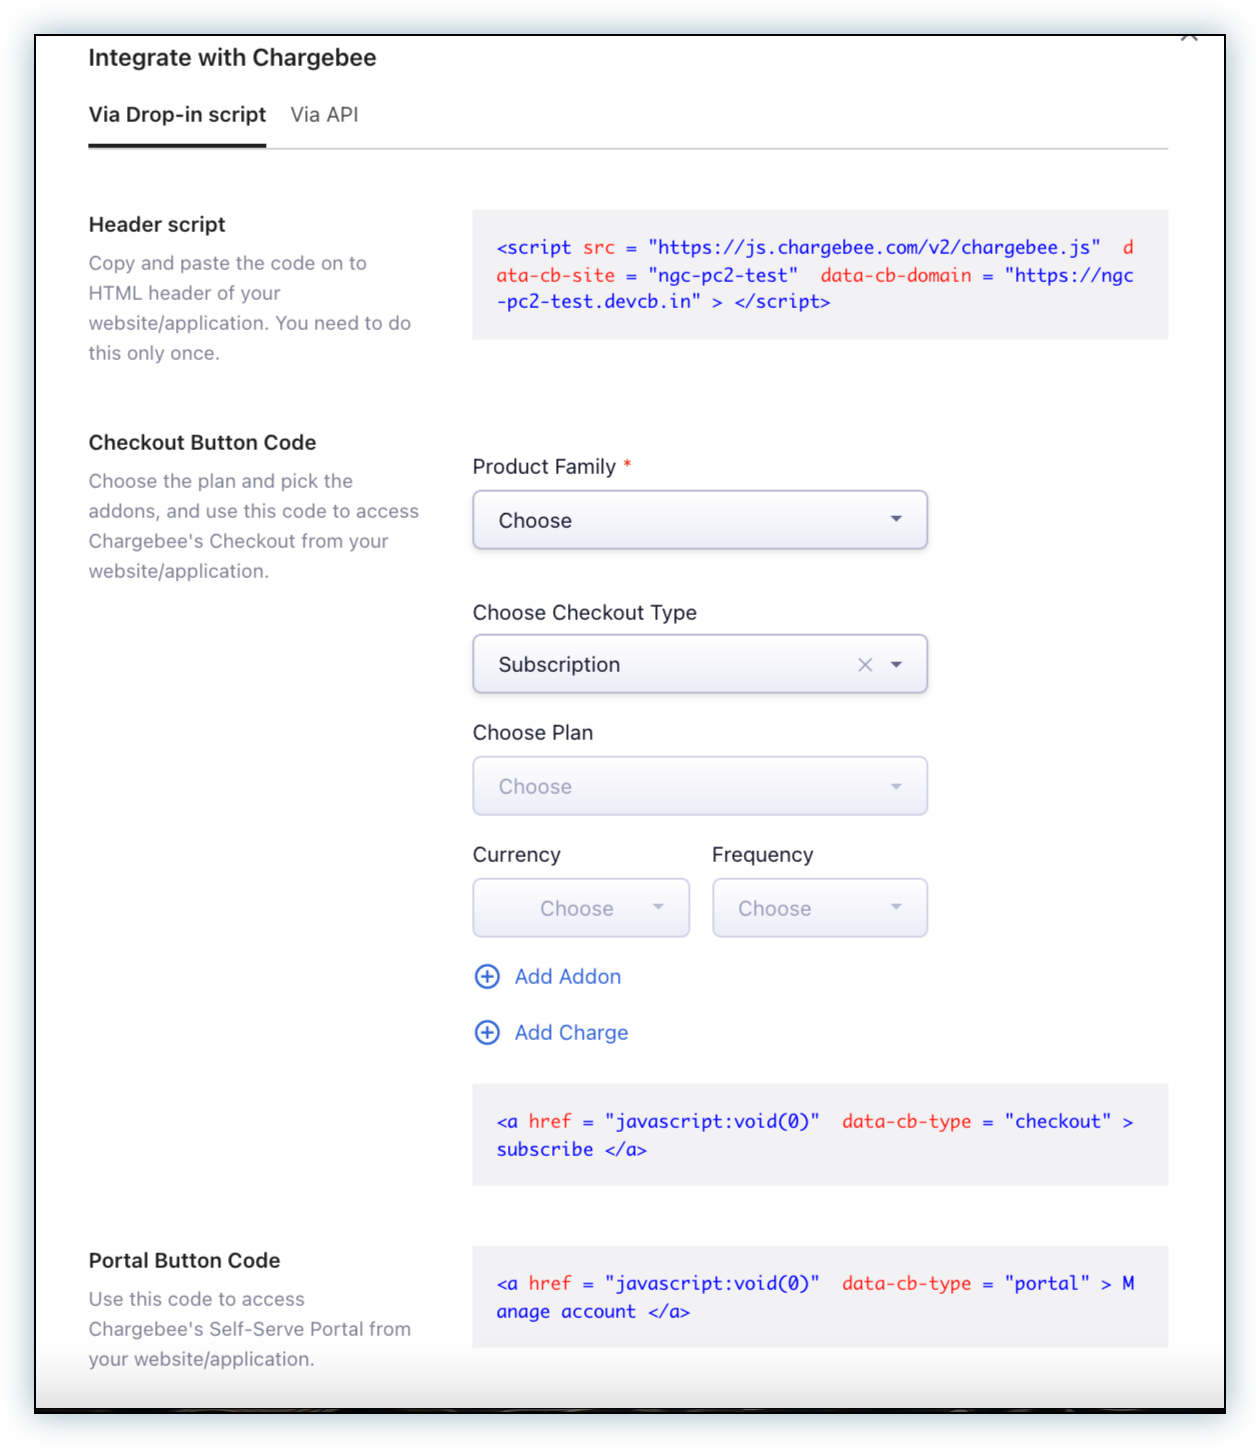
Checkout Button Code for a particular plan-item can also be copied from the respective plan page. Following are the steps to copy code from a plan page:
This feature allows you to construct a customized URL bound with the necessary plan, addons, charges, and coupons. The resulting URL can then be embedded into the Checkout button on your application/website. This is useful if you are using a website that does not allow you to add JS scripts.For more information, see creating Item Specific URL.
Benefits of using API integration
To understand more about the integration and implementation of Checkout via API, see API documentation.
Using Hosted Pages API to create a Full page checkout is the recommended approach when you already maintain a user-management or authentication system. It gives you control over overriding item price and changing the trial end date. However, this requires significant developer efforts from your end.
Handling payment details via API requires you to be PCI compliant. Fill in this questionnaire if you would like Chargebee to manage your PCI Compliance.