This document guides you through the process of connecting your Google Play Store app with Chargebee. To connect Google Play Store with Chargebee, you must provide permissions to Chargebee through a service account. This permission allows Chargebee to connect to Google on behalf of your app and manage your subscriptions too. Establishing this connection offer you the following benefits:
Chargebee requires the following information to connect to Google on behalf of your app:
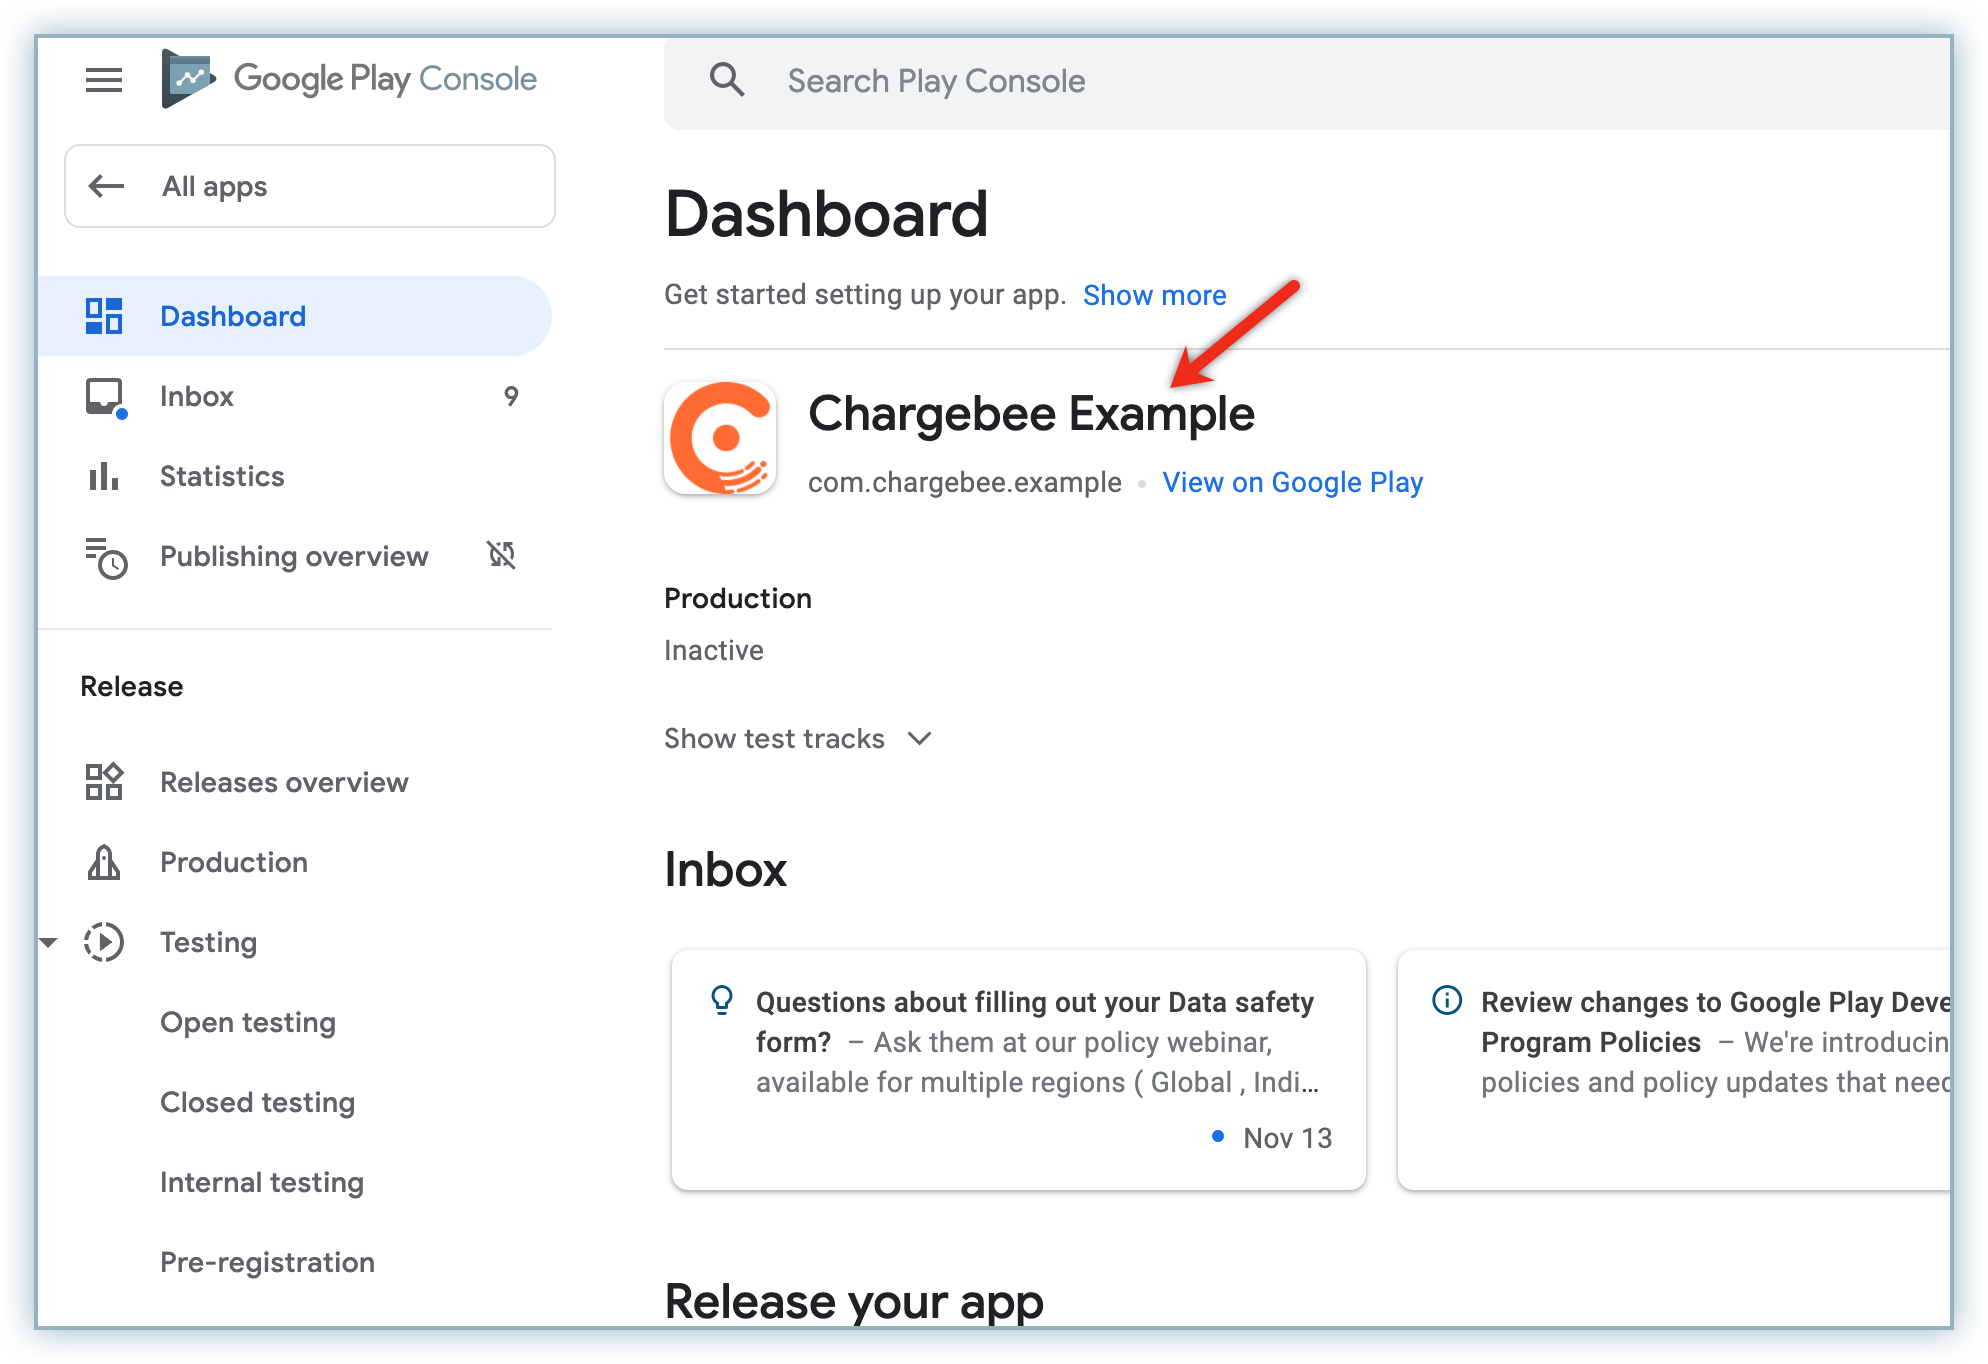
Follow the steps below to retrieve your app name and app package name:
Follow the steps below to generate service account credentials JSON:
Navigate to the home page of Google Play Console.
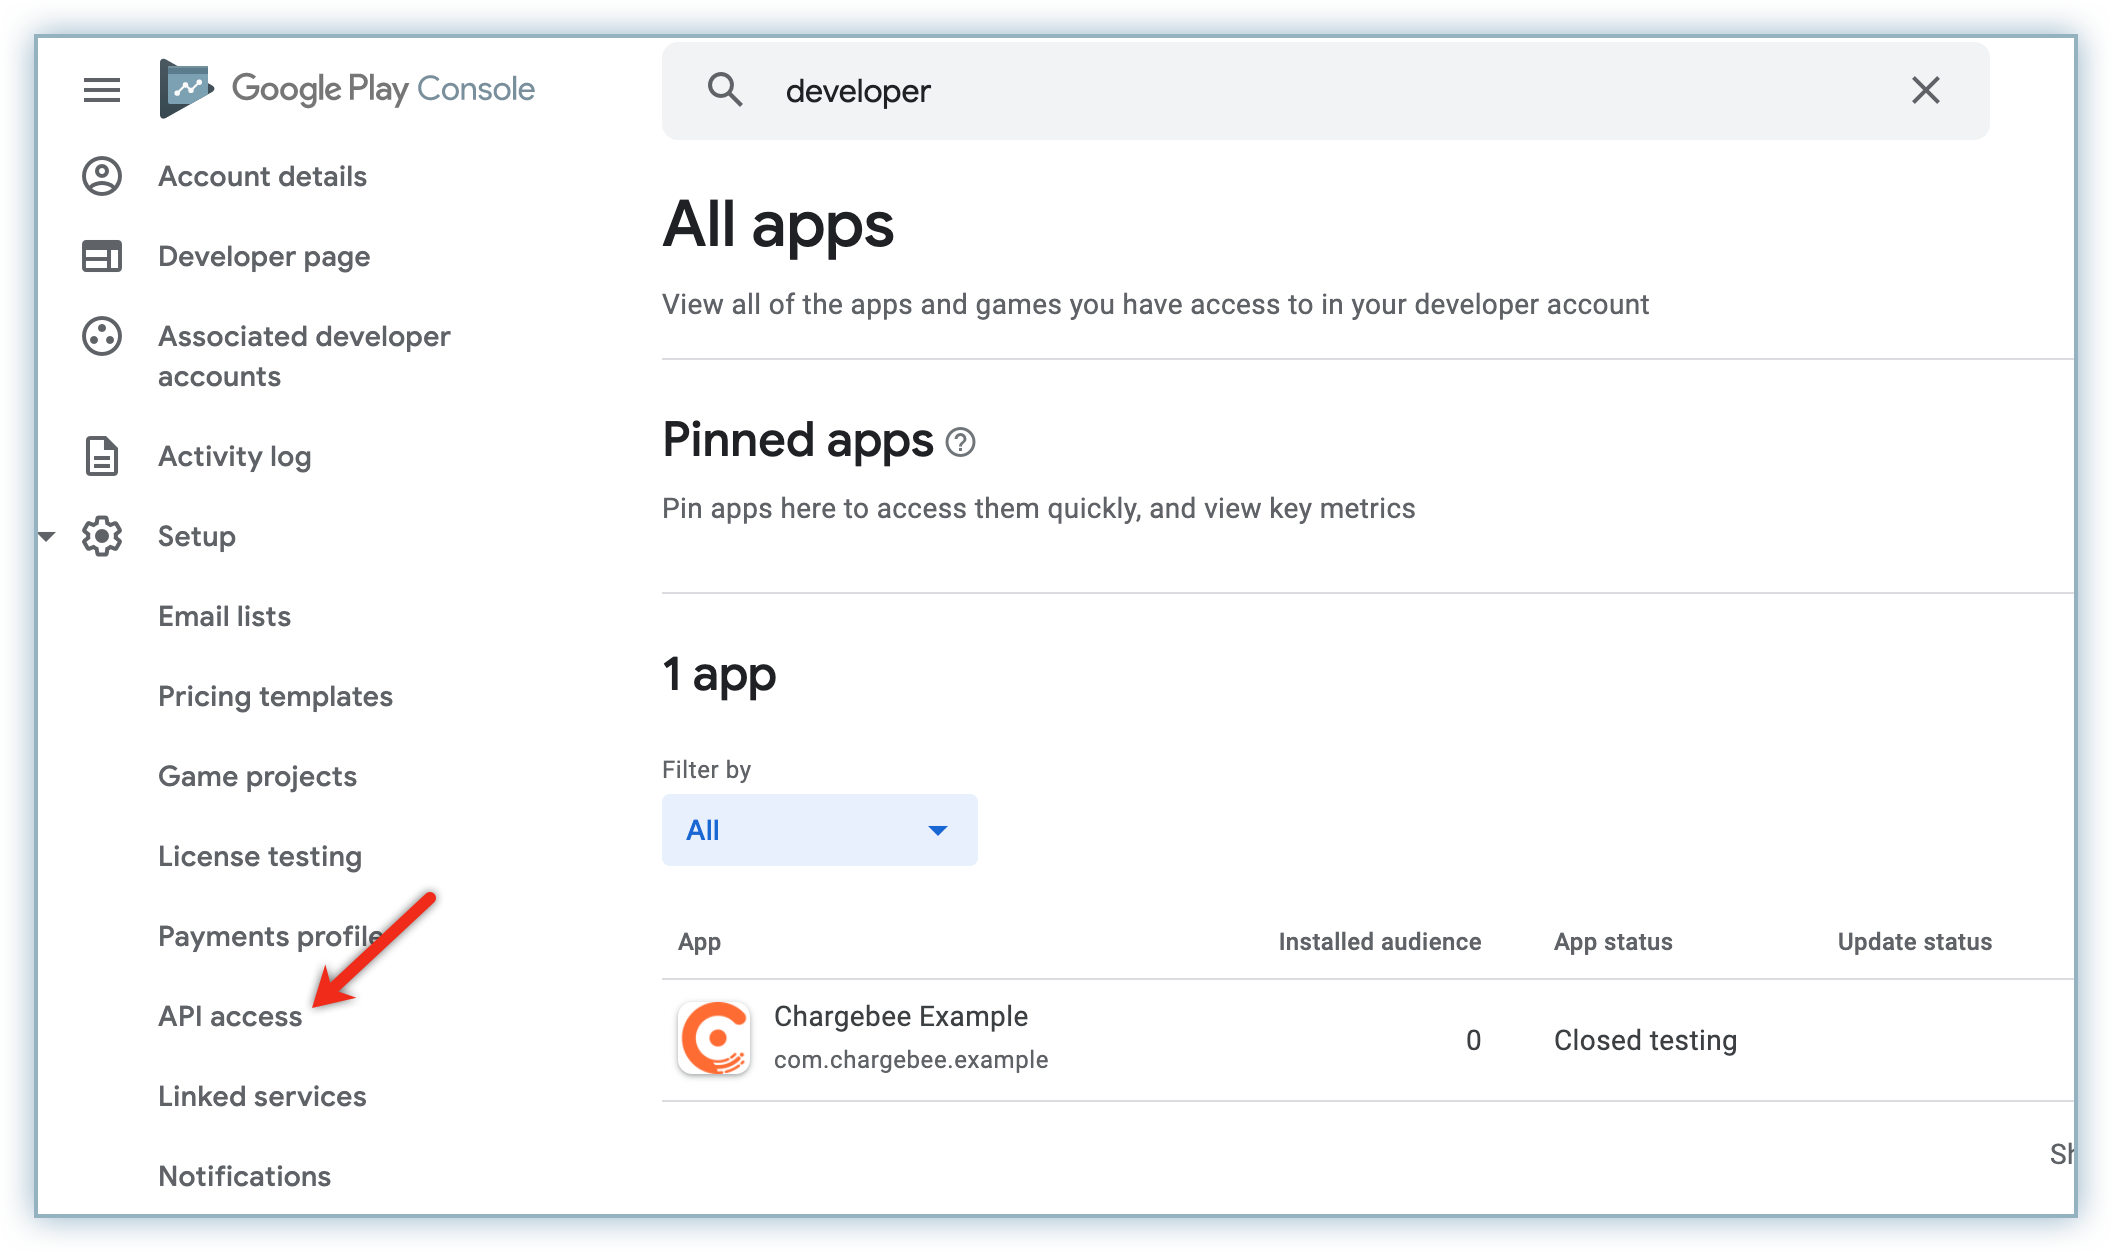
Click API Access from the Setup menu.
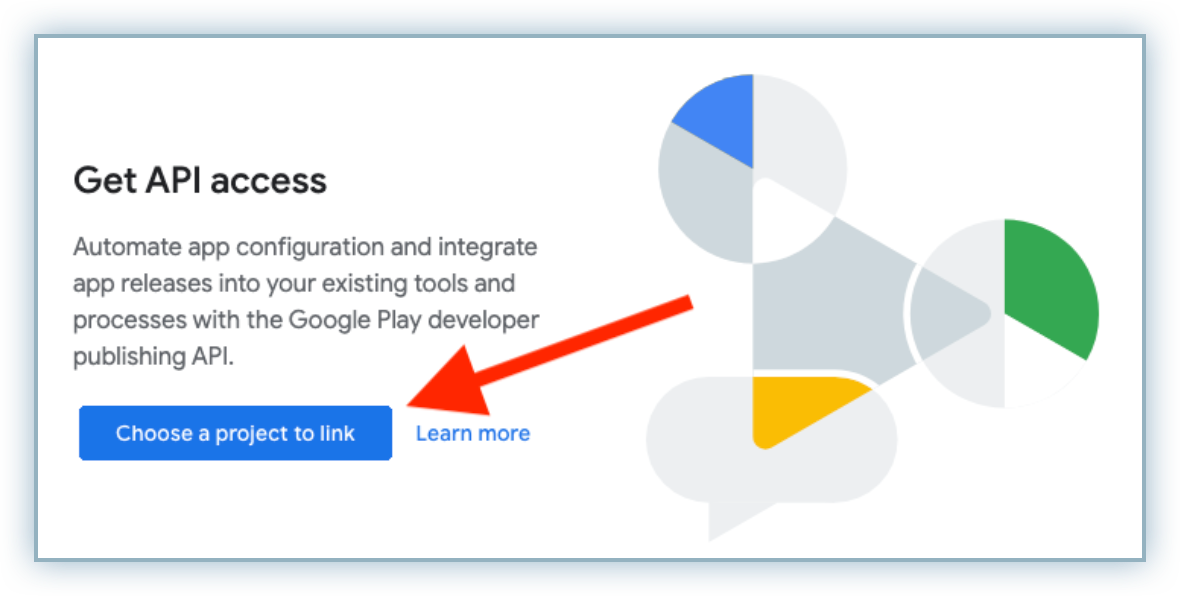
Click Choose a project to link to associate with your Chargebee app.
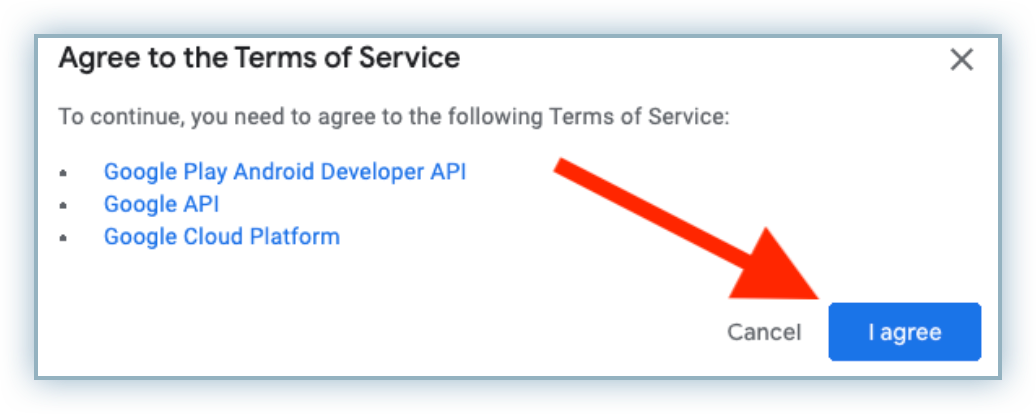
Review the Terms of Service notification and click I Agree.
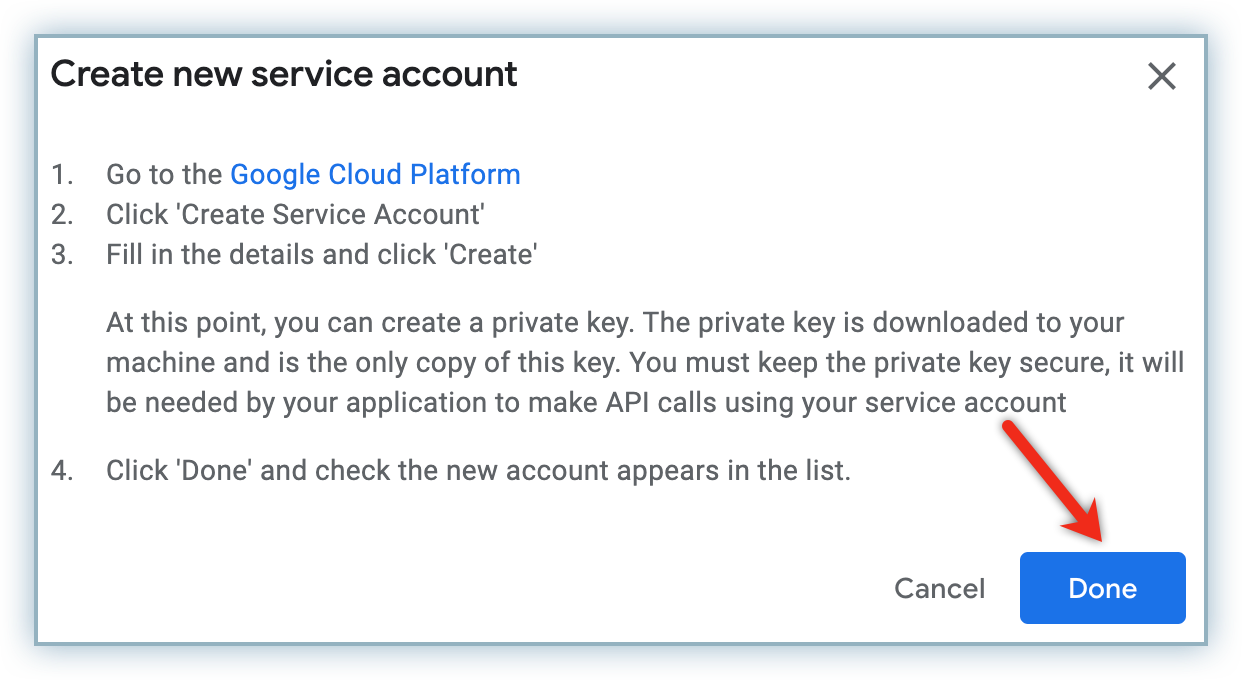
Click Create new service account from the Service accounts section.

Click Google Cloud Platform from the Create new service account pop-up window.
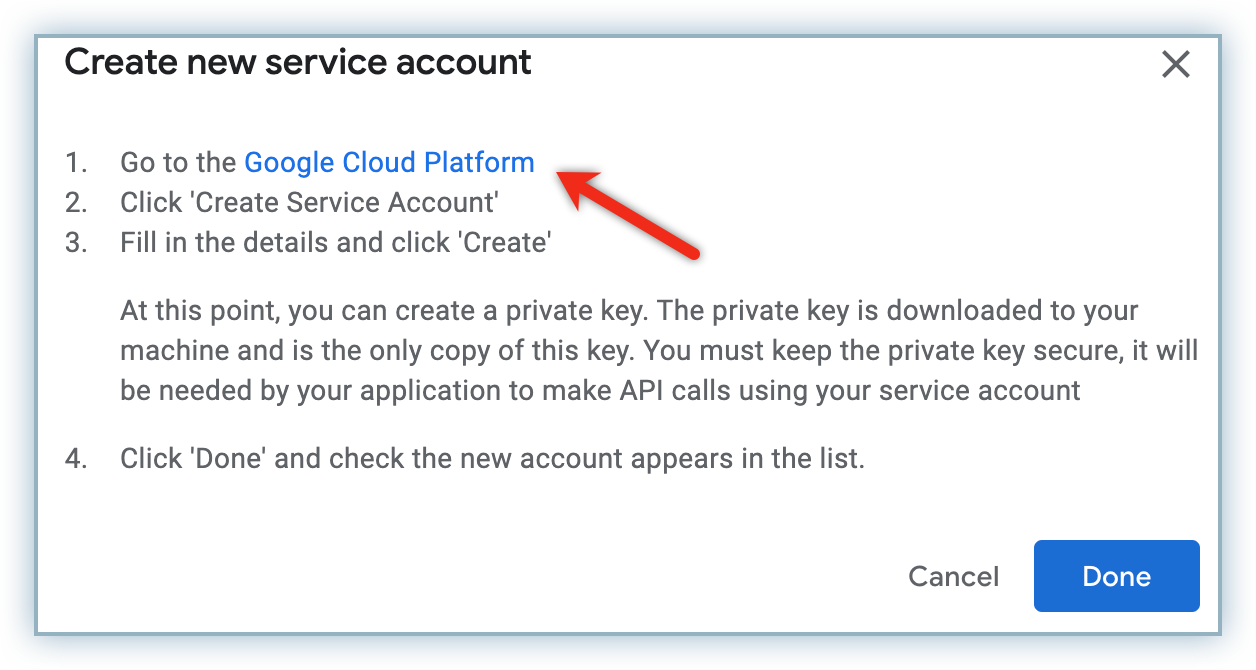
Note: You are directed to a new window. Do not close the current window since it will be used for configuration later.
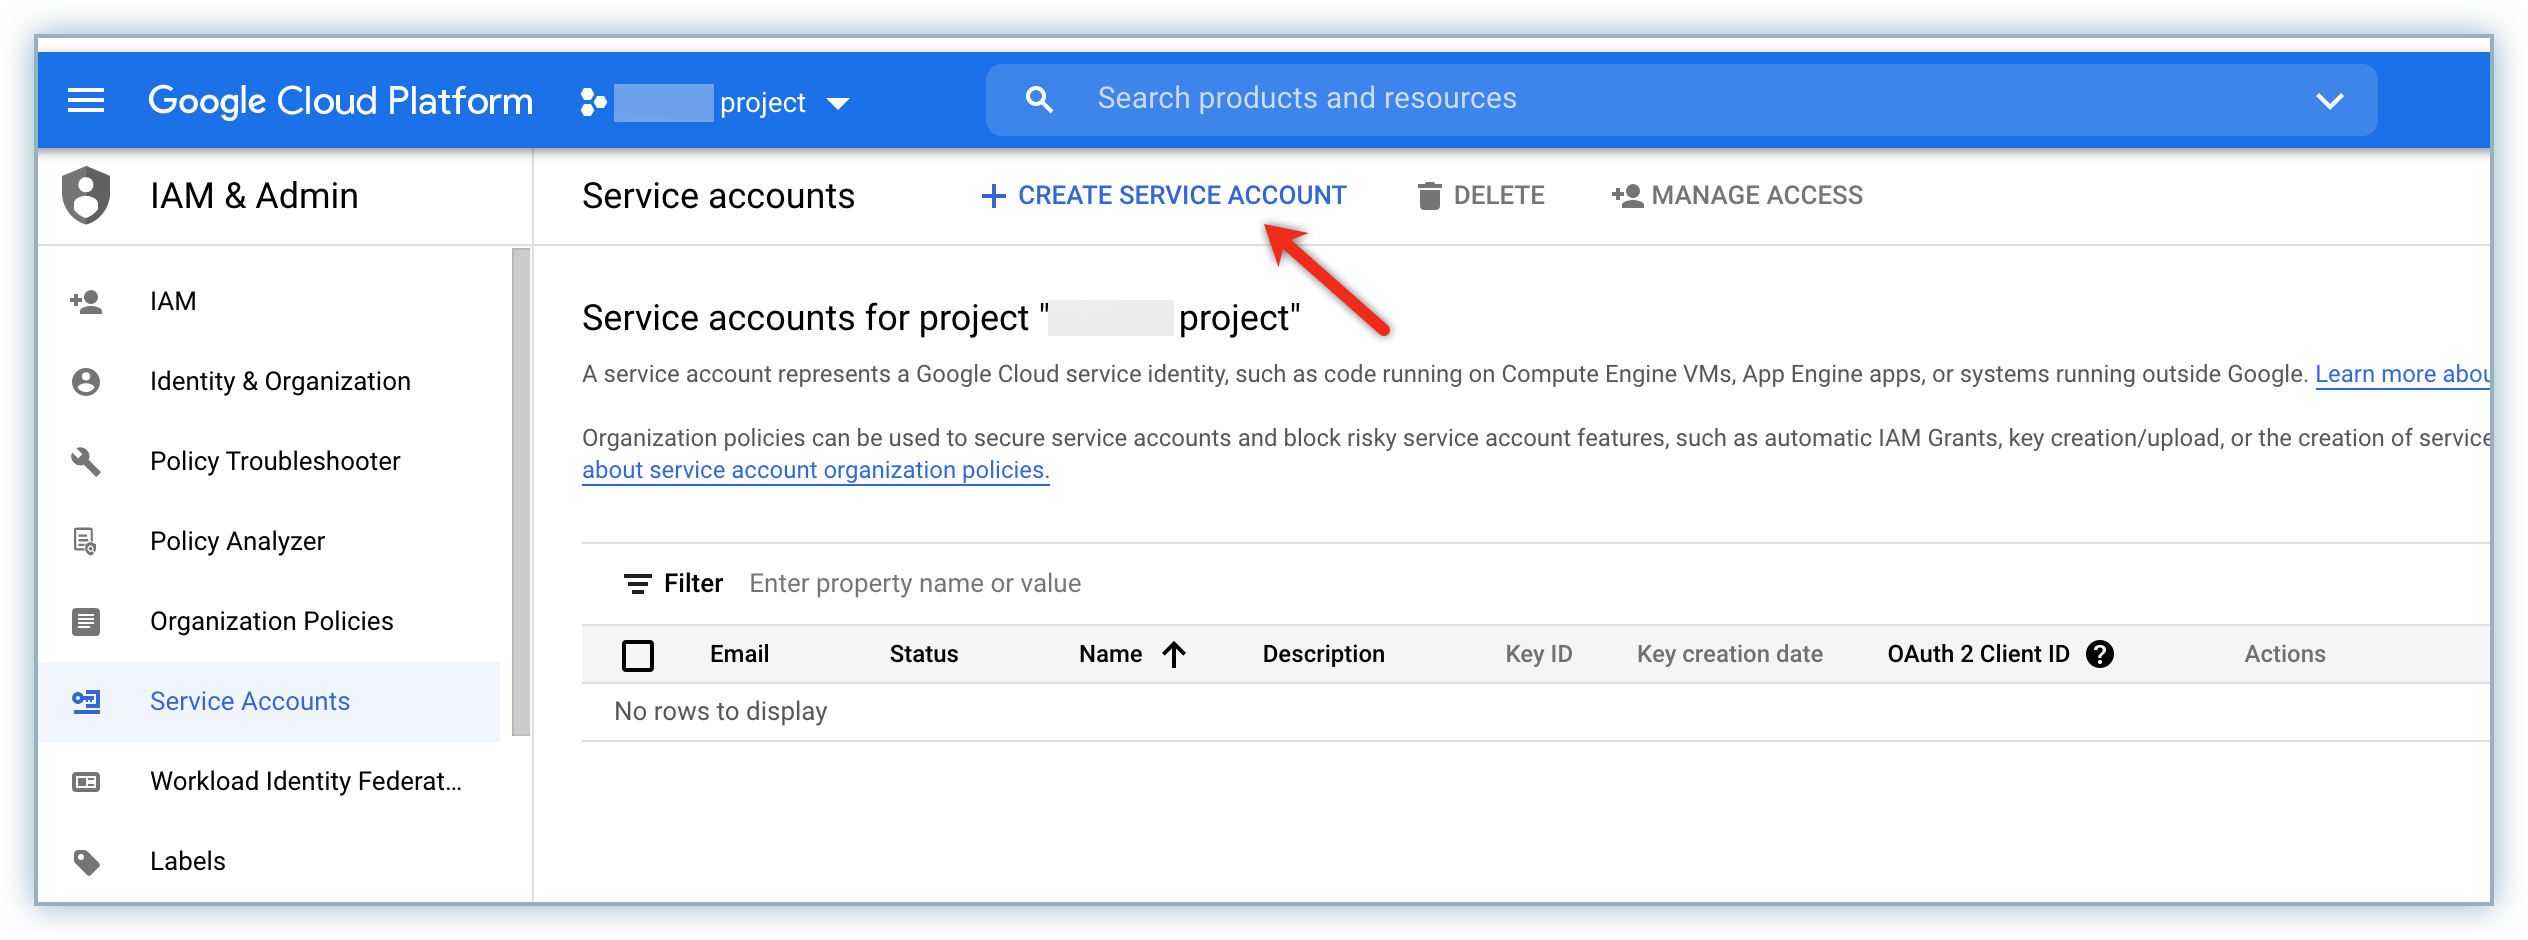
Select the applicable project from the list.
Click Create Service Account from the header menu.
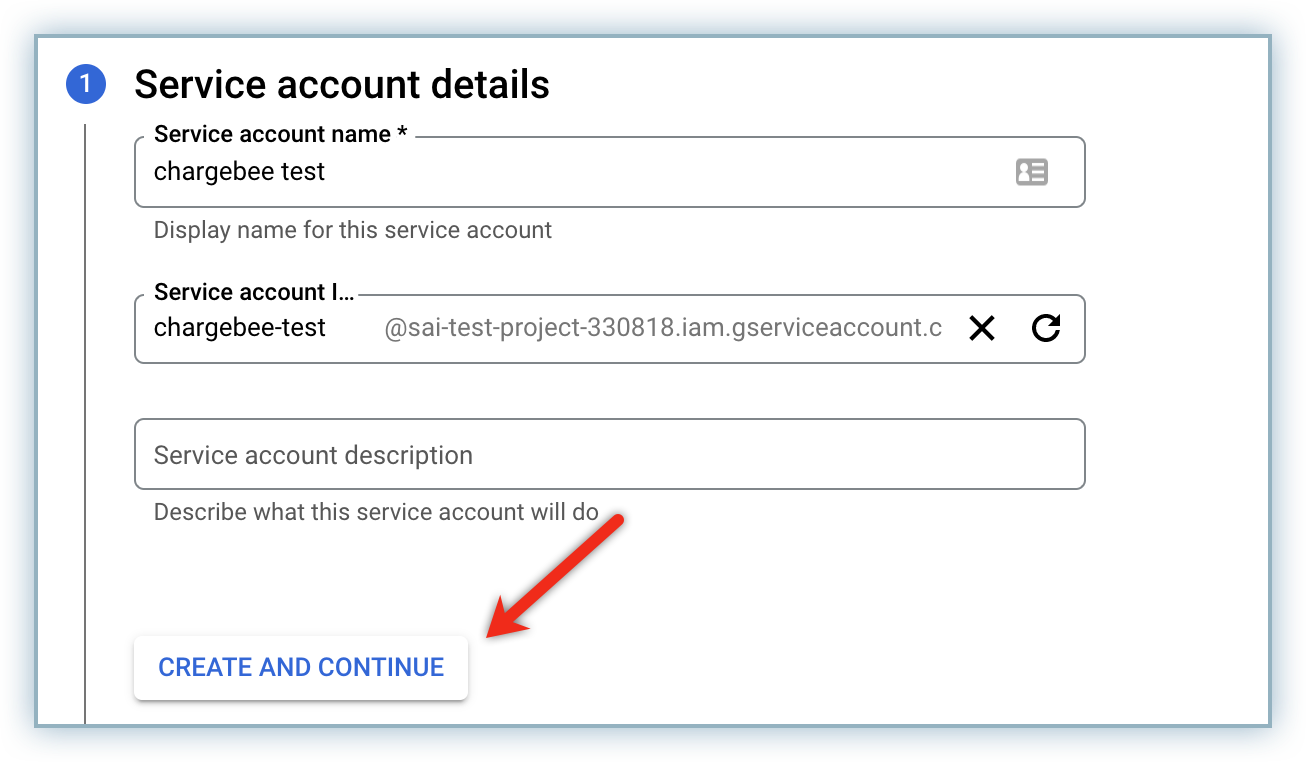
Enter the desired name in the Service account name field and click CREATE AND CONTINUE.
Select Pub/Sub Admin from the Select a role drop-down list in the Grant this service account access section. This allows Chargebee to receive notifications from Google on your App's behalf.
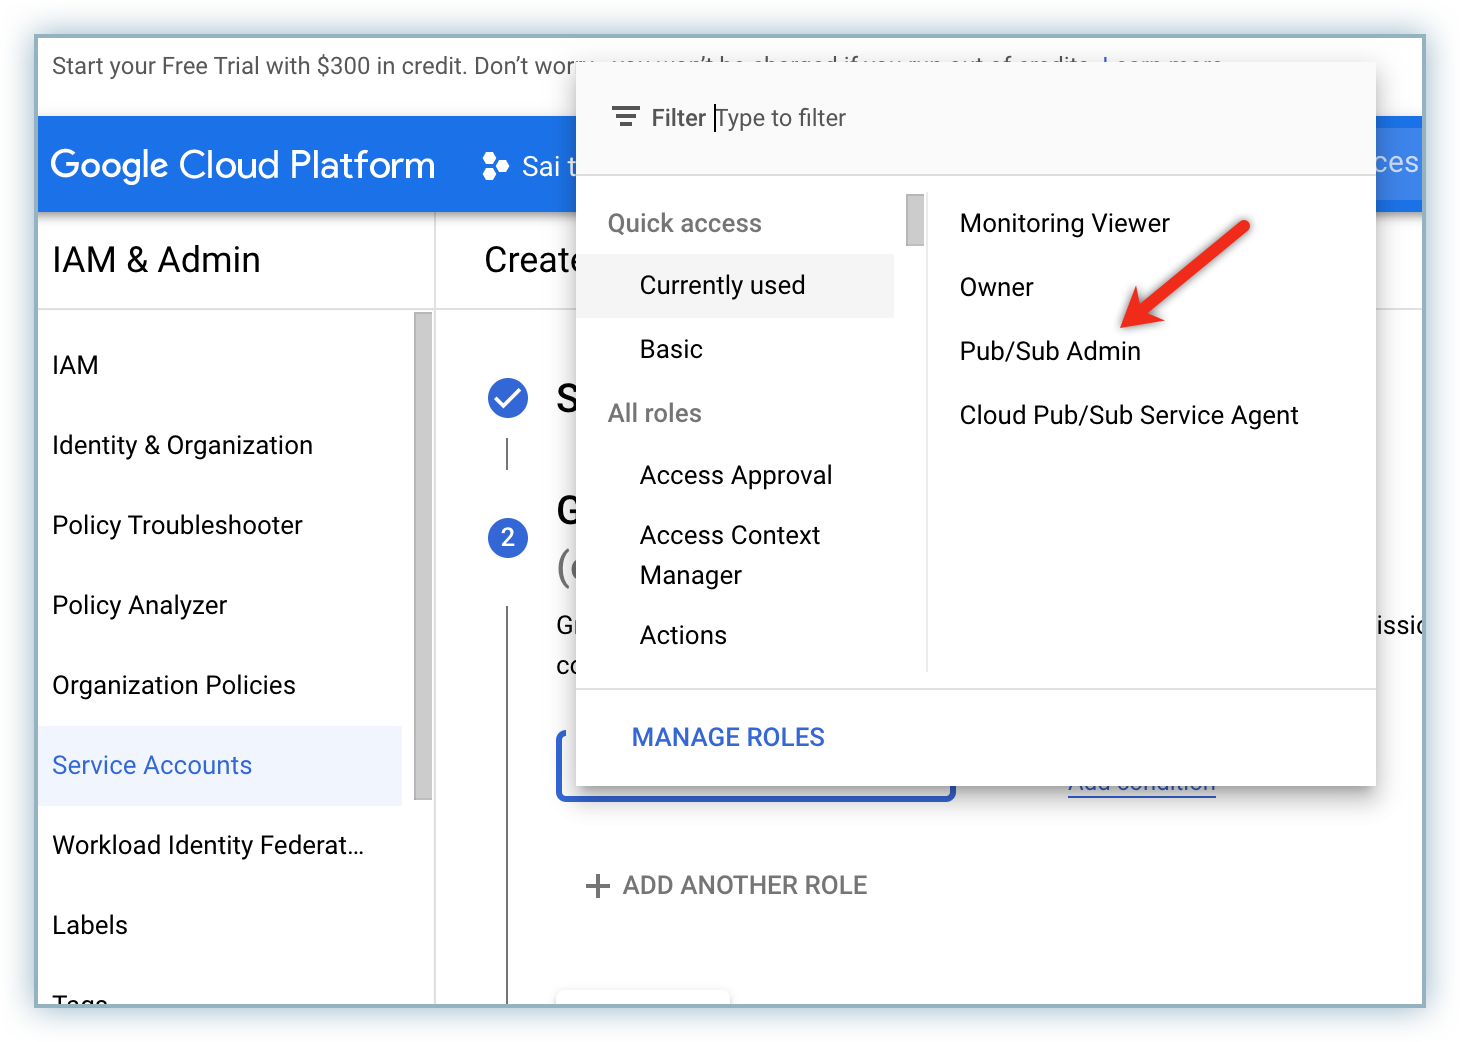
Click ADD ANOTHER ROLE.
Select Monitoring Viewer from the Select a role drop-down list in the Grant this service account access section.
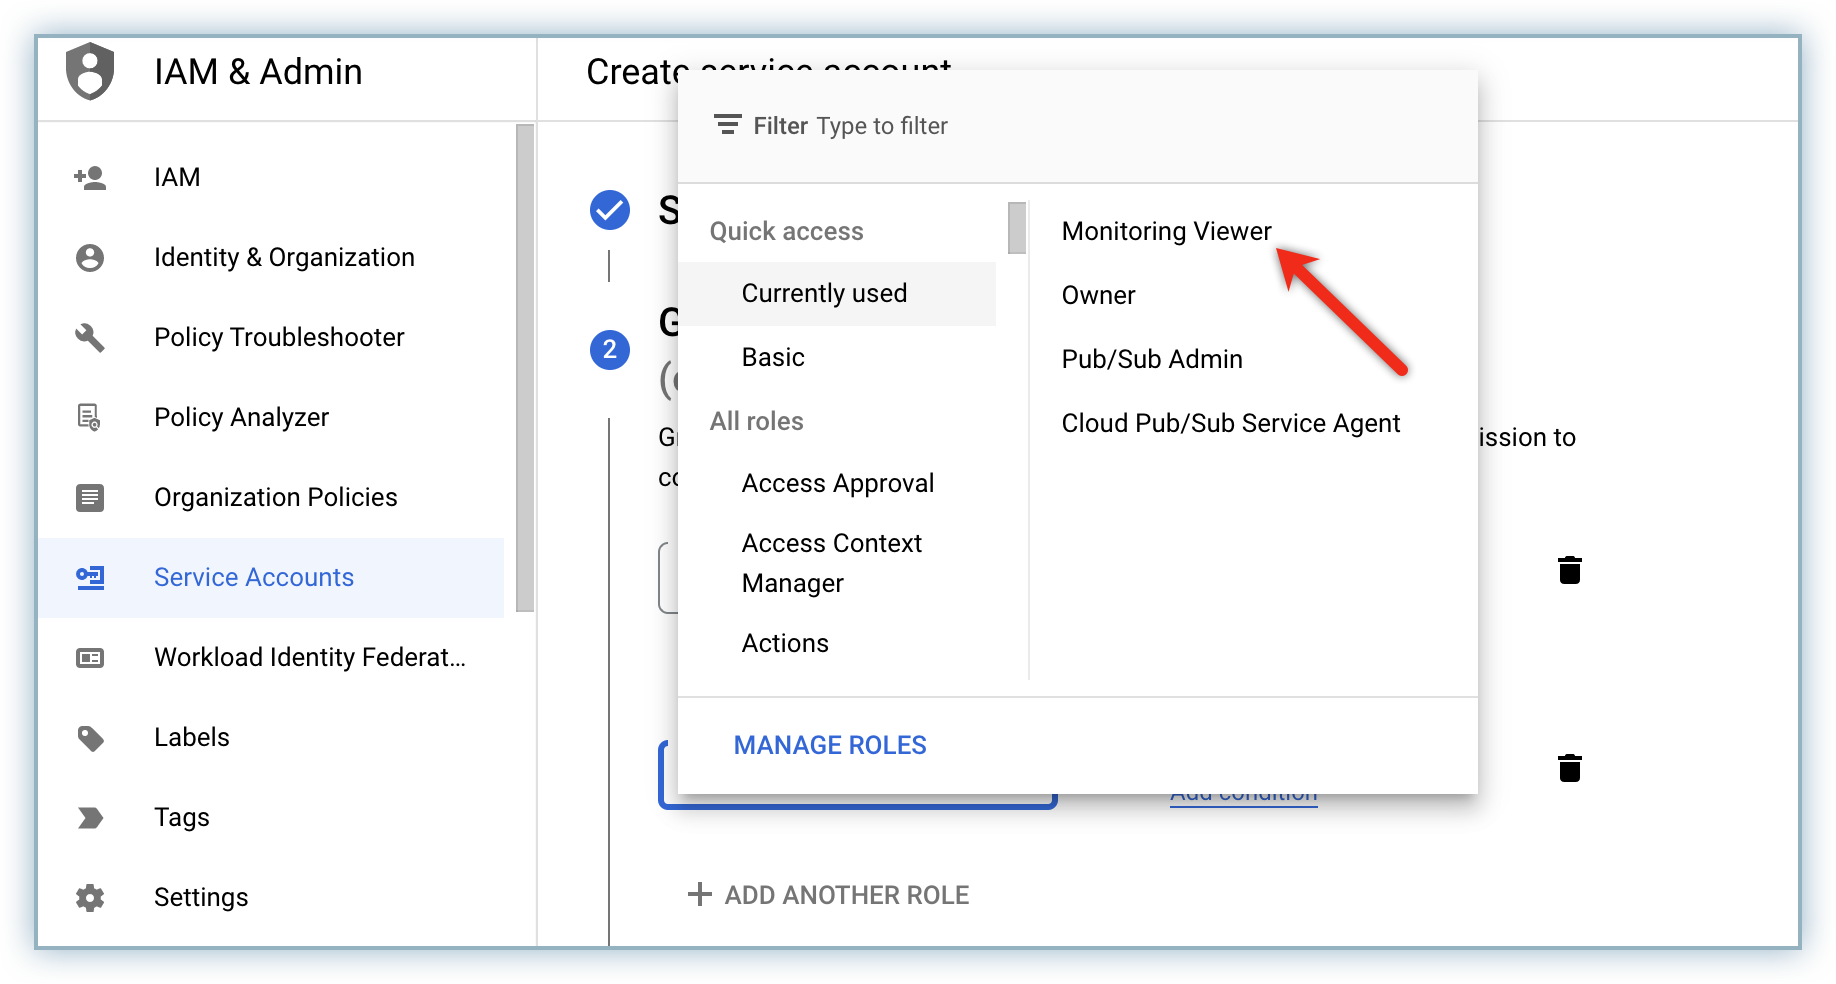
Click Continue to proceed.
Click Done to complete the creation of a service request.
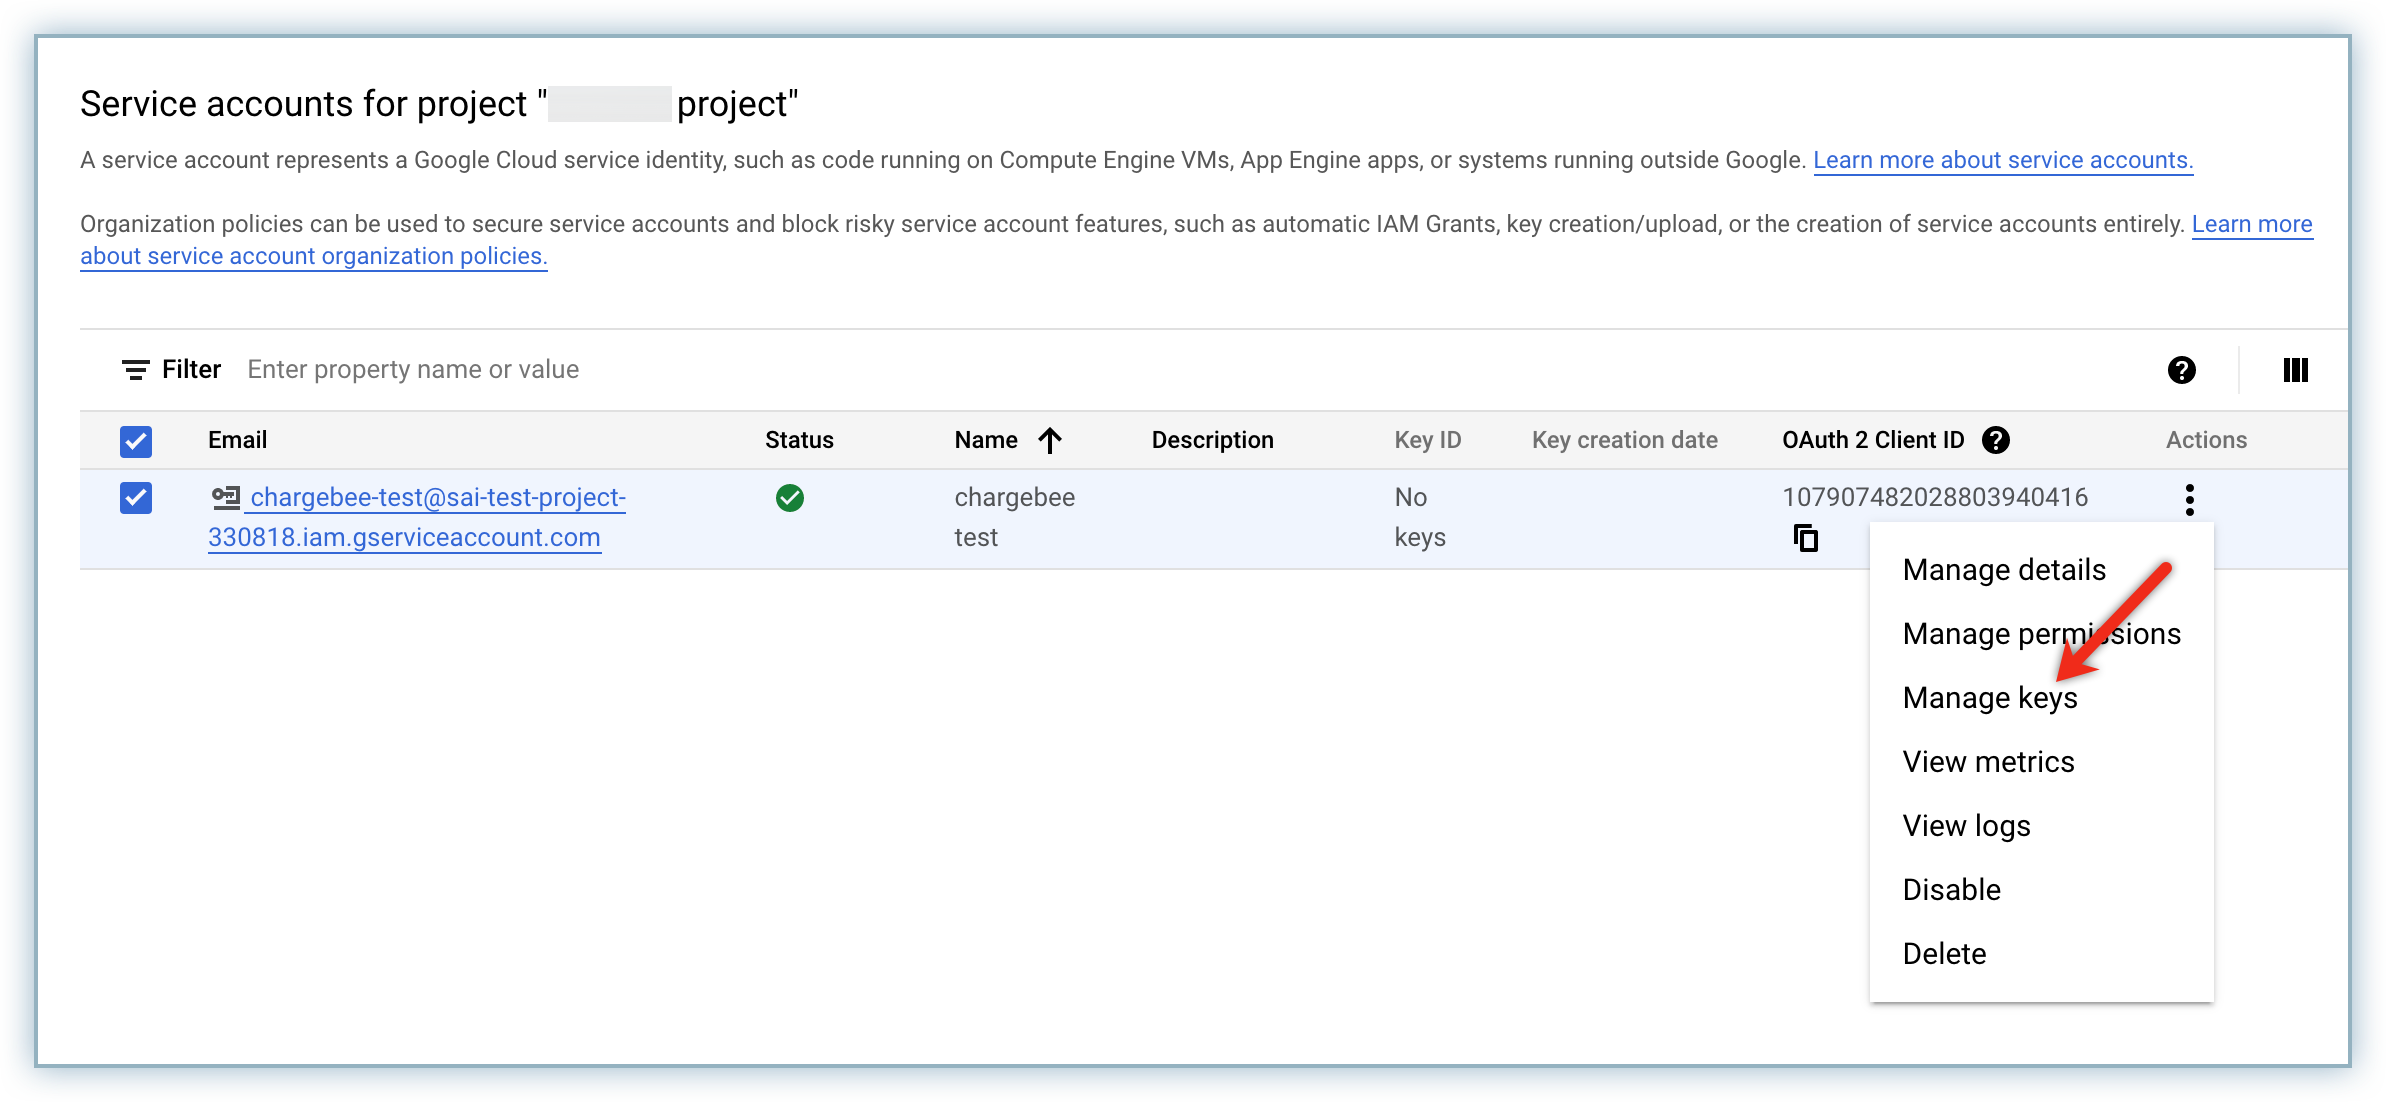
Select the applicable service account and click Manage keys from menu.
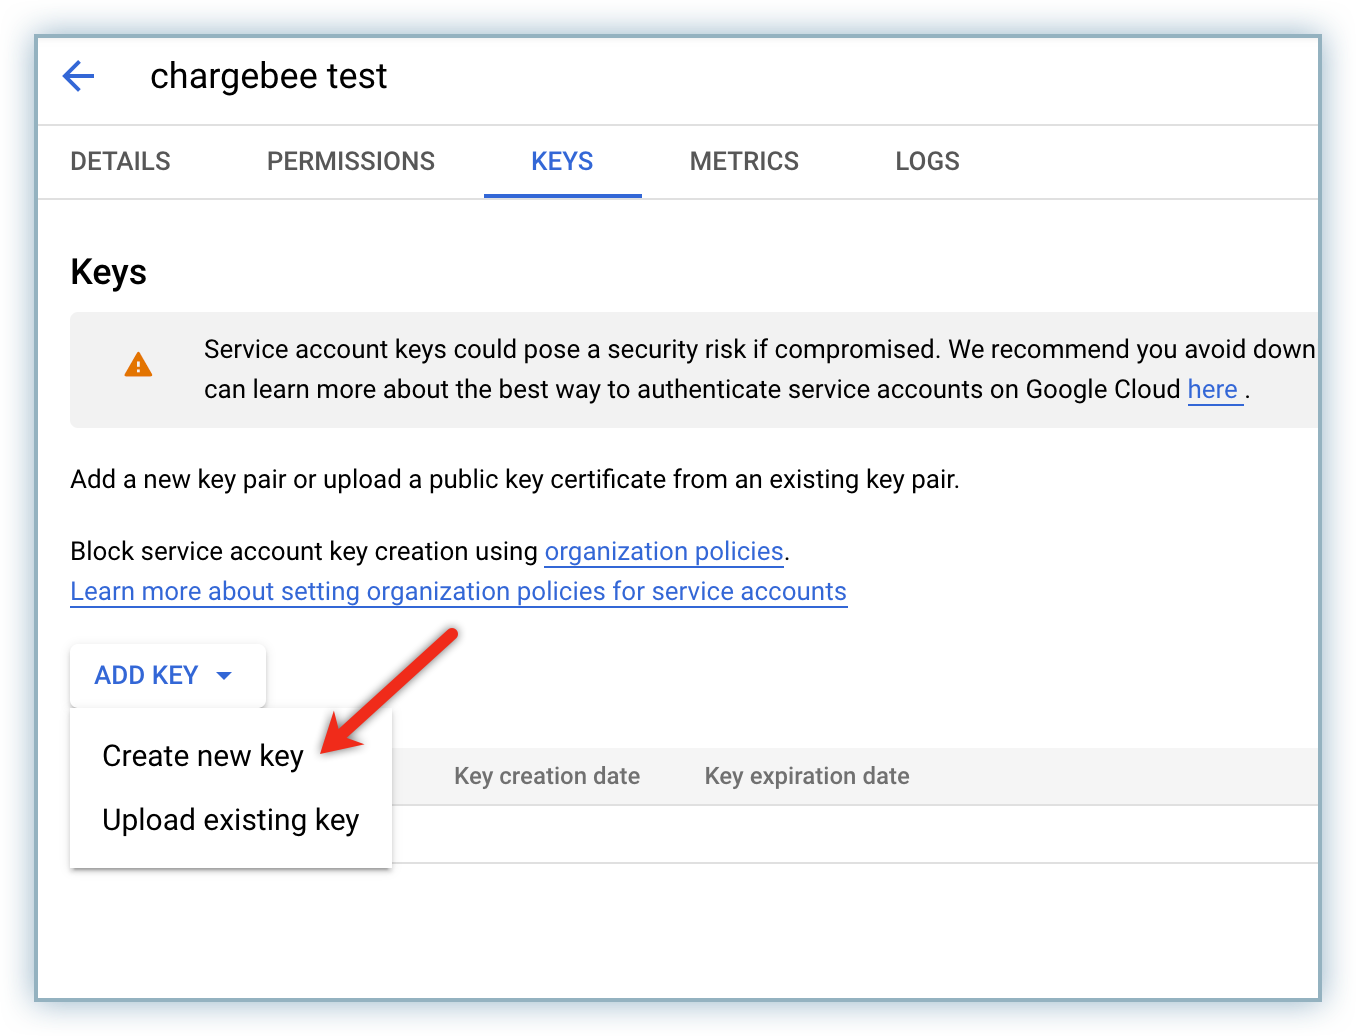
Click Create a new key from the ADD Key drop-down list.
Select the JSON radio button and click CREATE.
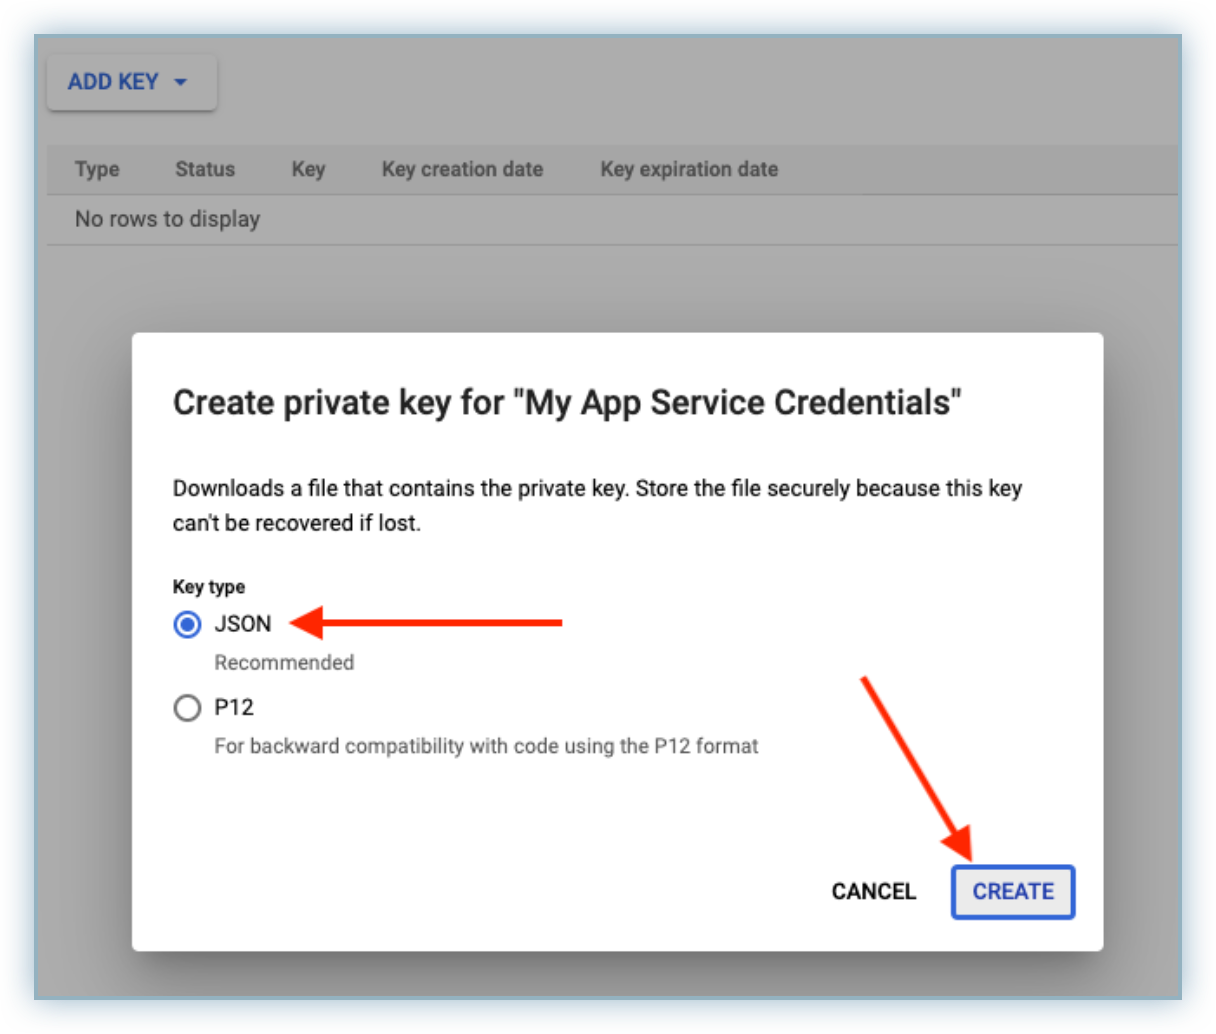
The JSON private key is saved to the your local computer.
Note: This key cannot be recovered if lost and must be stored safely.
Return to your Google Play Console and click Done.
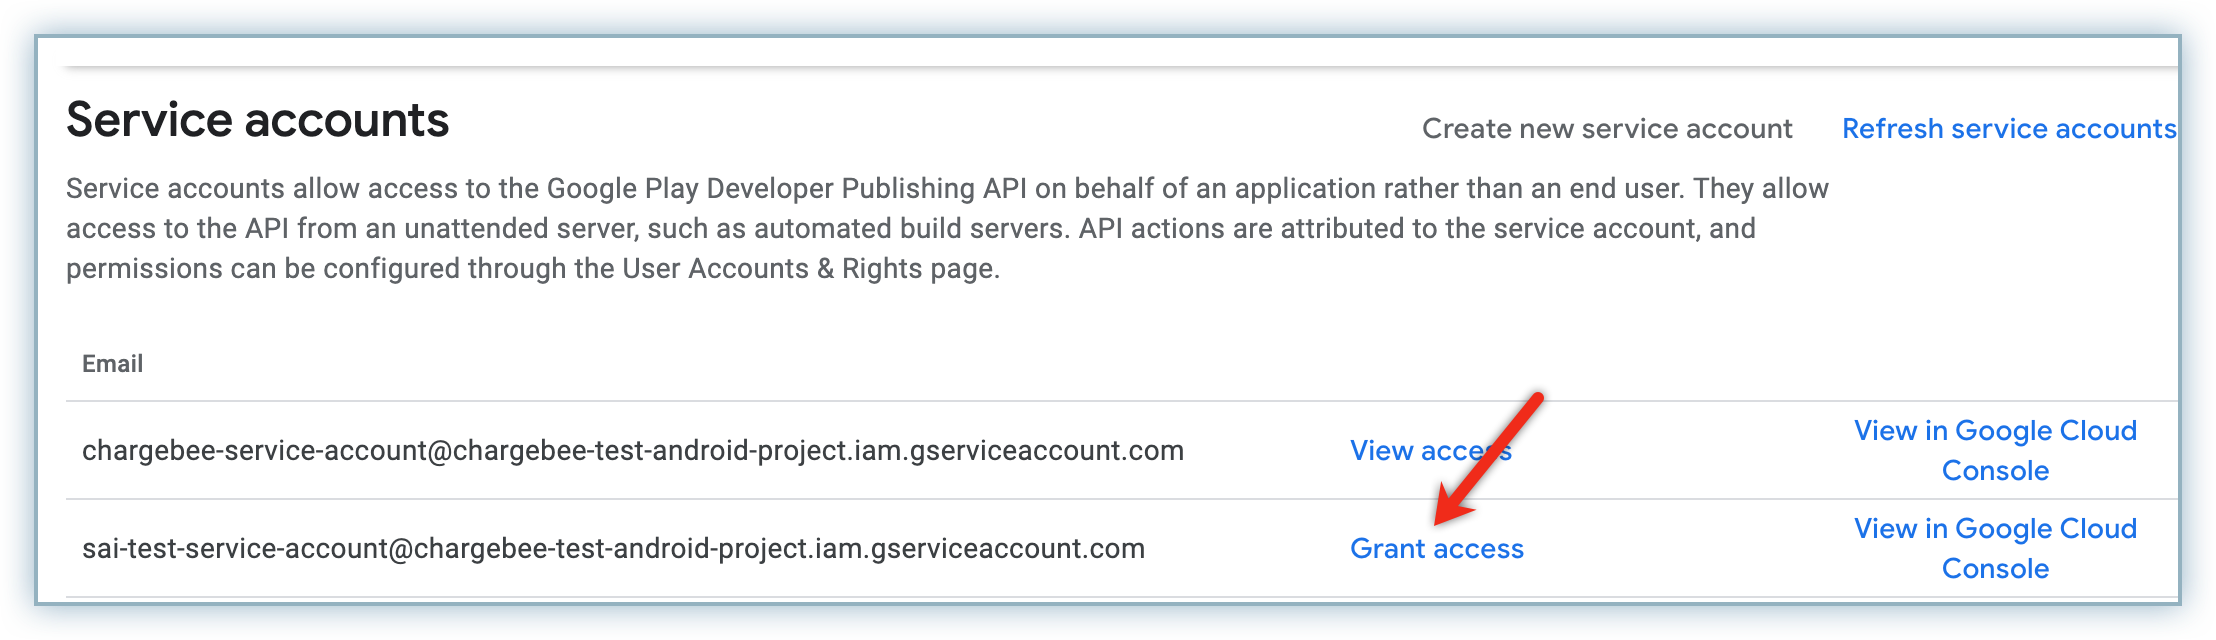
Click Grant Access for the applicable service account in the Google Play Console.
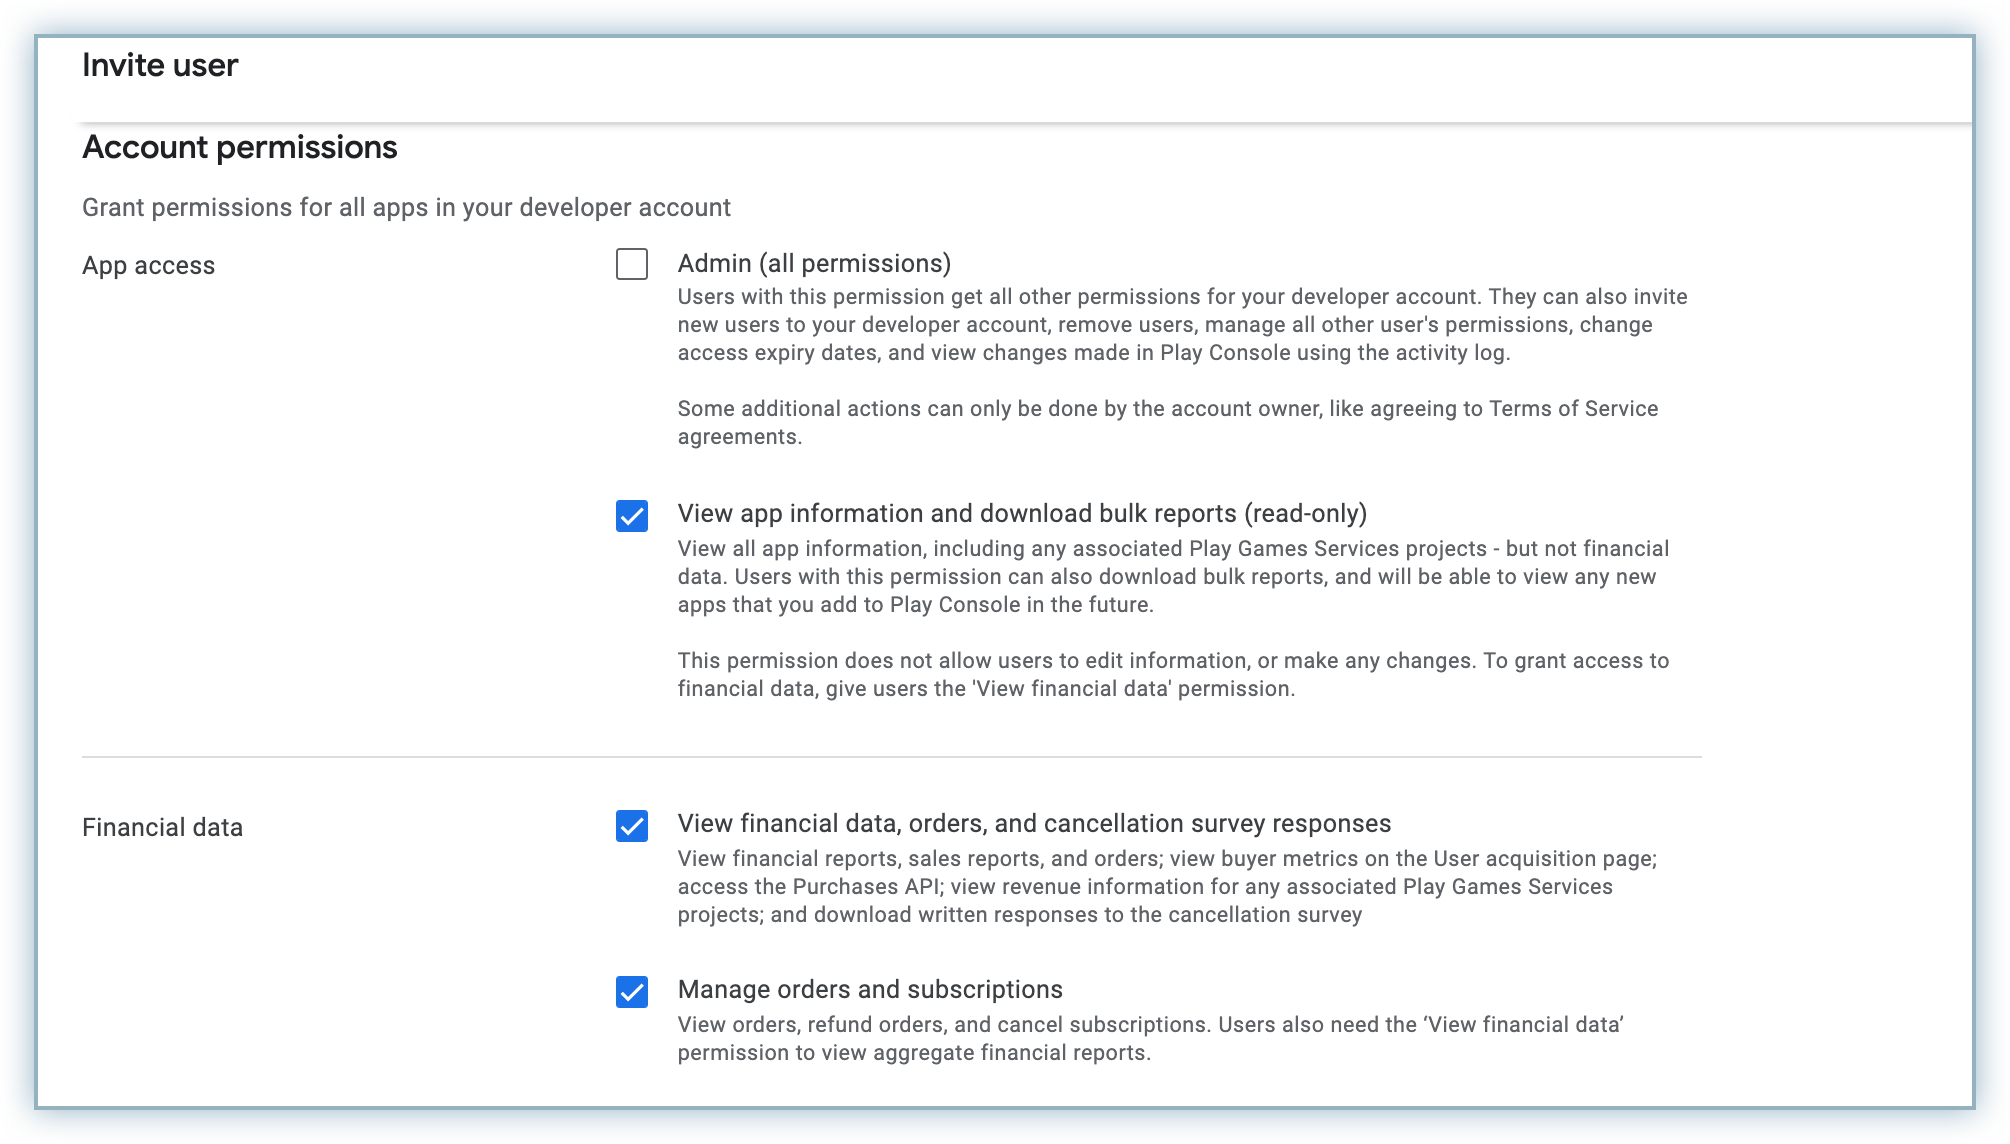
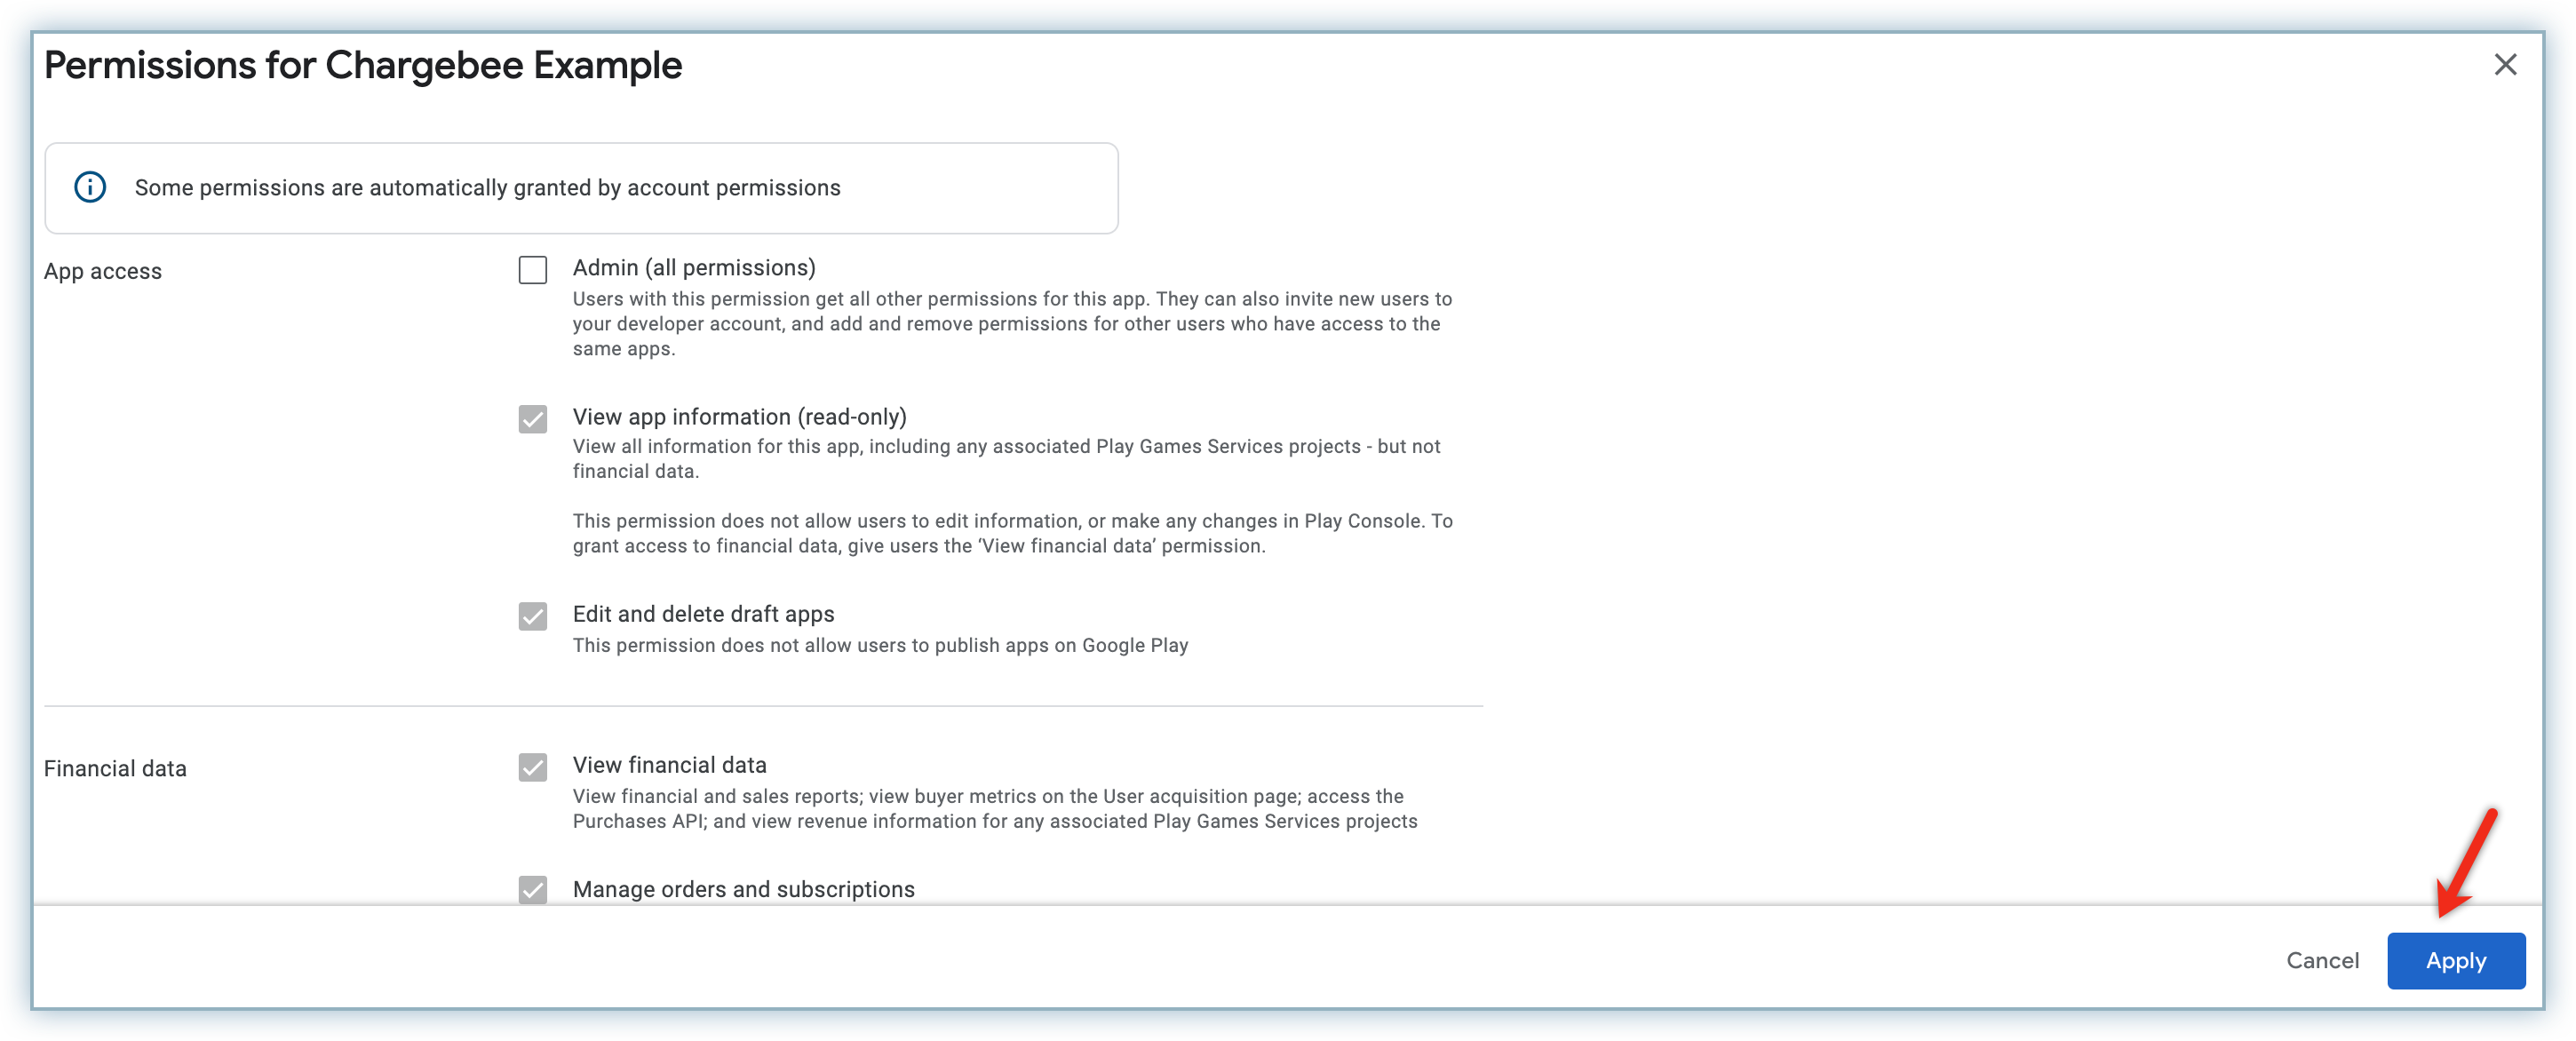
Select the following checkboxes to enable Chargebee to receive subscription-related notifications from Google.
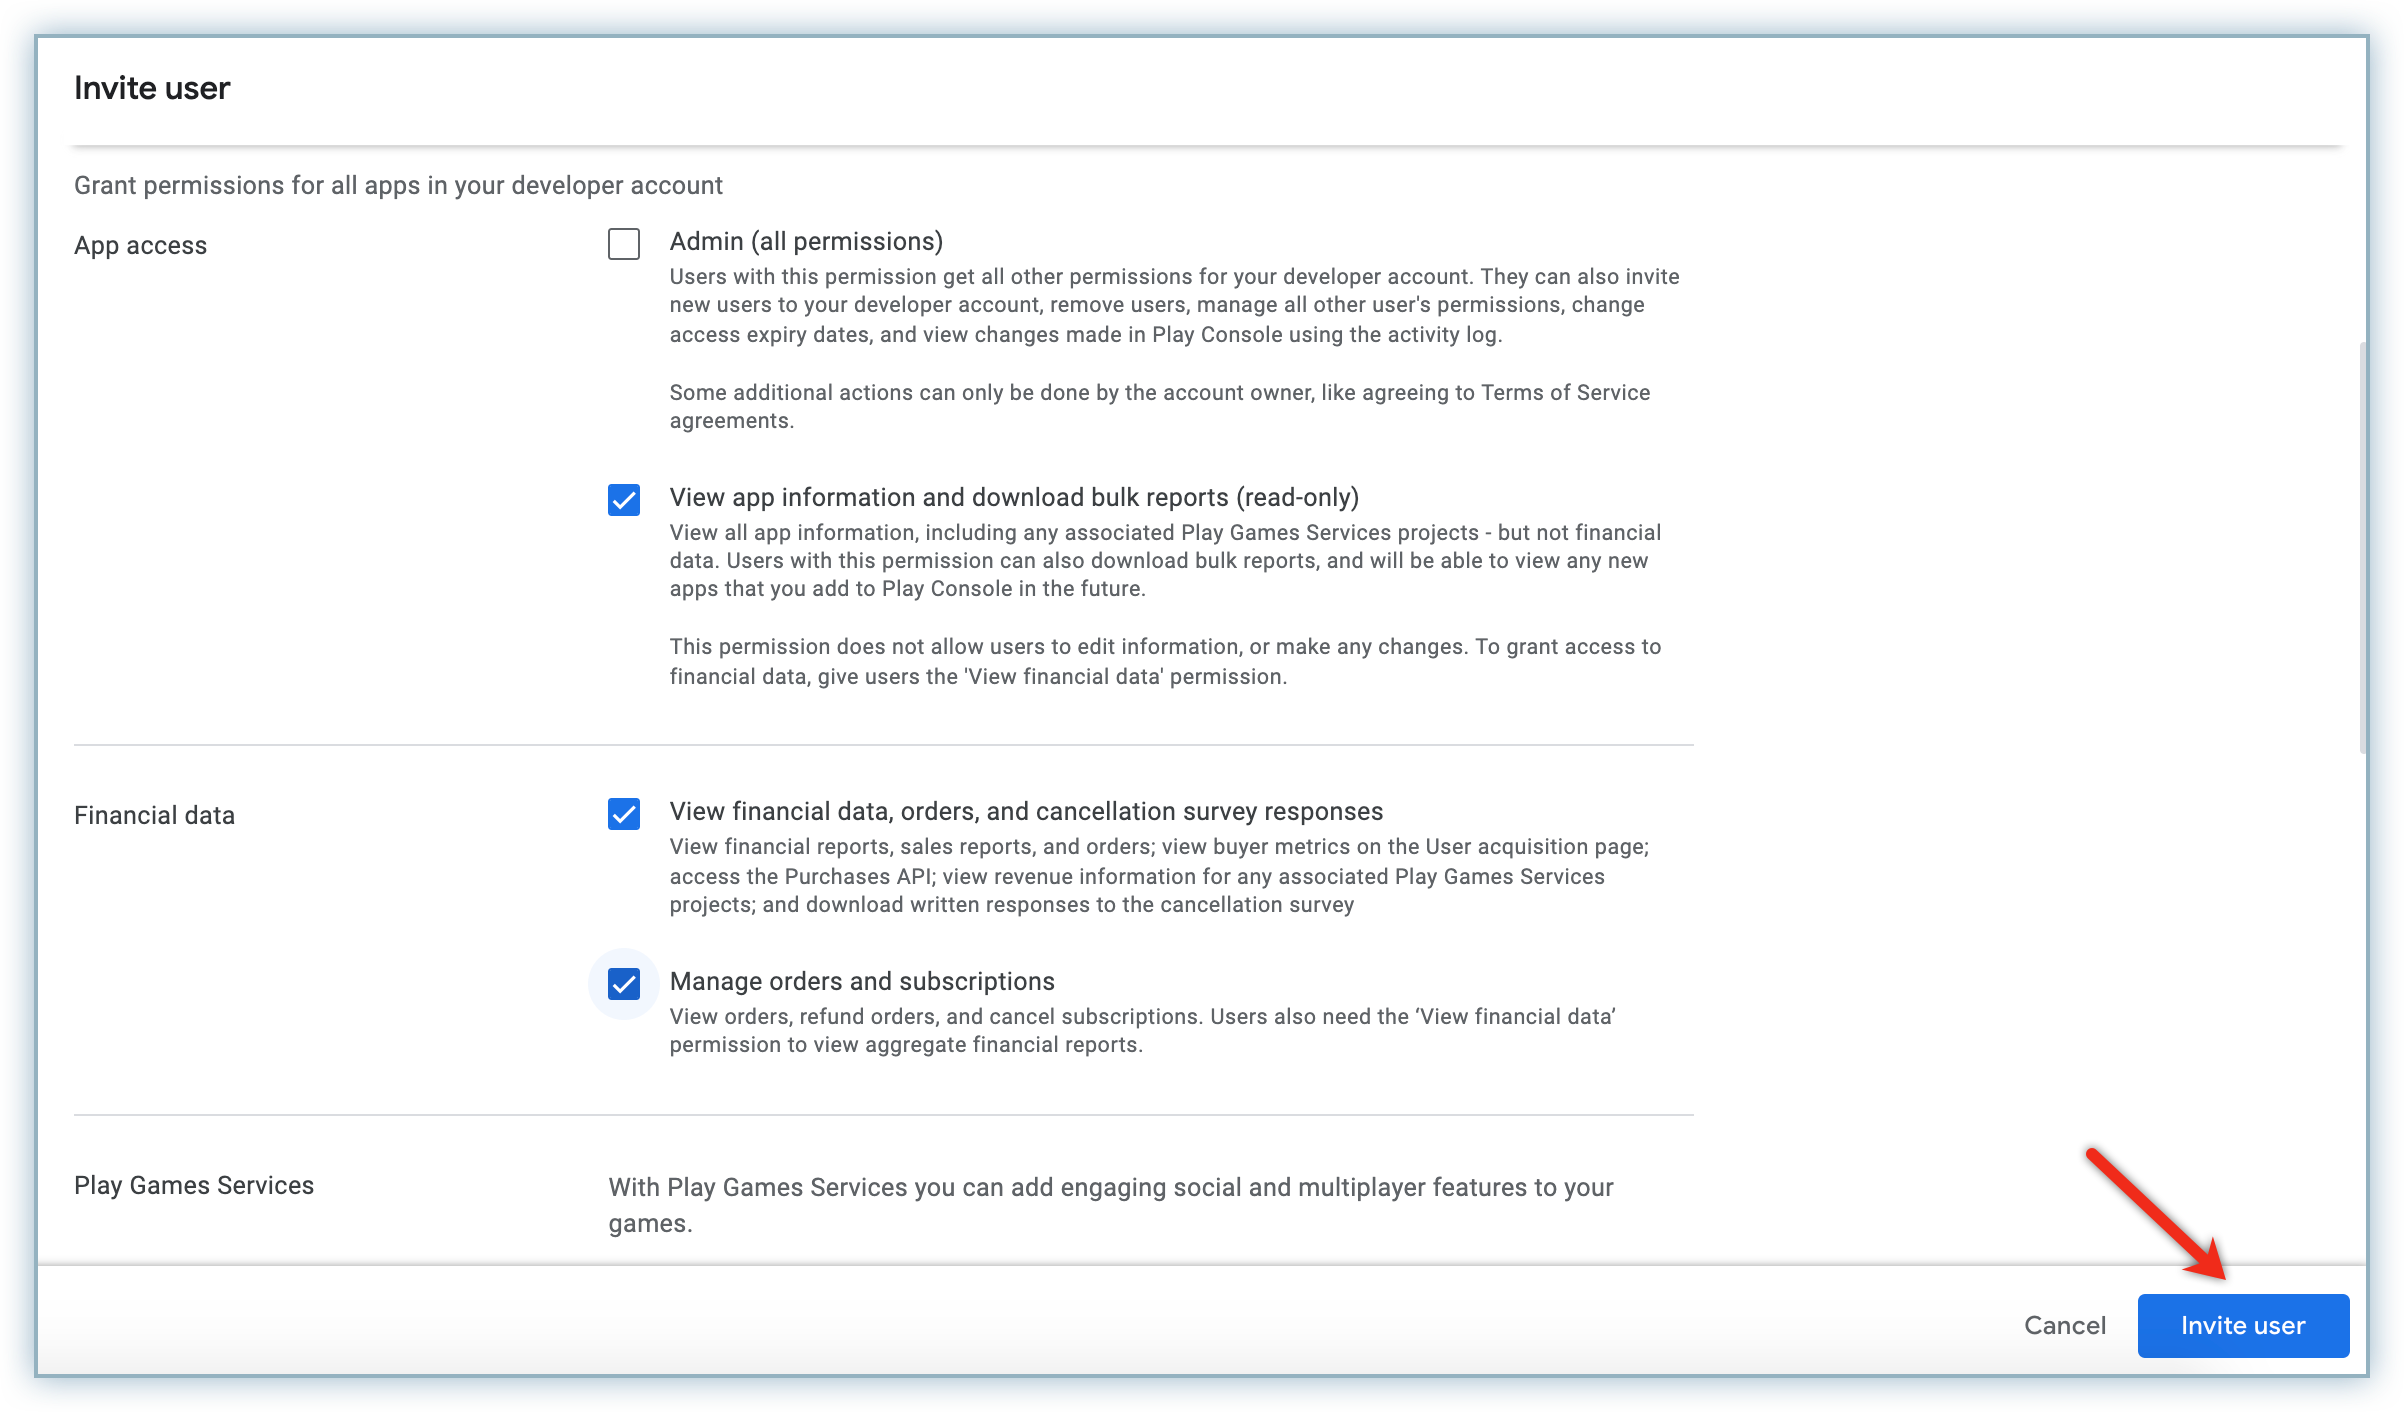
Click Invite User to review the pop-up notification and click Send Invite.
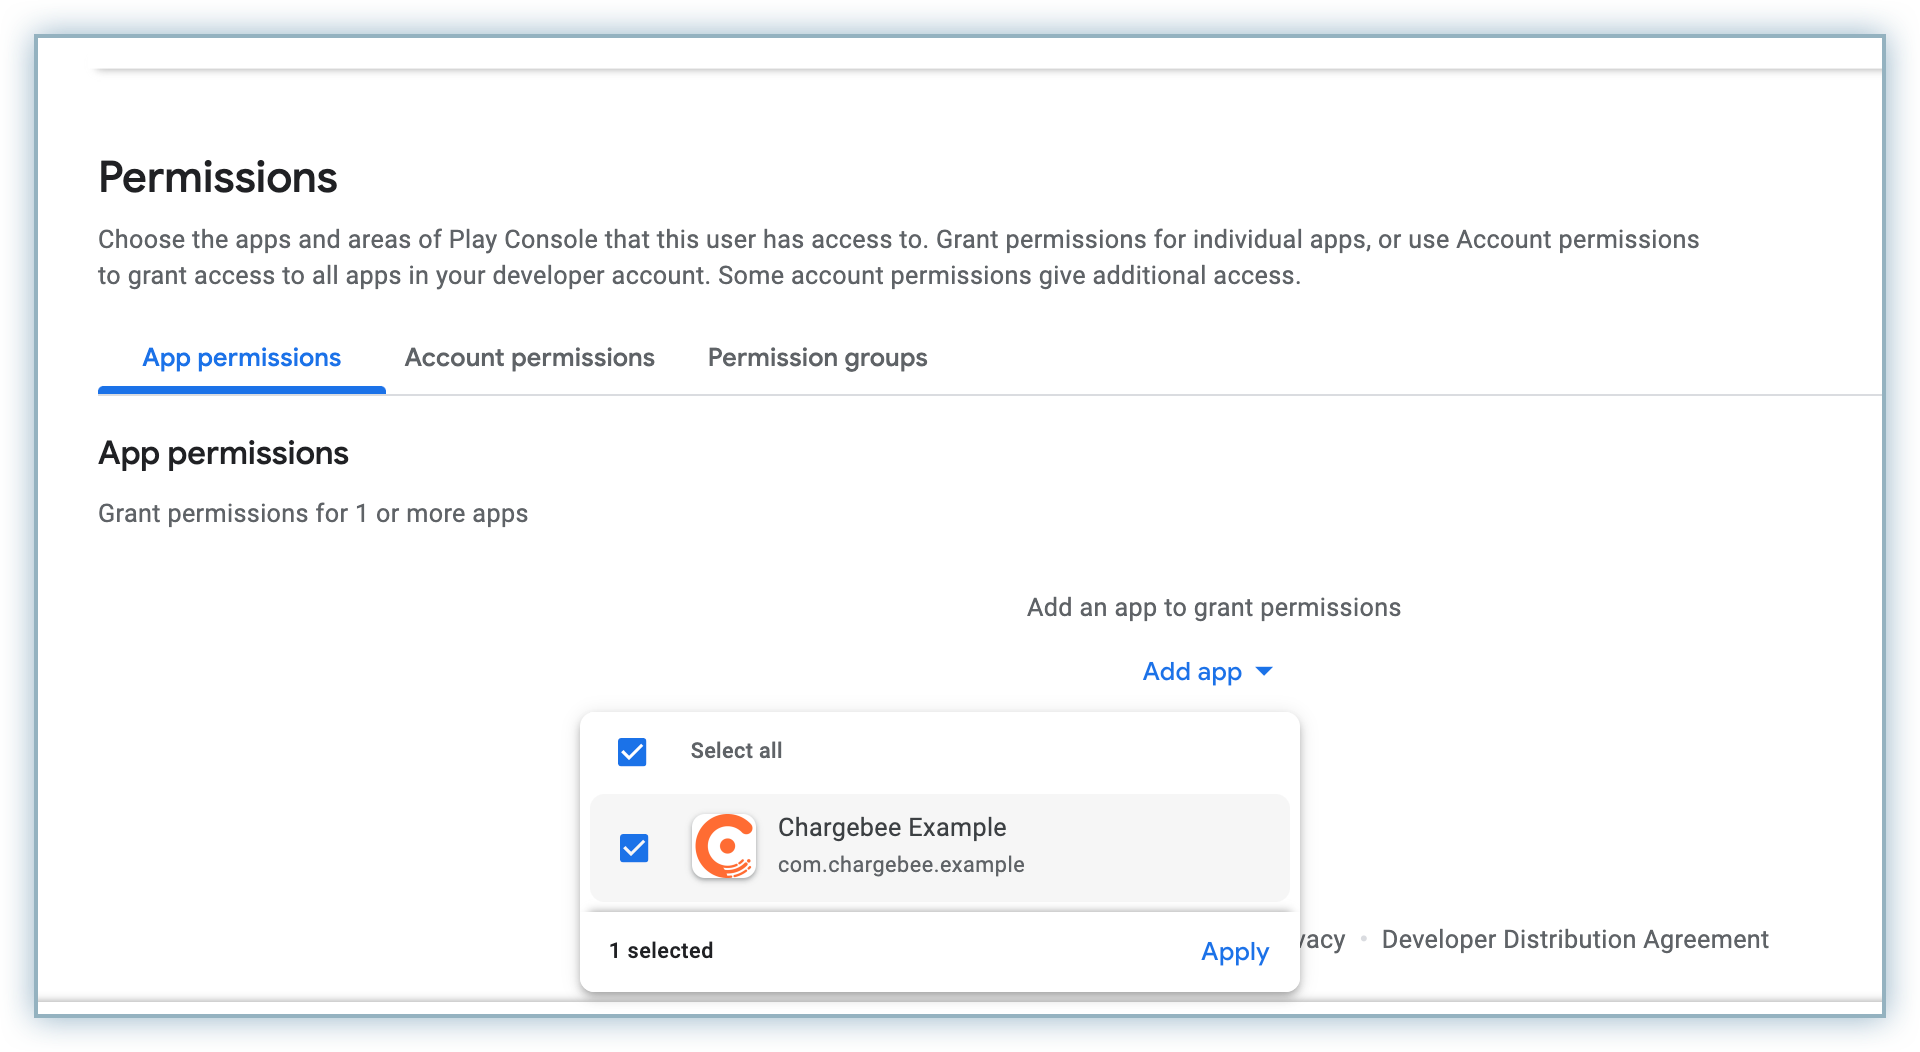
Click the applicable service account from the list.
Select the applicable app from the Add app drop-down list and click Apply.
Click Apply to complete linking the service account.
Follow the steps below to configure your Play Store app with Chargebee:
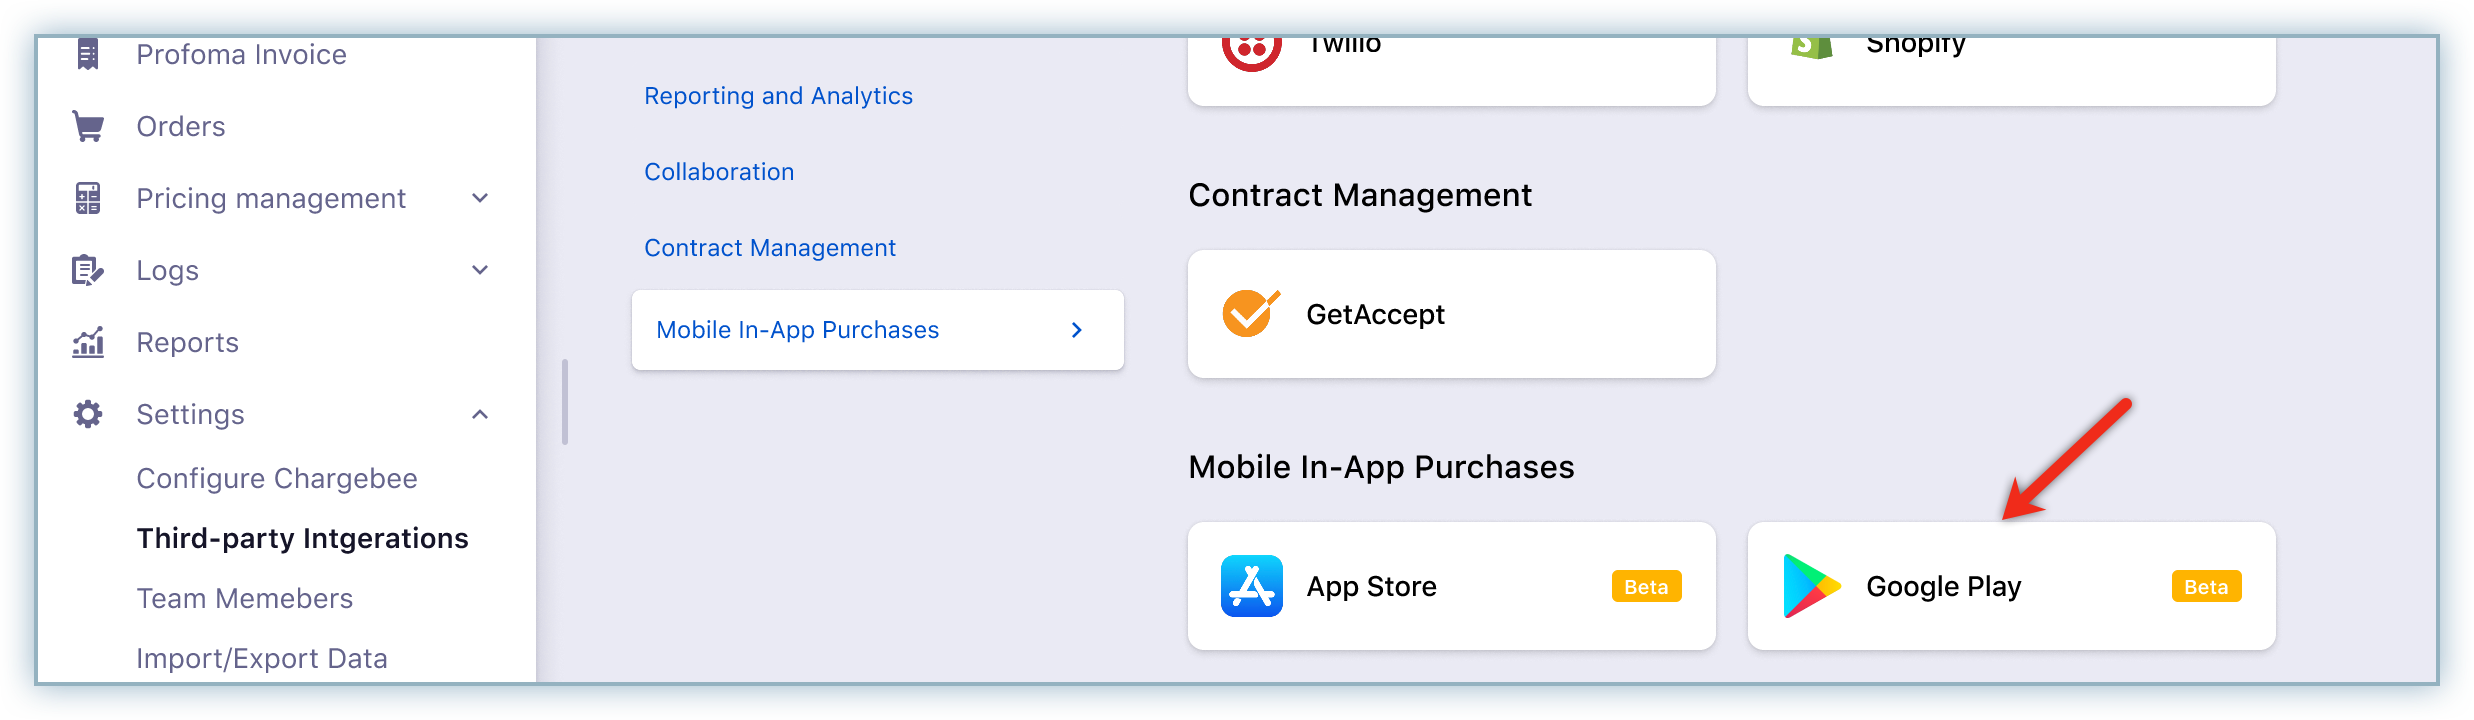
Login to your Chargebee site and click Settings > Third-Party Integrations.
Select Google Play from the Mobile In-App Purchases section.
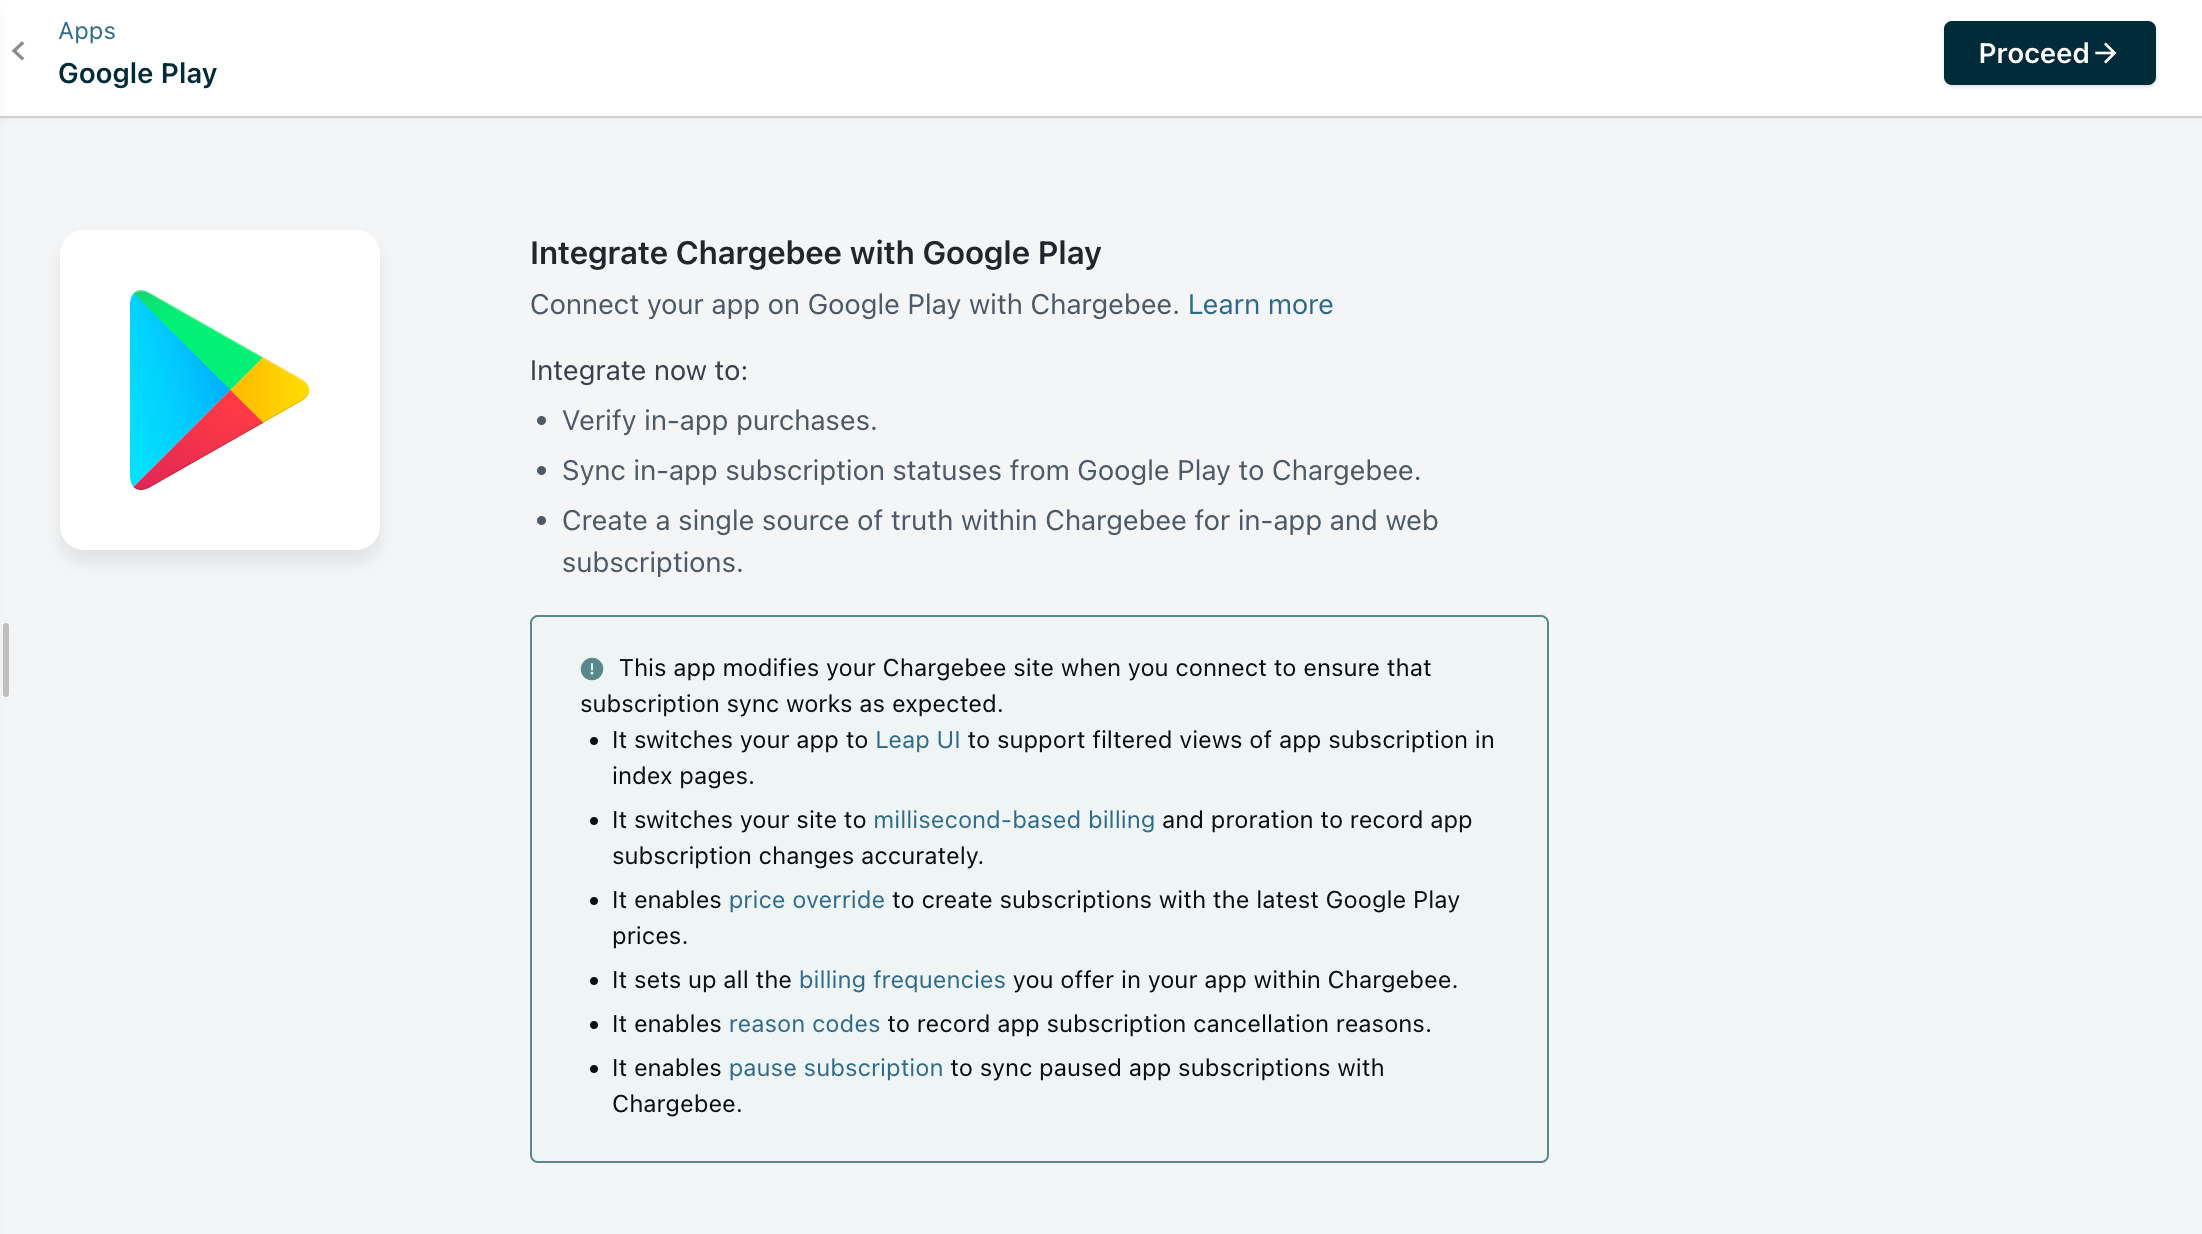
Click Proceed to initiate the connection of your Play Store app with Chargebee.
Type the name of the app and package name retrieved from the Play Store Console in the App Name and Package Name field.
Click Browse or use the drag-and-drop function to upload the JSON file saved on your system during the creation of the service account.
Note: All three fields are mandatory to connect your Play Store app with Chargebee.
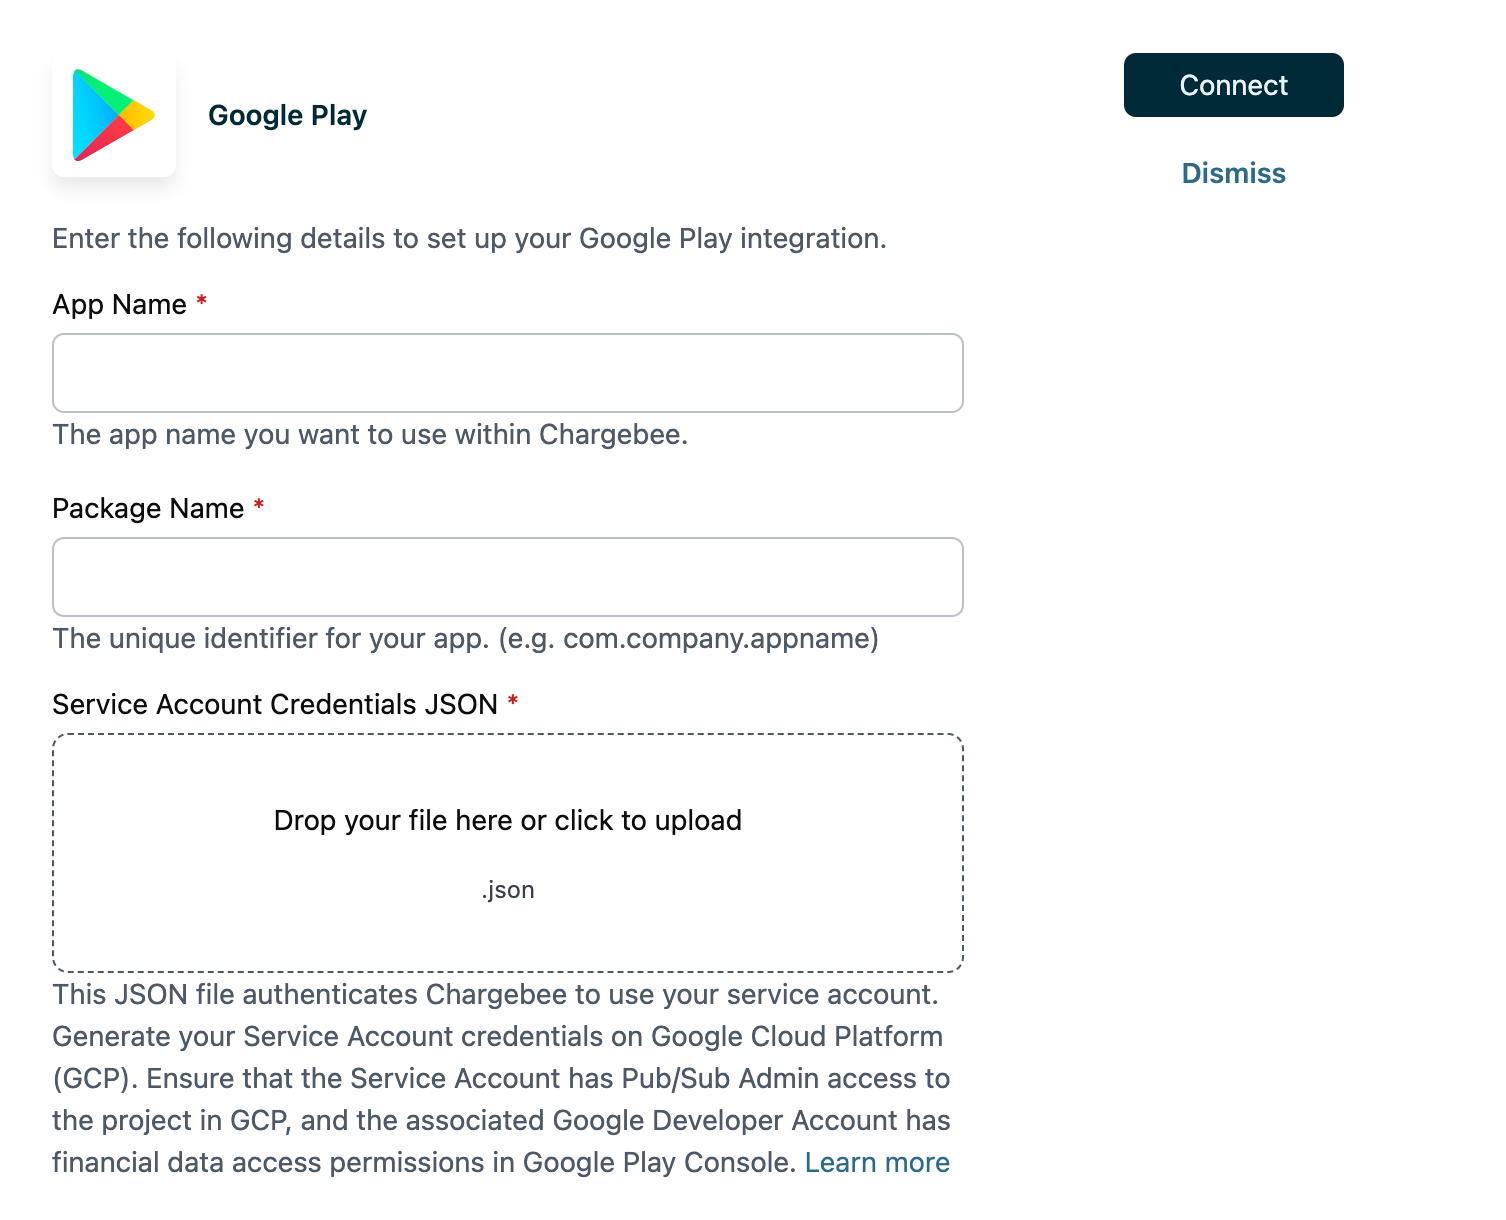
Click Connect to complete the integration process.
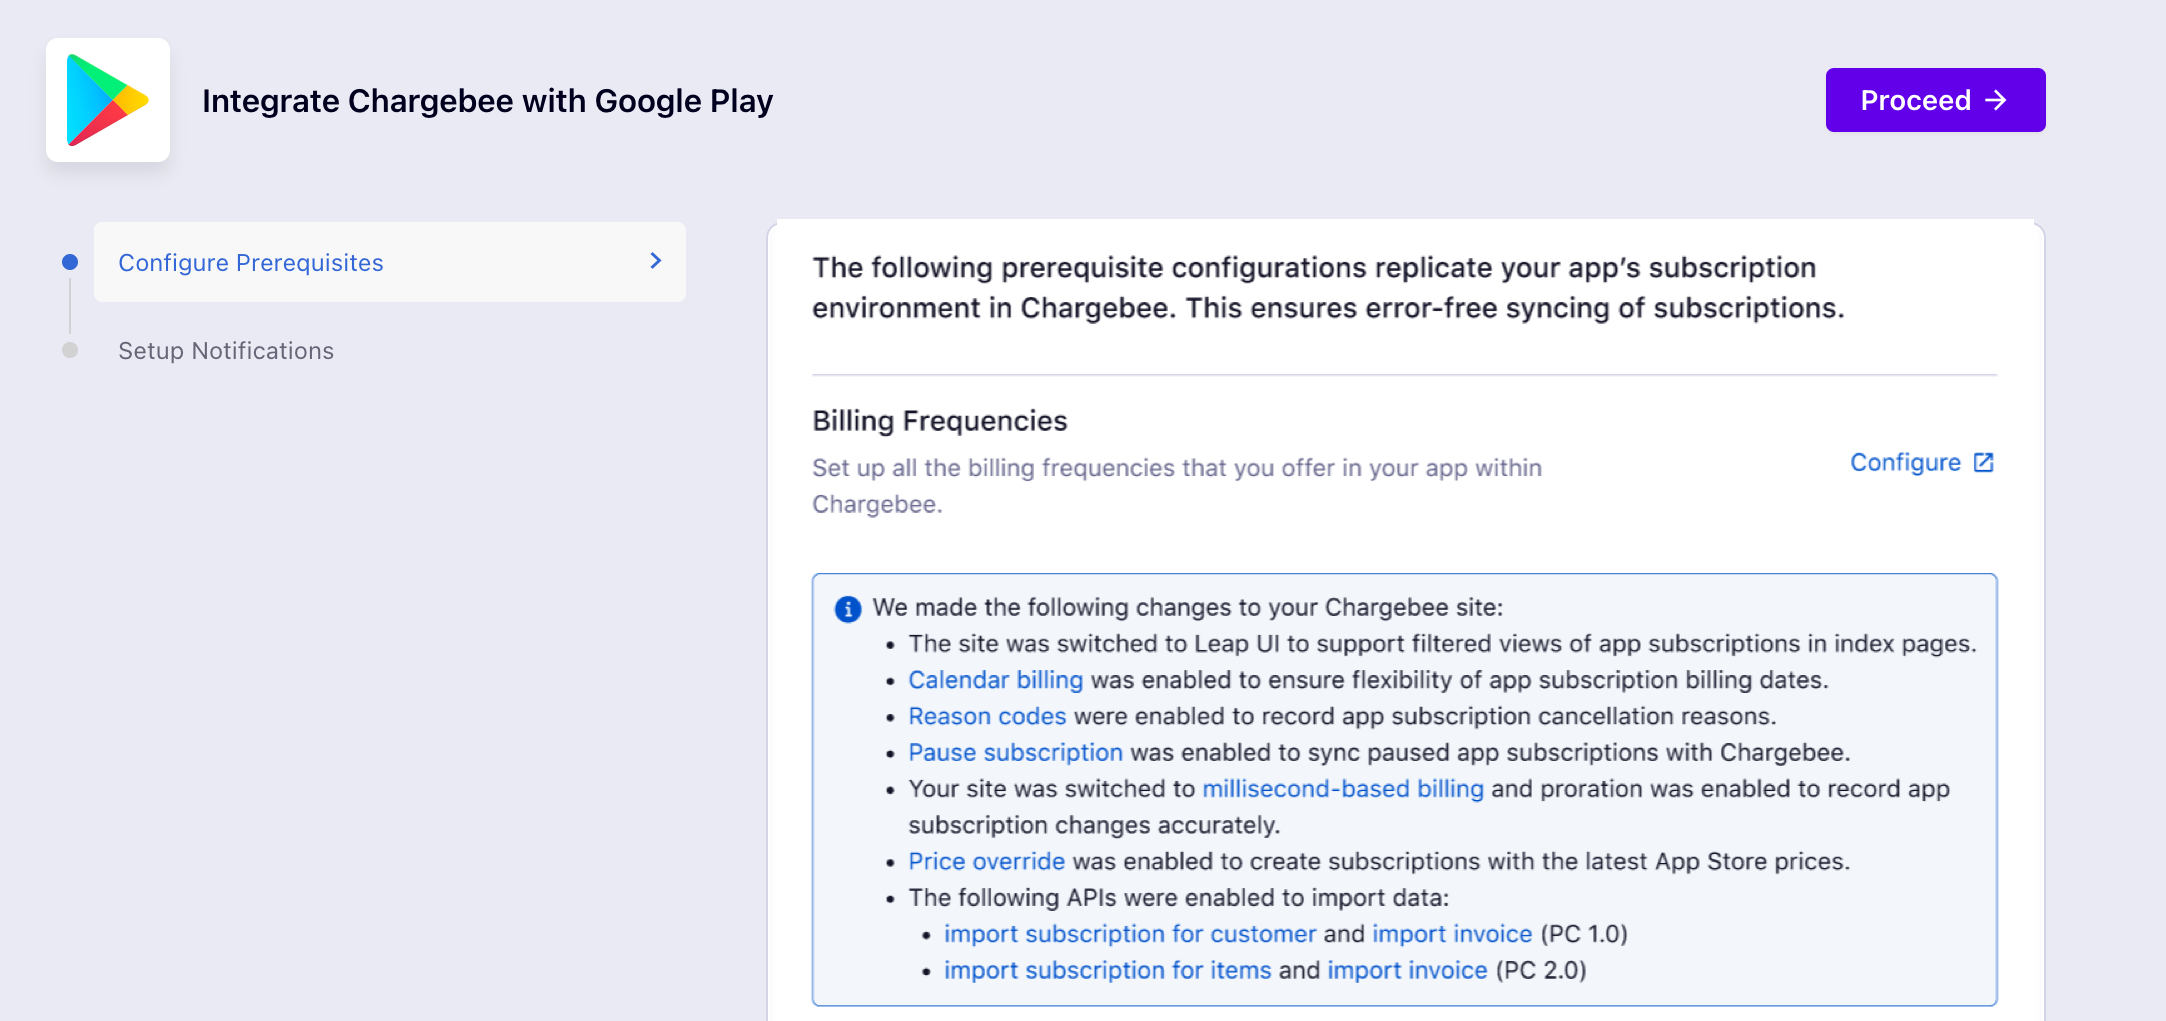
As part of the integration you must configure the following prerequisites within your Chargebee site.
You must configure all of the currencies associated with your Playstore app.
Click Configure to set up your currencies. Read more here.
You must model the accountable duration for your billing to include milli-second based billing and enable proration for your app in Chargebee.
Click Configure to set up your Billing mode. Read more here.
You must configure the billing frequency options associated with your app within Chargebee.
Click Configure to setup Billing Frequency. Read more here.
Click Proceed after all of the prerequisites are configured.
Google Play Store is successfully connected to your Chargebee site and is ready to setup notifications.
1. Can I connect multiple apps with my Chargebee site?
No, you cannot connect multiple apps from Google Playstore with Chargebee. However, we are continuously reviewing our offerings and should be able to offer this functionality soon. Meanwhile we would appreciate if you share your use case with us. Please write to us at [email protected] if you need to connect multiple apps to a single Chargebee site.
2.I have issues with my Service Account Credentials, what can I do?
You can always review the documentation from Google here for additional information.
3. Can I change the name of my app on the Chargebee site once the setup is complete?
No, you cannot change the display name that you choose for your app on the Chargebee site. However, you may choose to delink your connection but while existing imported data is available no new updates or data will be synced.
4. Can I manage changes to customer subscriptions from Playstore within Chargebee after integration?
No, the subscriptions are added to Chargebee in "Read Only" mode hence disabling the action to complete any actions for subscriptions. Any changes to a subscription must be completed within Google Playstore. This will ensure that any changes to the subscription will be handled in line with the guidelines established by Google.