Chargebee's Transfer configurations capability, allows you to copy configurations from one Chargebee site to another, irrespective of it is a Live site or a Test site. To use this feature, you need at least one Chargebee Live account.
| Source | Destination | How it works |
| Live Site | Test Site | 1. Clear Chargebee Test site data. 2. Copy Configurations and Product catalog data |
| Test Site | Live Site | 1. Copy Configurations and relevant/associated Product Catalog data |
Listed here are the steps to be followed for transferring configurations from Test Site to a Live Site:
On your Chargebee Test site, click Settings > Configure Chargebee > Transfer Configurations under Tools to get started with the transfer.

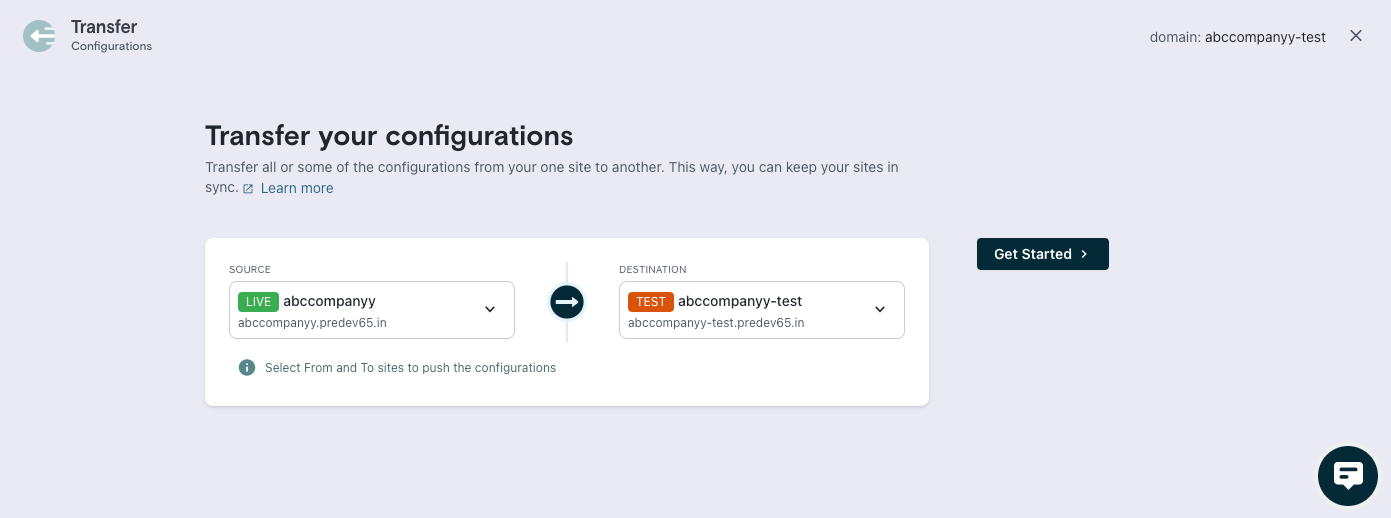
The Transfer Configurations feature loads, with the current logged-in site pre-selected at the Source. This is the Chargebee site from which the configurations will be copied.

Select a Destination site, to which you want the configurations from the Source site to be copied.
The Destination site selection lists all the Chargebee sites that you have "Administrator" access rights to. Choose to select a destination site from this list.

Click Get Started.
The next step depends on the type of destination site. Following are the two scenarios for transferring configurations.
Follow these steps to transfer configurations if the selected destination is a Test site.
Click Get Started to clear the Chargebee Test sites to prepare the destination site for copying configurations. An initial confirmation message is displayed, "All the data and configurations will be deleted from your site before validating".
Click Proceed to confirm to transfer the configuration.

Click Proceed to validate the configurations being copied.

Post validation, a list of configurations to be copied to your destination site is displayed. Click Proceed to Transfer to initiate the data transfer.

Upon selection, you will be notified with this alert, click Proceed to confirm and begin the transfer.

Once the transfer is done a message is displayed with the total transfers completed successfully.

Follow these steps to transfer configurations if the selected destination is a Live site.
Selecting the configurations to be copied:
You can select the configurations to be copied from one of the following options:
Click Proceed to validate the configurations being copied.

Post validation, a list of configurations to be copied to your destination site is displayed. Click Proceed to Transfer to initiate the data transfer.

Upon selection, you will be notified with this alert, click Proceed to confirm and begin the transfer.

Once the transfer is done, a message is displayed with the total transfers completed successfully.

1)What are the configurations that cannot be transferred?
Configurations that require separate credentials for the Live site cannot be transferred. This includes,
2)Is there any configuration that can be transferred but is not listed in the Transfer Configurations tool?
Custom fields can be copied to Live site using the Publish to live option in its overview page.
3)What happens to the configuration changes in draft state while transferring?