If you are using Adyen.js as your checkout solution and need to be SCA-compliant under the European PSD2 regulation, you may have to additionally integrate Chargebee's 3DS Helper in your checkout to handle 3DS transactions. For more information, take a look at how to integrate 3DS Helper and support 3DS flows.
Adyen iis the payments platform of choice for many of the world's leading companies. Its success can be attributed to its ability to offer multiple payment options using a streamlined platform. Adyen provides a modern end-to-end infrastructure with direct connections to international cards networks like Visa and Mastercard while supporting a host of other globally preferred payment methods.
This document will assist you with integrating your Adyen payment gateway with Chargebee.
Here are a few things to consider before you choose Adyen as your payment solution:
A few zero-decimal currencies (IDR, UGX, and more) in Adyen are non-zero-decimal currencies in Chargebee. Therefore, it is recommended that you pass the amount to Chargebee in cents via a Chargebee API. Chargebee supports amounts with up to two decimal places in the major unit of the currency. This amount with 2 decimal places must be converted to an integer by multiplying it with 100.
For example, to specify an amount of 10 IDR, set the amount as (10 x 100) = 1000 cents.
Due to recent world events, you may experience failures for payments originating from Russian financial institutions or instruments. We recommend reviewing guidelines issued by respective payment gateways for additional information.
Payment failures and recovery are commonly inconveniences associated with recurring billing businesses. In most cases, payment failures occur as a result of expired or outdated card details.
Adyen utilizes a solution that offers Batch or Real-time automated account updater to reduce payment failures.
Chargebee only supports the Real-time account updater feature to ensure all updates to a customer's card information is updated in Chargebee (in real-time). This is accomplished with the help of card networks and the Adyen gateway.
To integrate your Adyen account with Chargebee, you must review the following prerequisites actions before initiating the configuration process:
Ensure you have an active Adyen account with access to a test and live site. Read more about Adyen accounts here .
We recommend that you complete and review the results of the end-to-end integration in your test site prior to transitioning it to your live site.
Create your API credentials on Adyen and contact their support team to enable the API PCI Payments Role for your API credentials. Read more here .
Contact Adyen support to enable the recurring contract notifications on your live and test accounts to facilitate recurring payments. Read more here .
Enable all applicable payment methods that you intend to offer to your customers in your Adyen account. Read more here .
Configuration of Chargebee's Notification[] webhooks on Adyen is mandatory for the integration to function.
The following options are available to integrate your Adyen Gateway with Chargebee
| Integration Method | Description | PCI Requirements | 3DS support Available? |
|---|---|---|---|
| Chargebee API + Adyen Gateway | Collection of card information is managed by Chargebee's secure hosted pages and directly passed on to Adyen. | Low |
Yes |
| Chargebee JS | Chargebee's Hosted Components and Fields You will use Chargebee's Components to collect card details and Chargebee's temporary token. | Low |
Yes |
| Chargebee JS | Using Adyen's Web Components+Chargebee.js Collect Card details using Adyen's hosted fields and tokenize using Chargebee.js | Low |
Yes |
| Chargebee JS | Using Permanent Token - a token that represents a customer's card details stored in Adyen's vault to process payments. | When creating a new token and when converting card details to tokens using: - Hosted Components: Low - Your own Checkout: High | Yes |
| Chargebee JS | Raw card details and JS helper for 3DS. However, this will need you to ensure PCI compliance - You will collect raw card details via your custom checkout and pass it to Chargebee.js 3DS Helper to conduct 3DS flow. | High | Yes |
| Adyen.js + Chargebee API | Using Adyen's Web Components+Chargebee.js Collect Card details using Adyen's hosted fields and tokenize using Chargebee.js. | Low | Yes |
Prior to integrating Adyen with Chargebee, you must set up the following configurations within your Adyen account.
Setup Roles/Privileges in Adyen
The Checkout Webservice role when enabled for your Adyen profile facilitates a simple and flexible way to initiate and authorize online payments. Read more about the Adyen Roles here .
Follow the steps below to confirm or enable this:
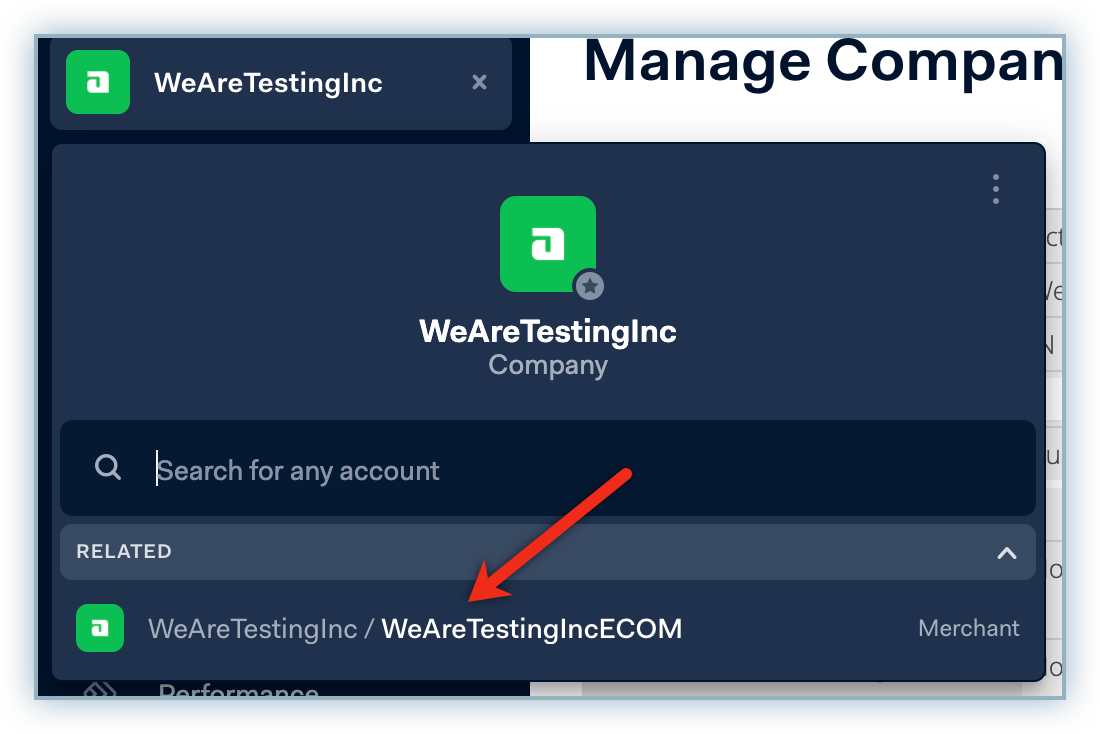
Log in to the Adyen Customer Area with your company-level account.
Navigate to Developers > API Credentials.
Click Add new credential. If you don't have an API credential yet, select Add new credential and select Webservice as User type.
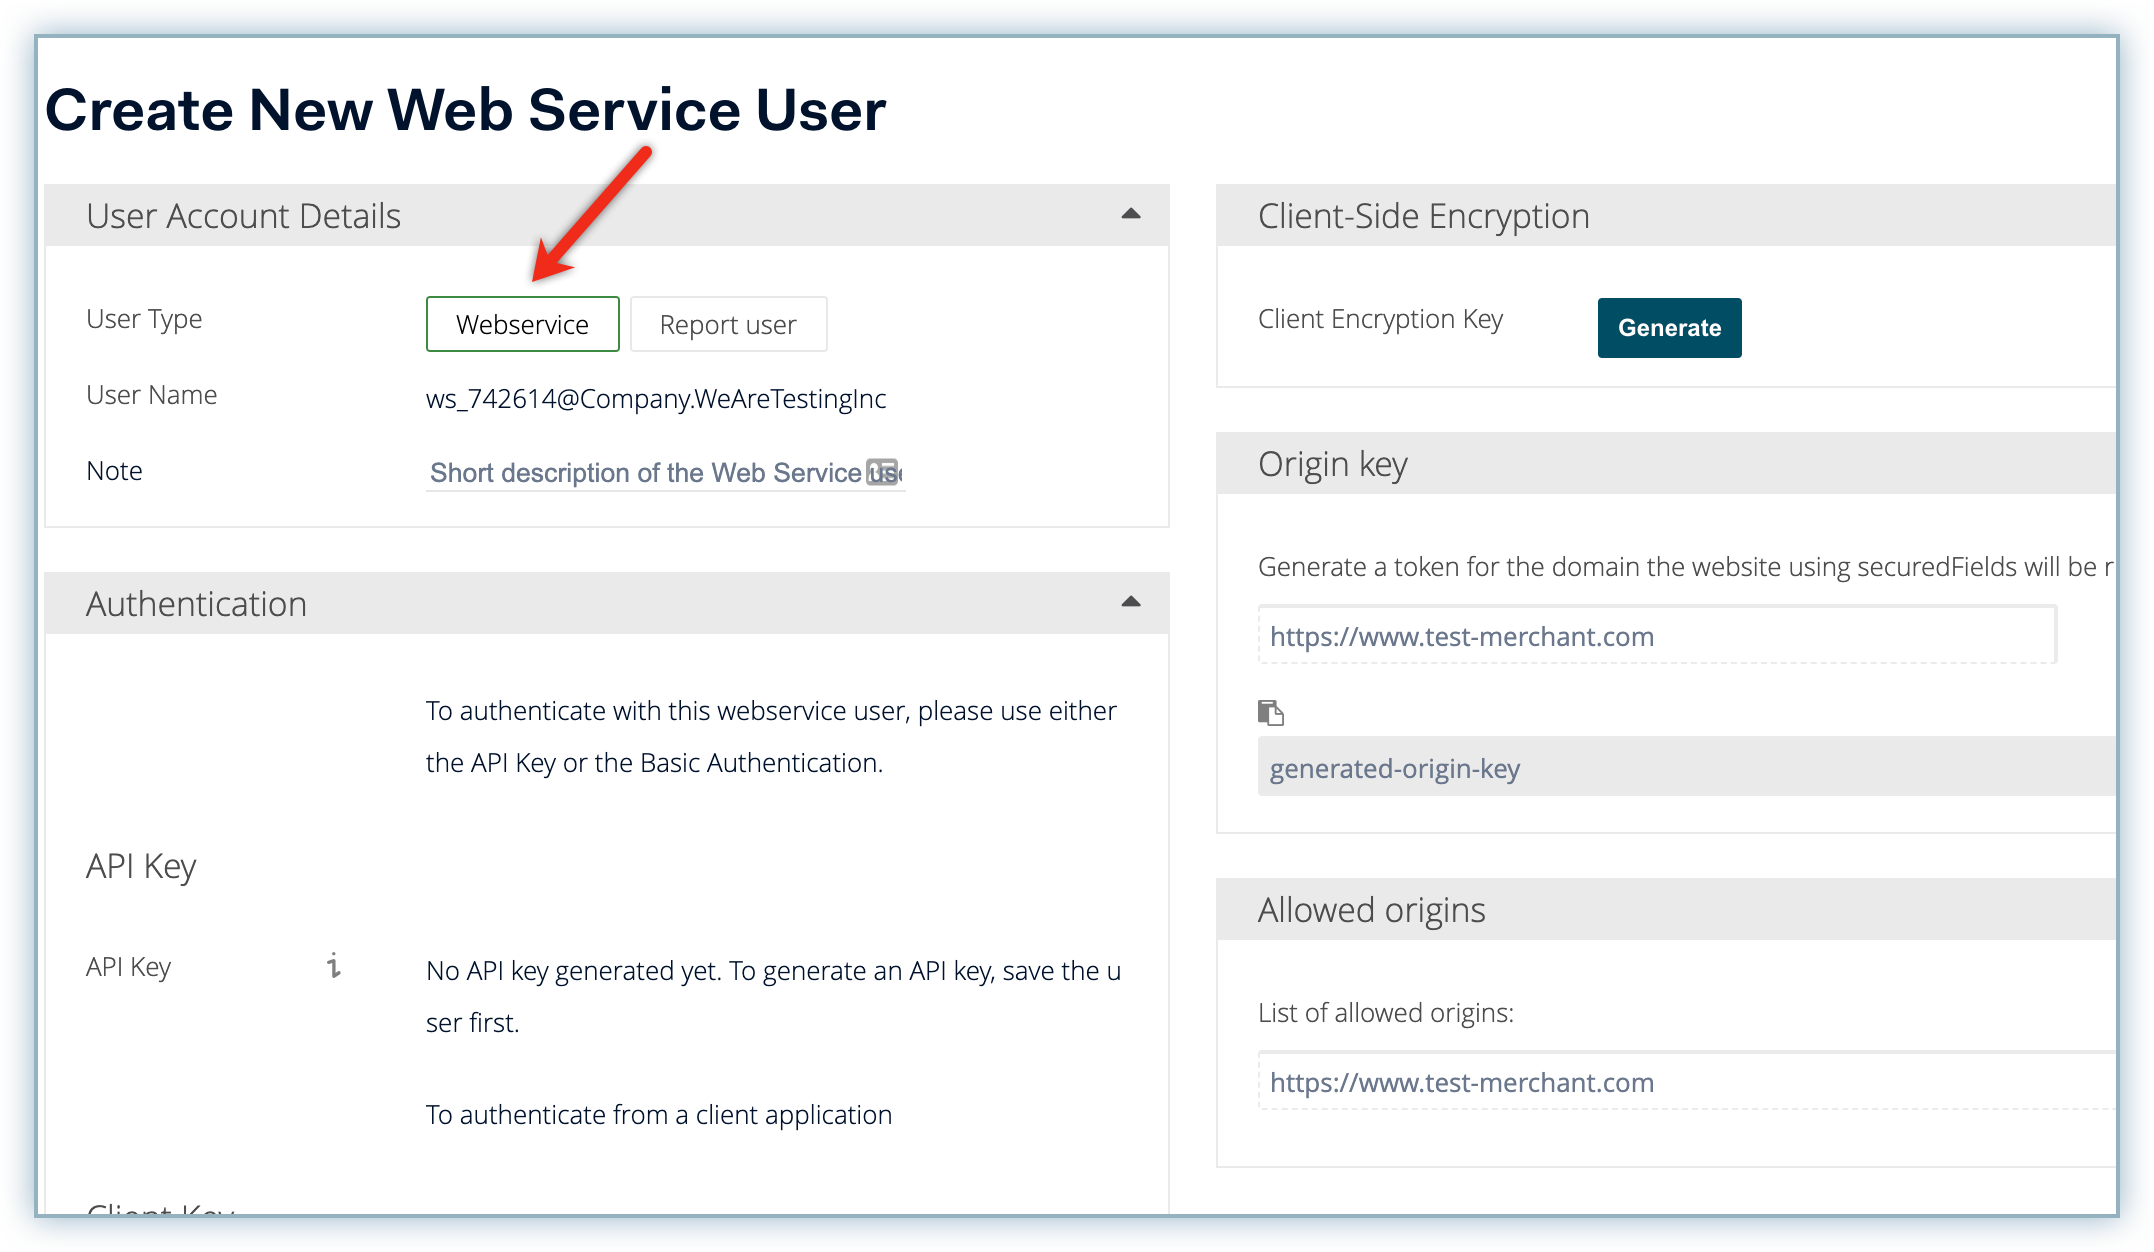
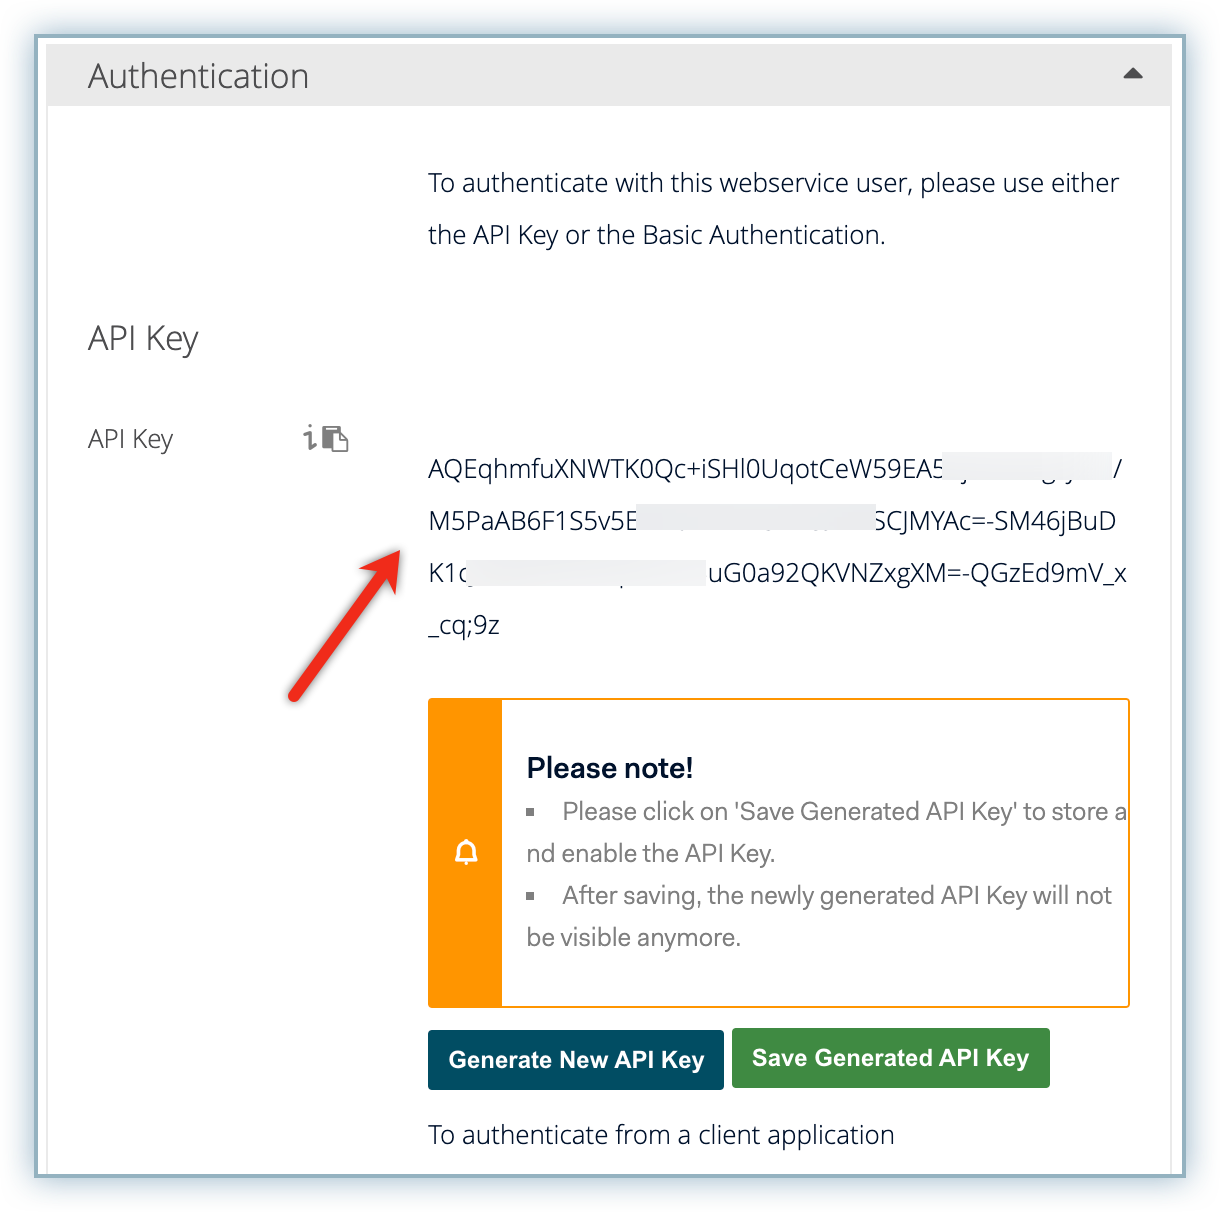
Click Generate API Key from the Authentication section.
Store the generated API key safely on your system and click Save Generated API Key to enable the API key.
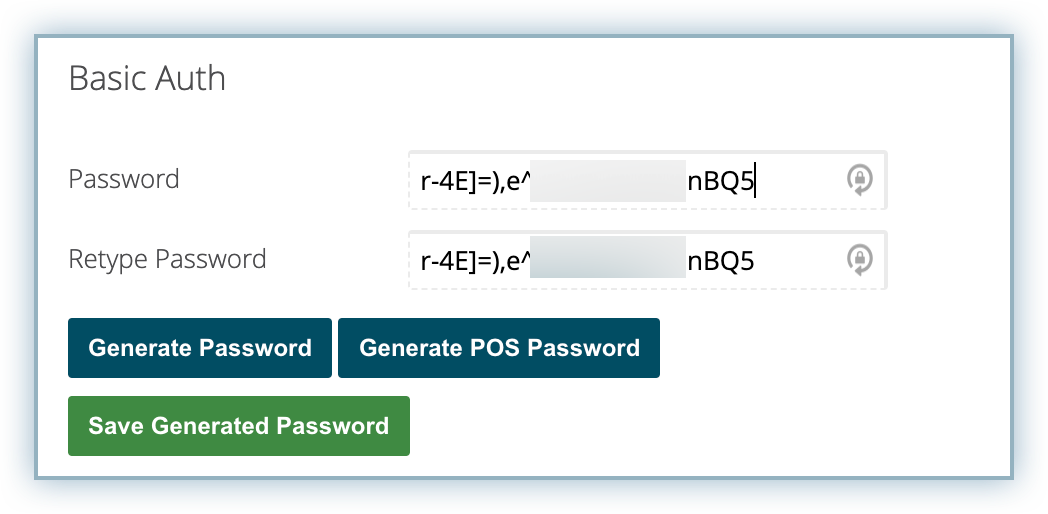
Click Generate Password from the Basic Auth section.
Store the password effectively and click Save Generated Password.
Note:This password cannot be retrieved at a later time hence you must store this effectively.
Enable the following roles from the Roles and Associated Accounts section:

Click the Account tab and enable the correct merchant accounts to the API credential.
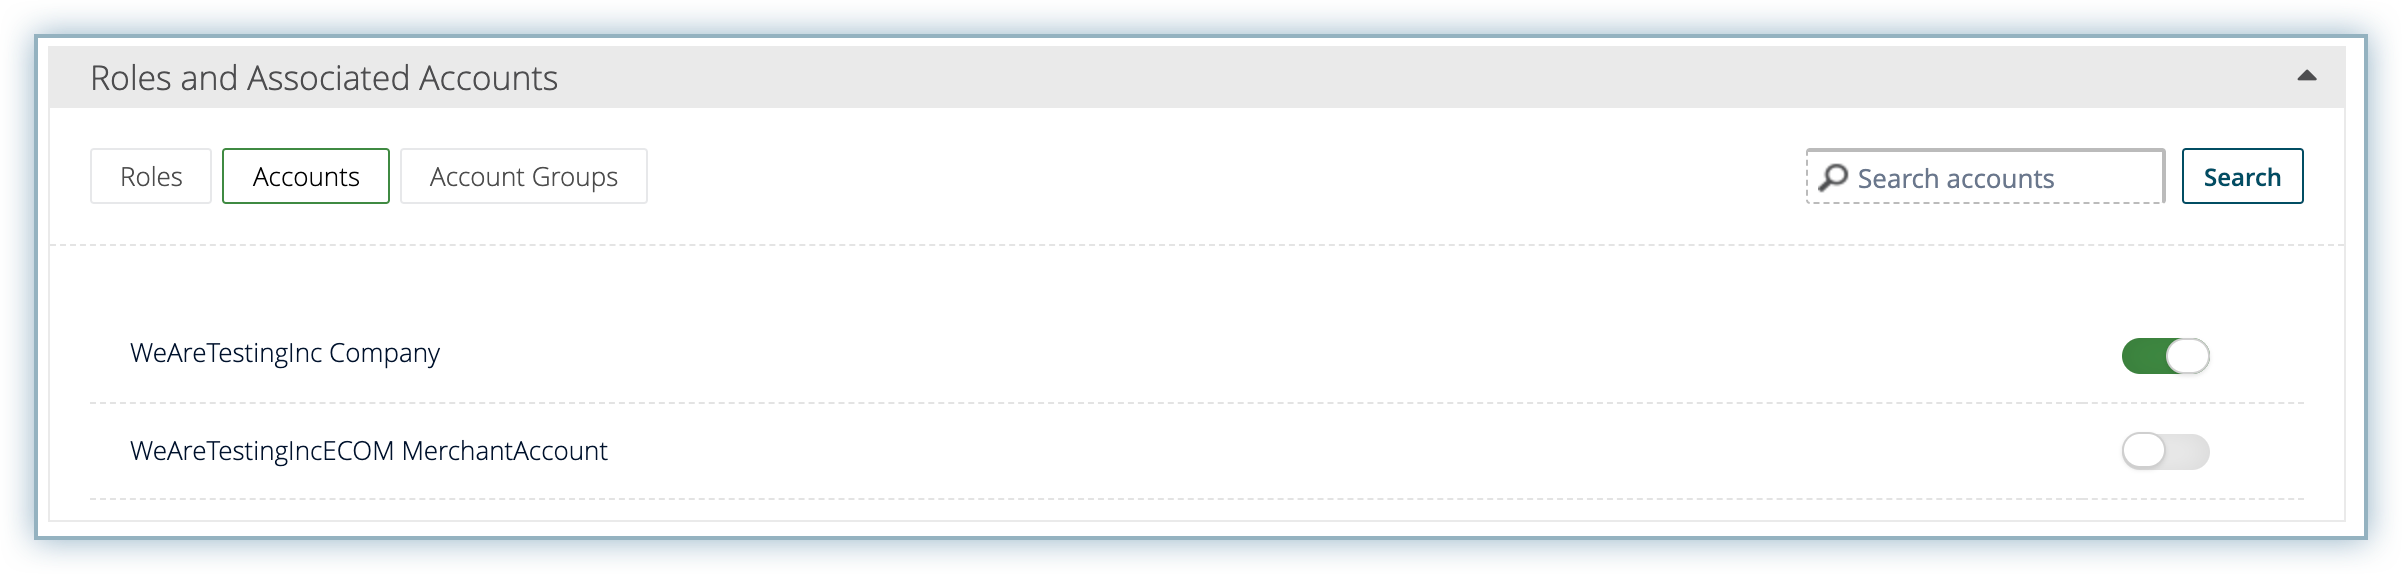
Click Save
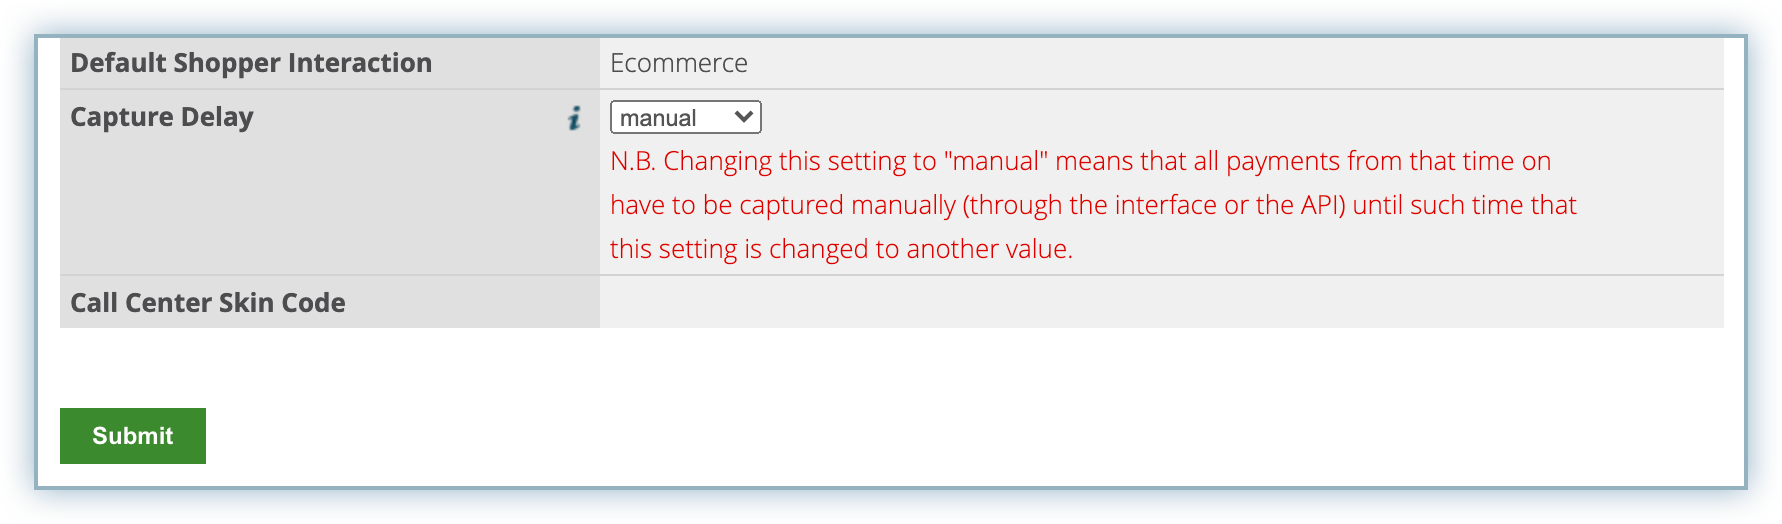
Enable Capture Delay
The time between the authorization of payment and the capture of payment is called the Capture Delay. Chargebee requires the Capture Delay to be set to Manual in Adyen. Capture delay is configured at the merchant account level. Follow the steps below to complete this action:
Switch to view your merchant account details since this setting applies to the merchant level settings.
Navigate to Accounts > Account Settings.
Select Manual from the Capture Delay drop-down list and click Submit.
Support for Auto Capture workflow - While the Manual capture delay is the recommended and default integration workflow for Chargebee, if you explicitly want to use the Auto capture feature, please contact [email protected] to enable the Auto capture workflow in our Adyen integration.
Retrieve Account Details
In order to effectively integrate your Adyen payment gateway with Chargebee, you must retrieve the following details from your Adyen account. Review the list below for the details required:
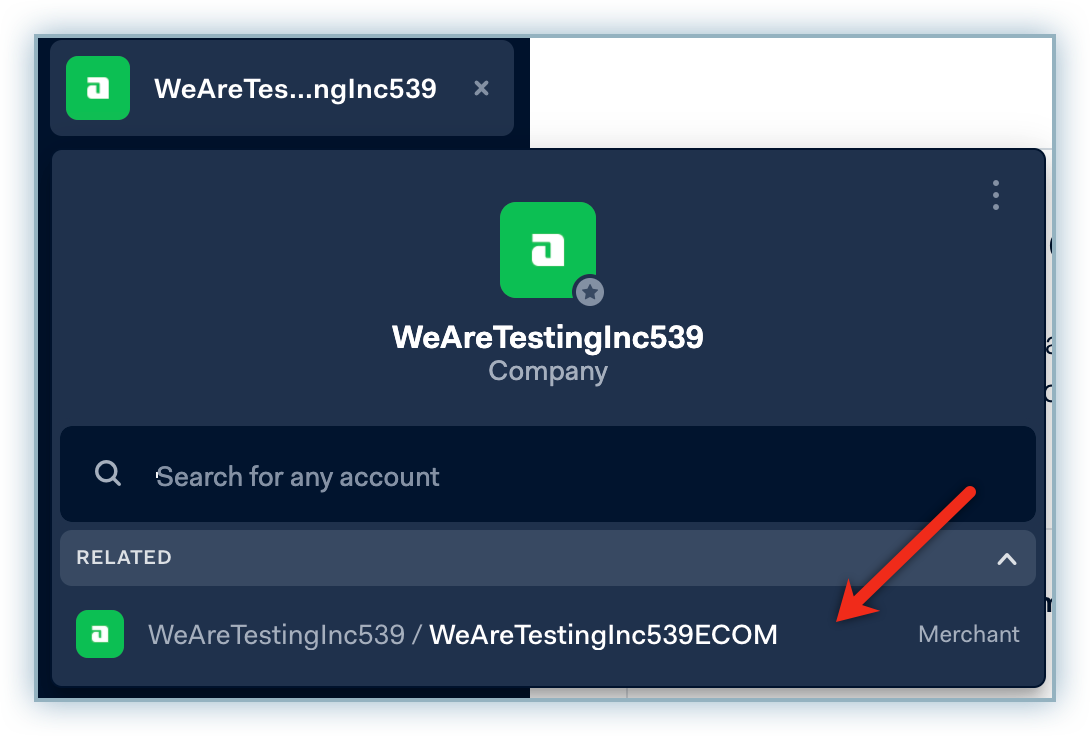
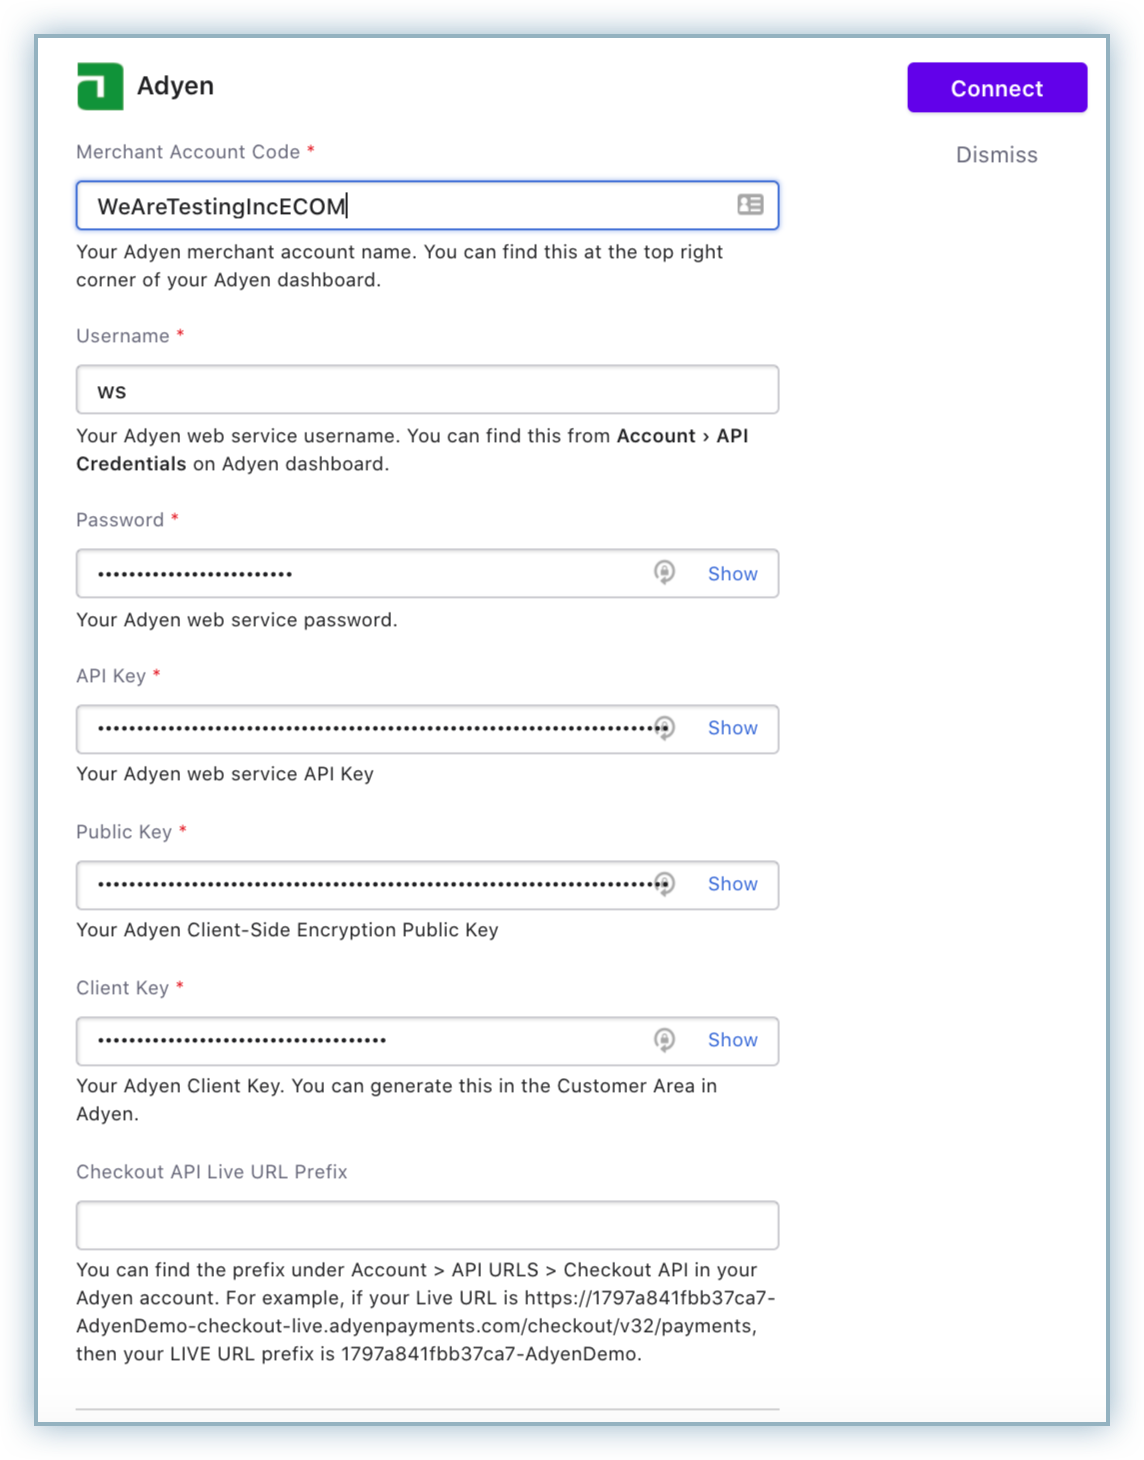
Adyen Merchant Code/Name
Click the icon at the top-left corner of your profile page to view or search for your merchant name.
User Name
Navigate to Account > User and retrieve the applicable Web Service username from the list.
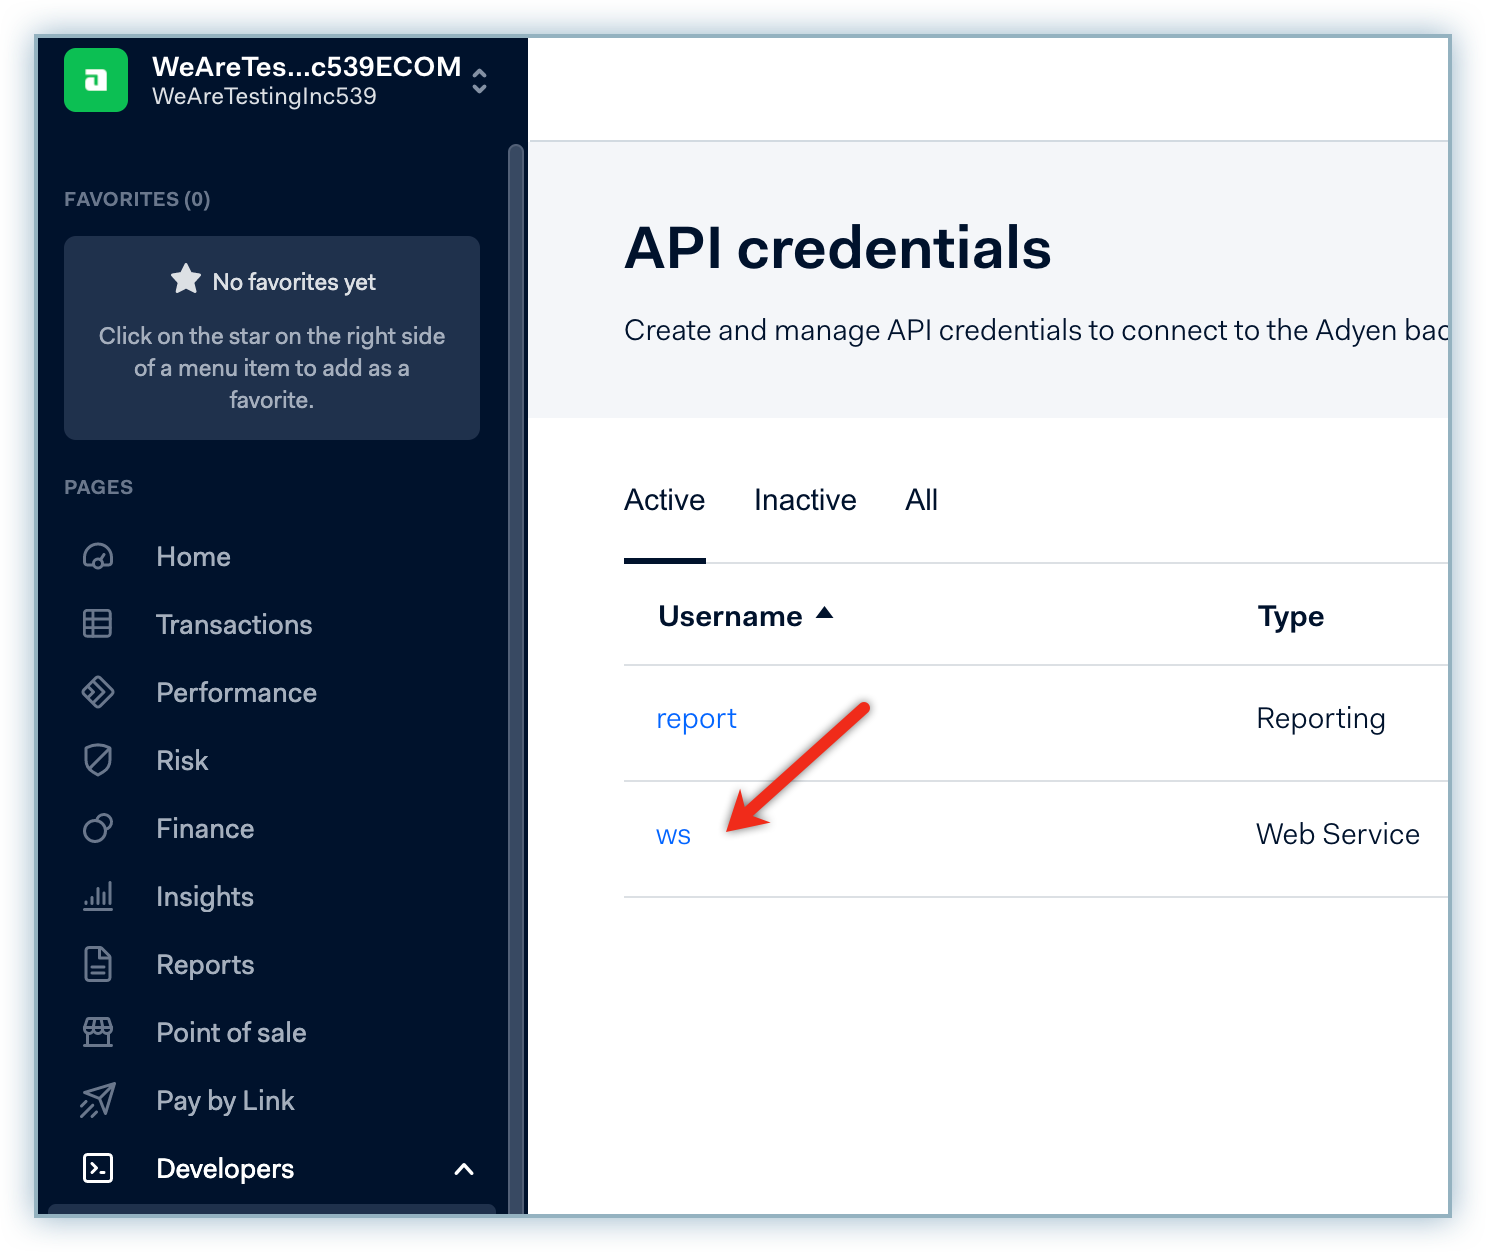
Client Key
Navigate to Developers > API Credentials and click the Web Service username. Review the details and copy the Client Key.
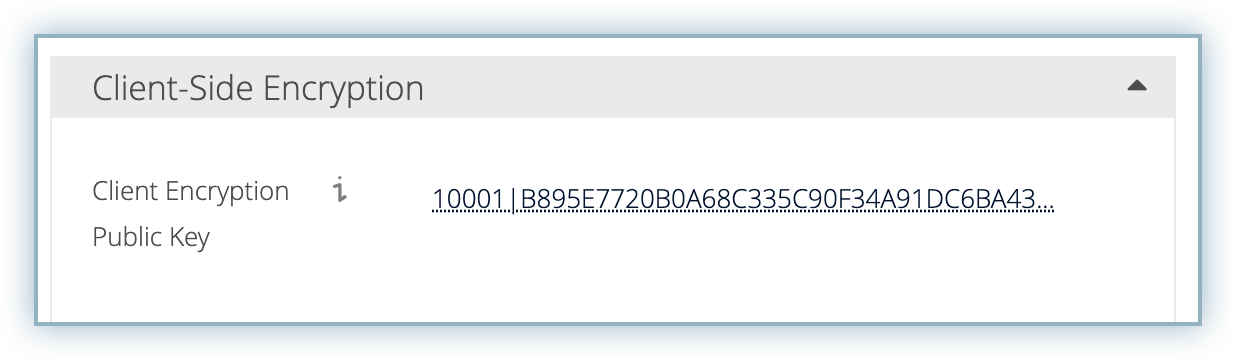
Client-Side Encryption Public key
Navigate to Developers > API Credentials and click the Web Service username. Review the details and copy the Client-Side Encryption Public Key.
Checkout API Live URL Prefix
Navigate to Developers > API URLs and make a note of the Checkout API URL.
For example, if your Live URL is https://1797a841fbb37ca7-AdyenDemo-checkout-live.adyenpayments.com/checkout/v32/payments, then your LIVE URL prefix is 1797a841fbb37ca7-AdyenDemo
This step is optional for your Live Site
Once you've set up your Adyen site configuration you can now move to configure this payment gateway to your Chargebee site. Follow the steps below to complete this process:
Log into your Chargebee site.
Navigate to Settings > Configure Chargebee > Payment Gateways.
Click Add Gateway.
Click Adyen from the list of Gateway options.
Type the details retrieved from the Adyen page to corresponding fields.
Create a username and password to allow your Adyen account to communicate with Chargebee via Notifications.
Note: This will be used for authentication while configuring webhooks on Adyen.

Click Connect.
Note: A Notification pop-up displays, proceed to Configure Notifications to continue further.
All occurrences of events triggered from your Adyen site must be communicated to your Chargebee site via Notifications.
The configuration of the webhook/notifications is mandatory for the integration to work.
Follow the steps below to configure your Chargebee notification webhook on your Adyen site:
Click Copy to copy the Notification URL to your clipboard.

Log into your Adyen account.
Navigate to Developers > Webhooks and click Add Webhook.
Navigate to Standard notification from the All Webhooks list and click Add.
Enter the following details in the Transport section:
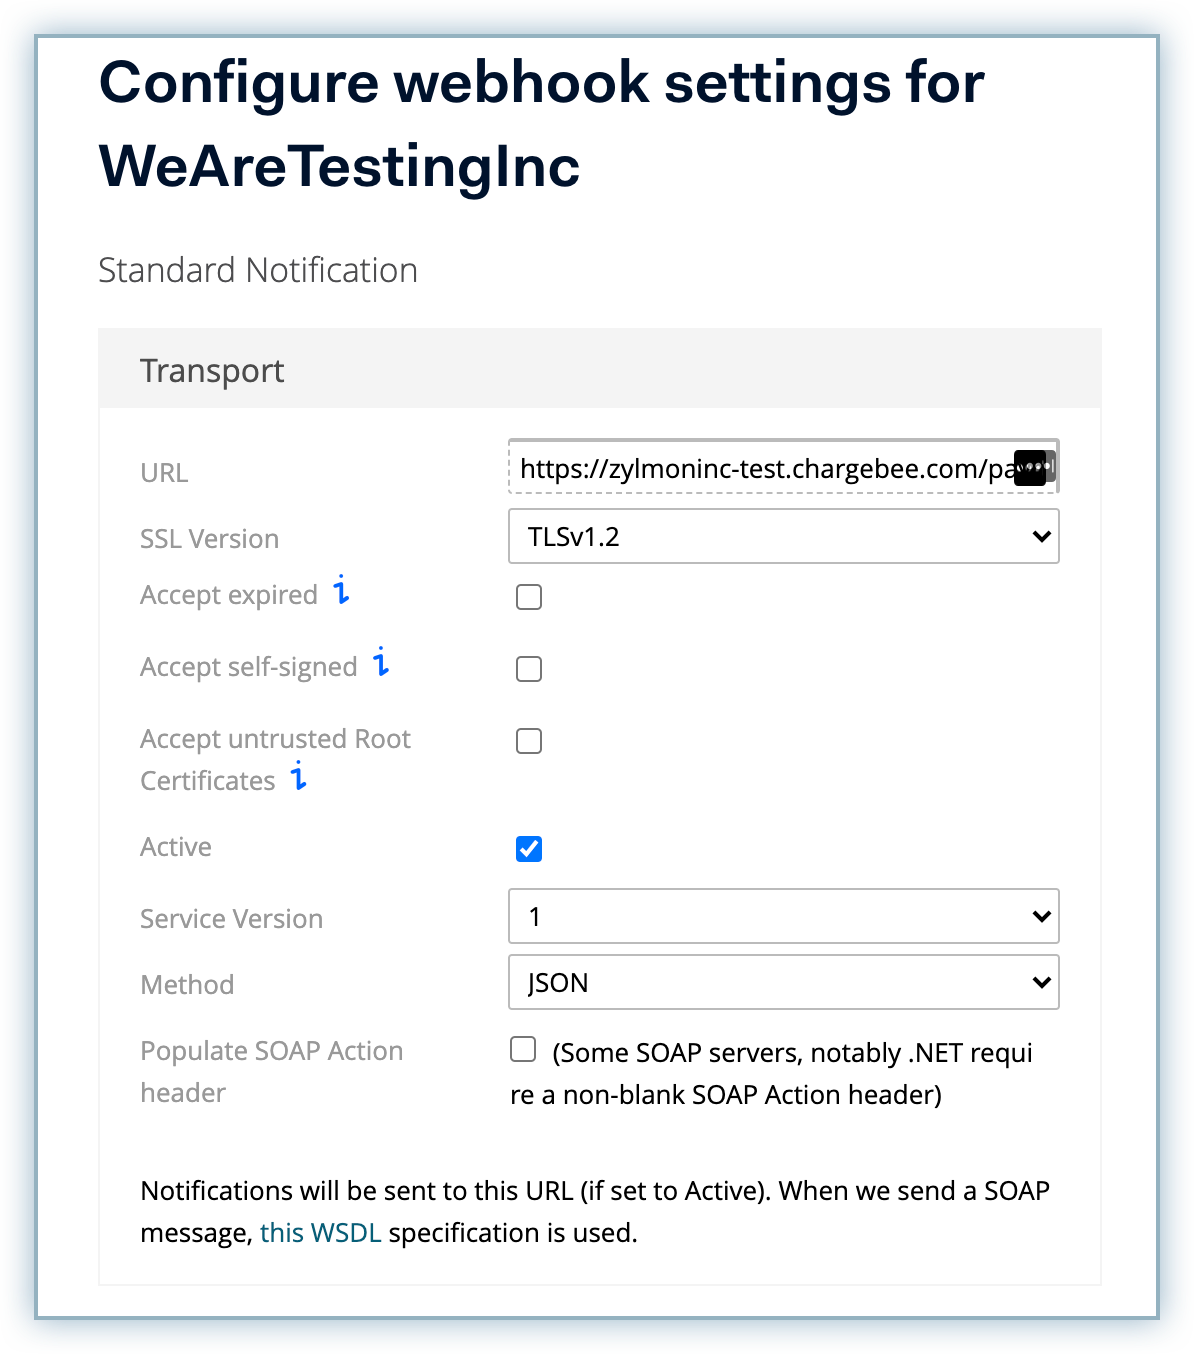
Enter the username and password created in the Authentication field to allow Adyen to communicate with your Chargebee site.
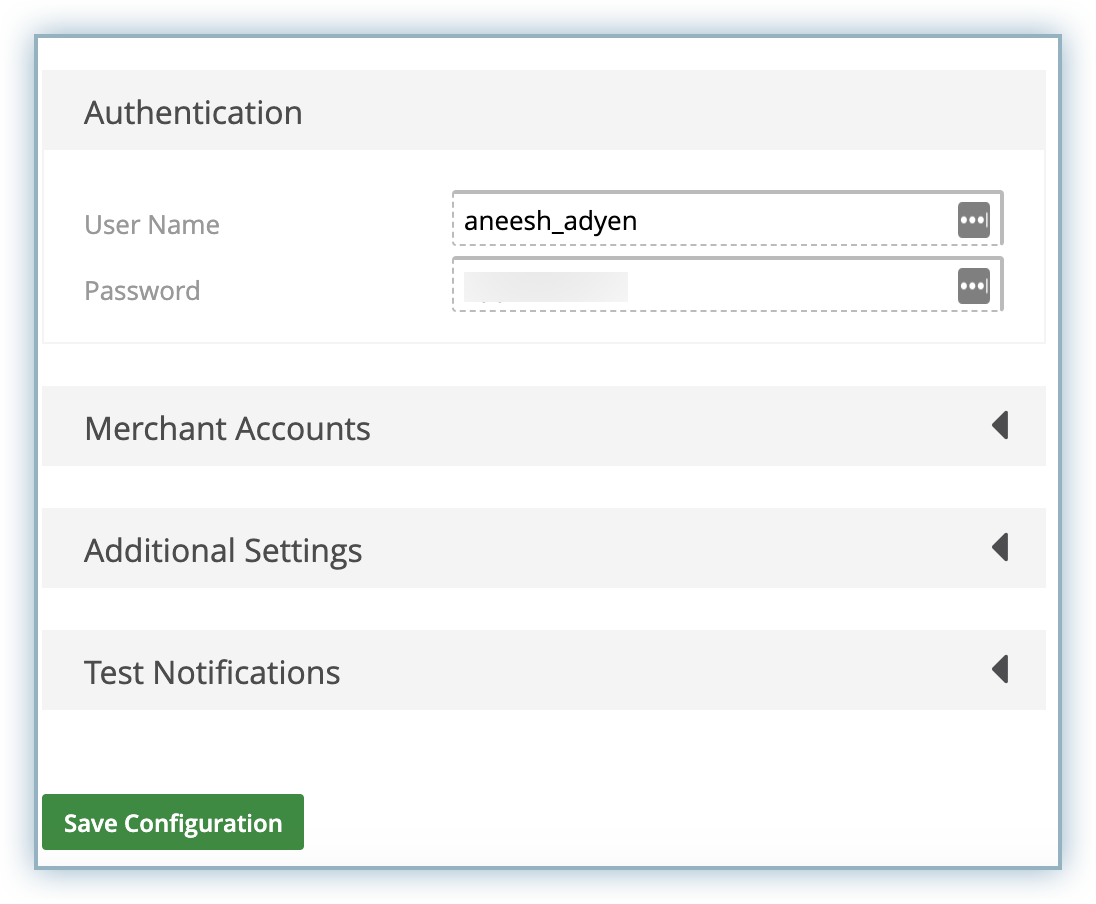
Click Save Configuration.
Switch back to your Chargebee site and enable the checkbox to confirm you have added the URL to your Adyen account and click Done.
Contact Adyen's support to enable RECURRING_CONTRACT notifications on your Adyen account to charge customers on a recurring basis. You can skip this step if this is already enabled on your Adyen account.
Based on your choice of integration there are additional settings that must be configured.
Configuring Hosted Pages with Adyen
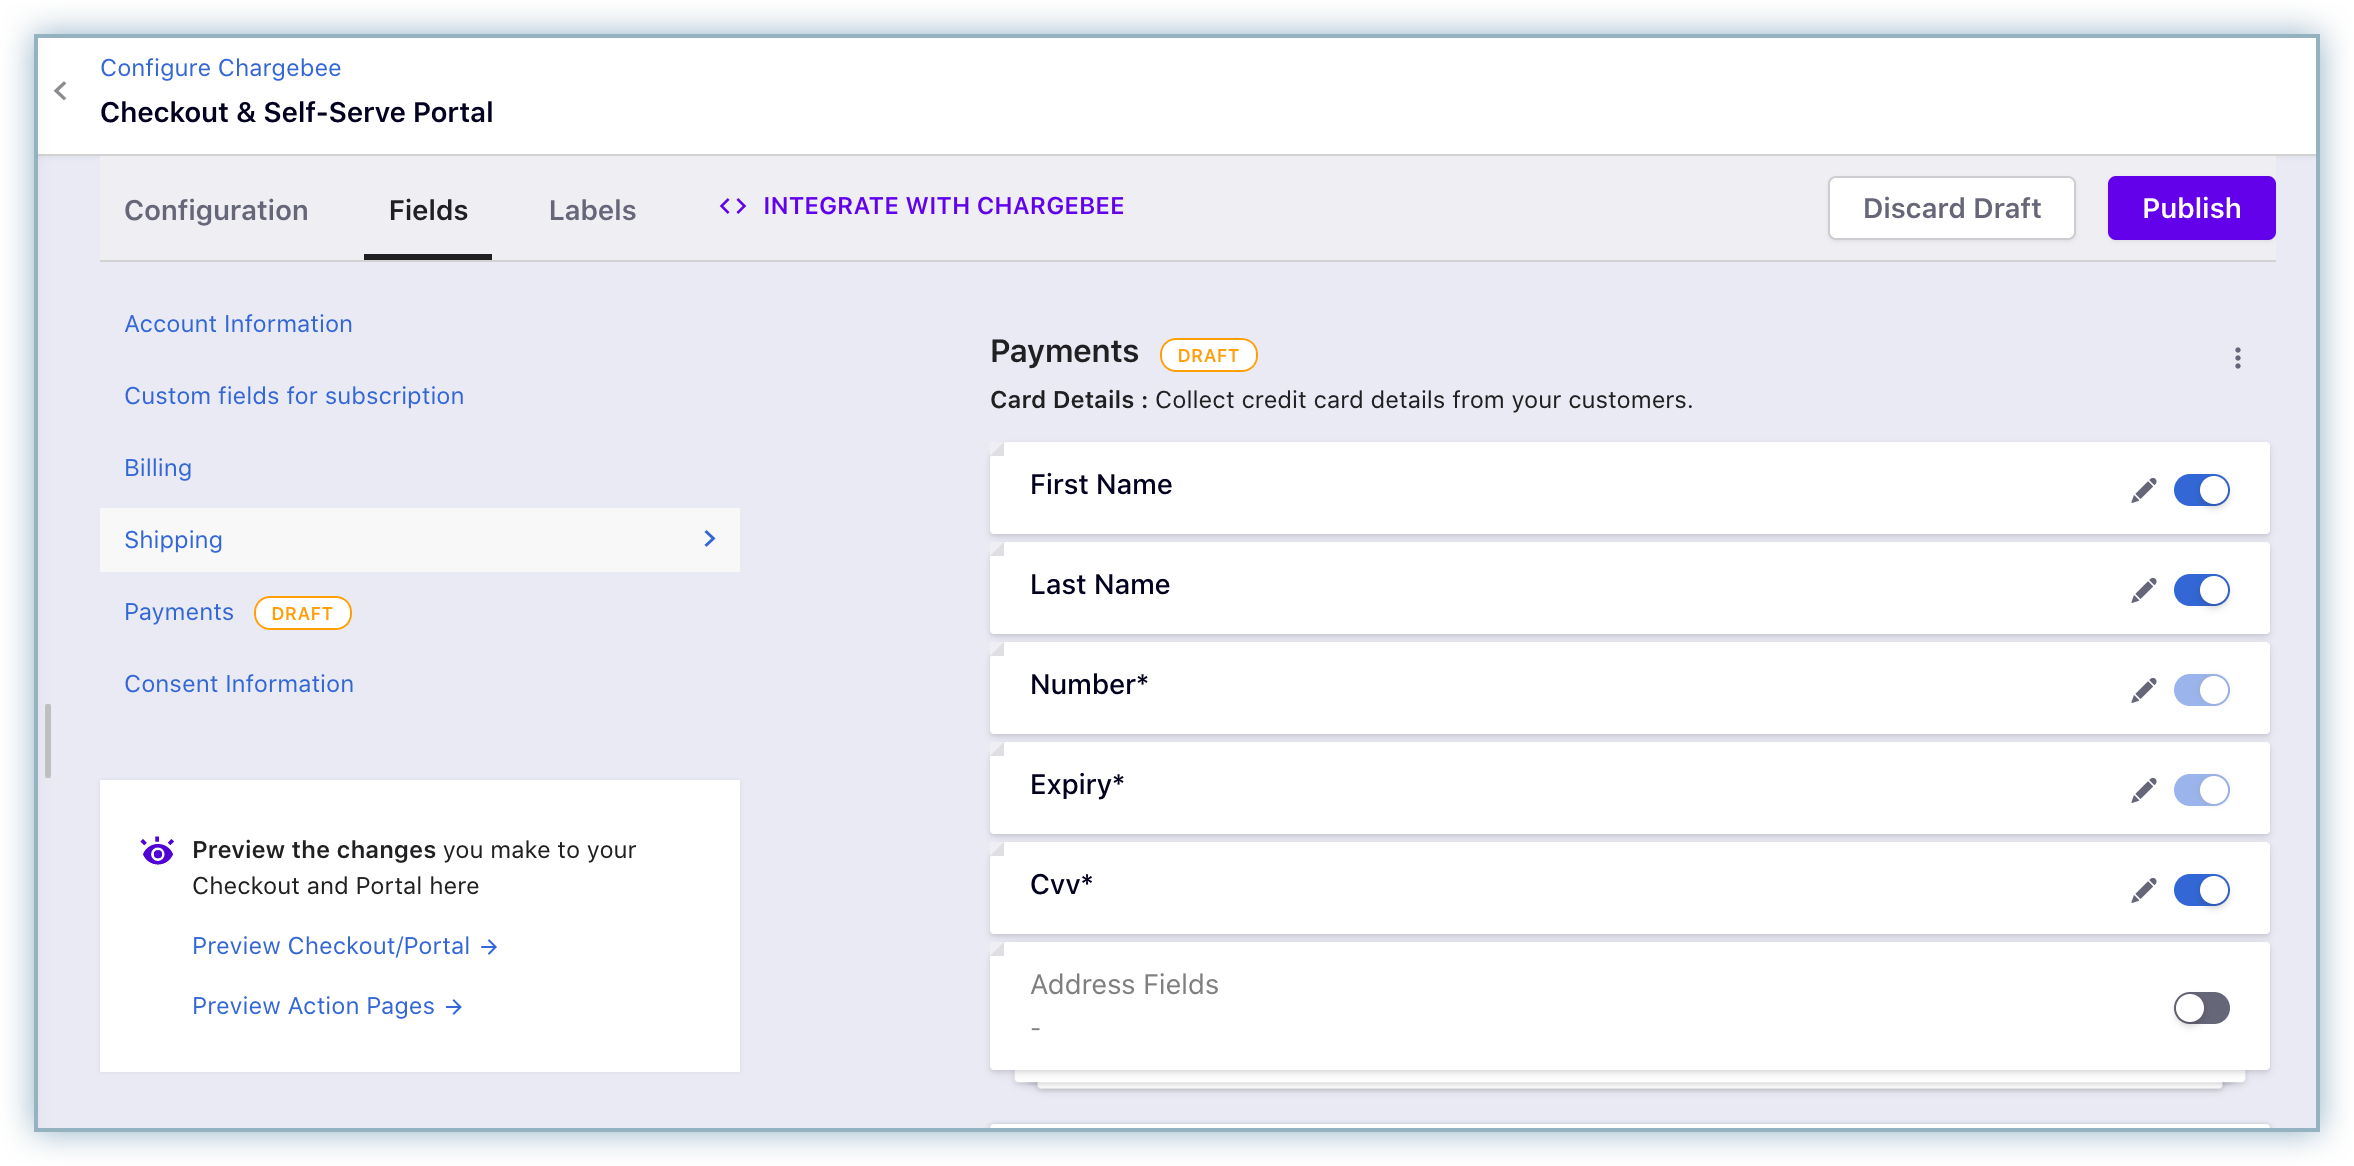
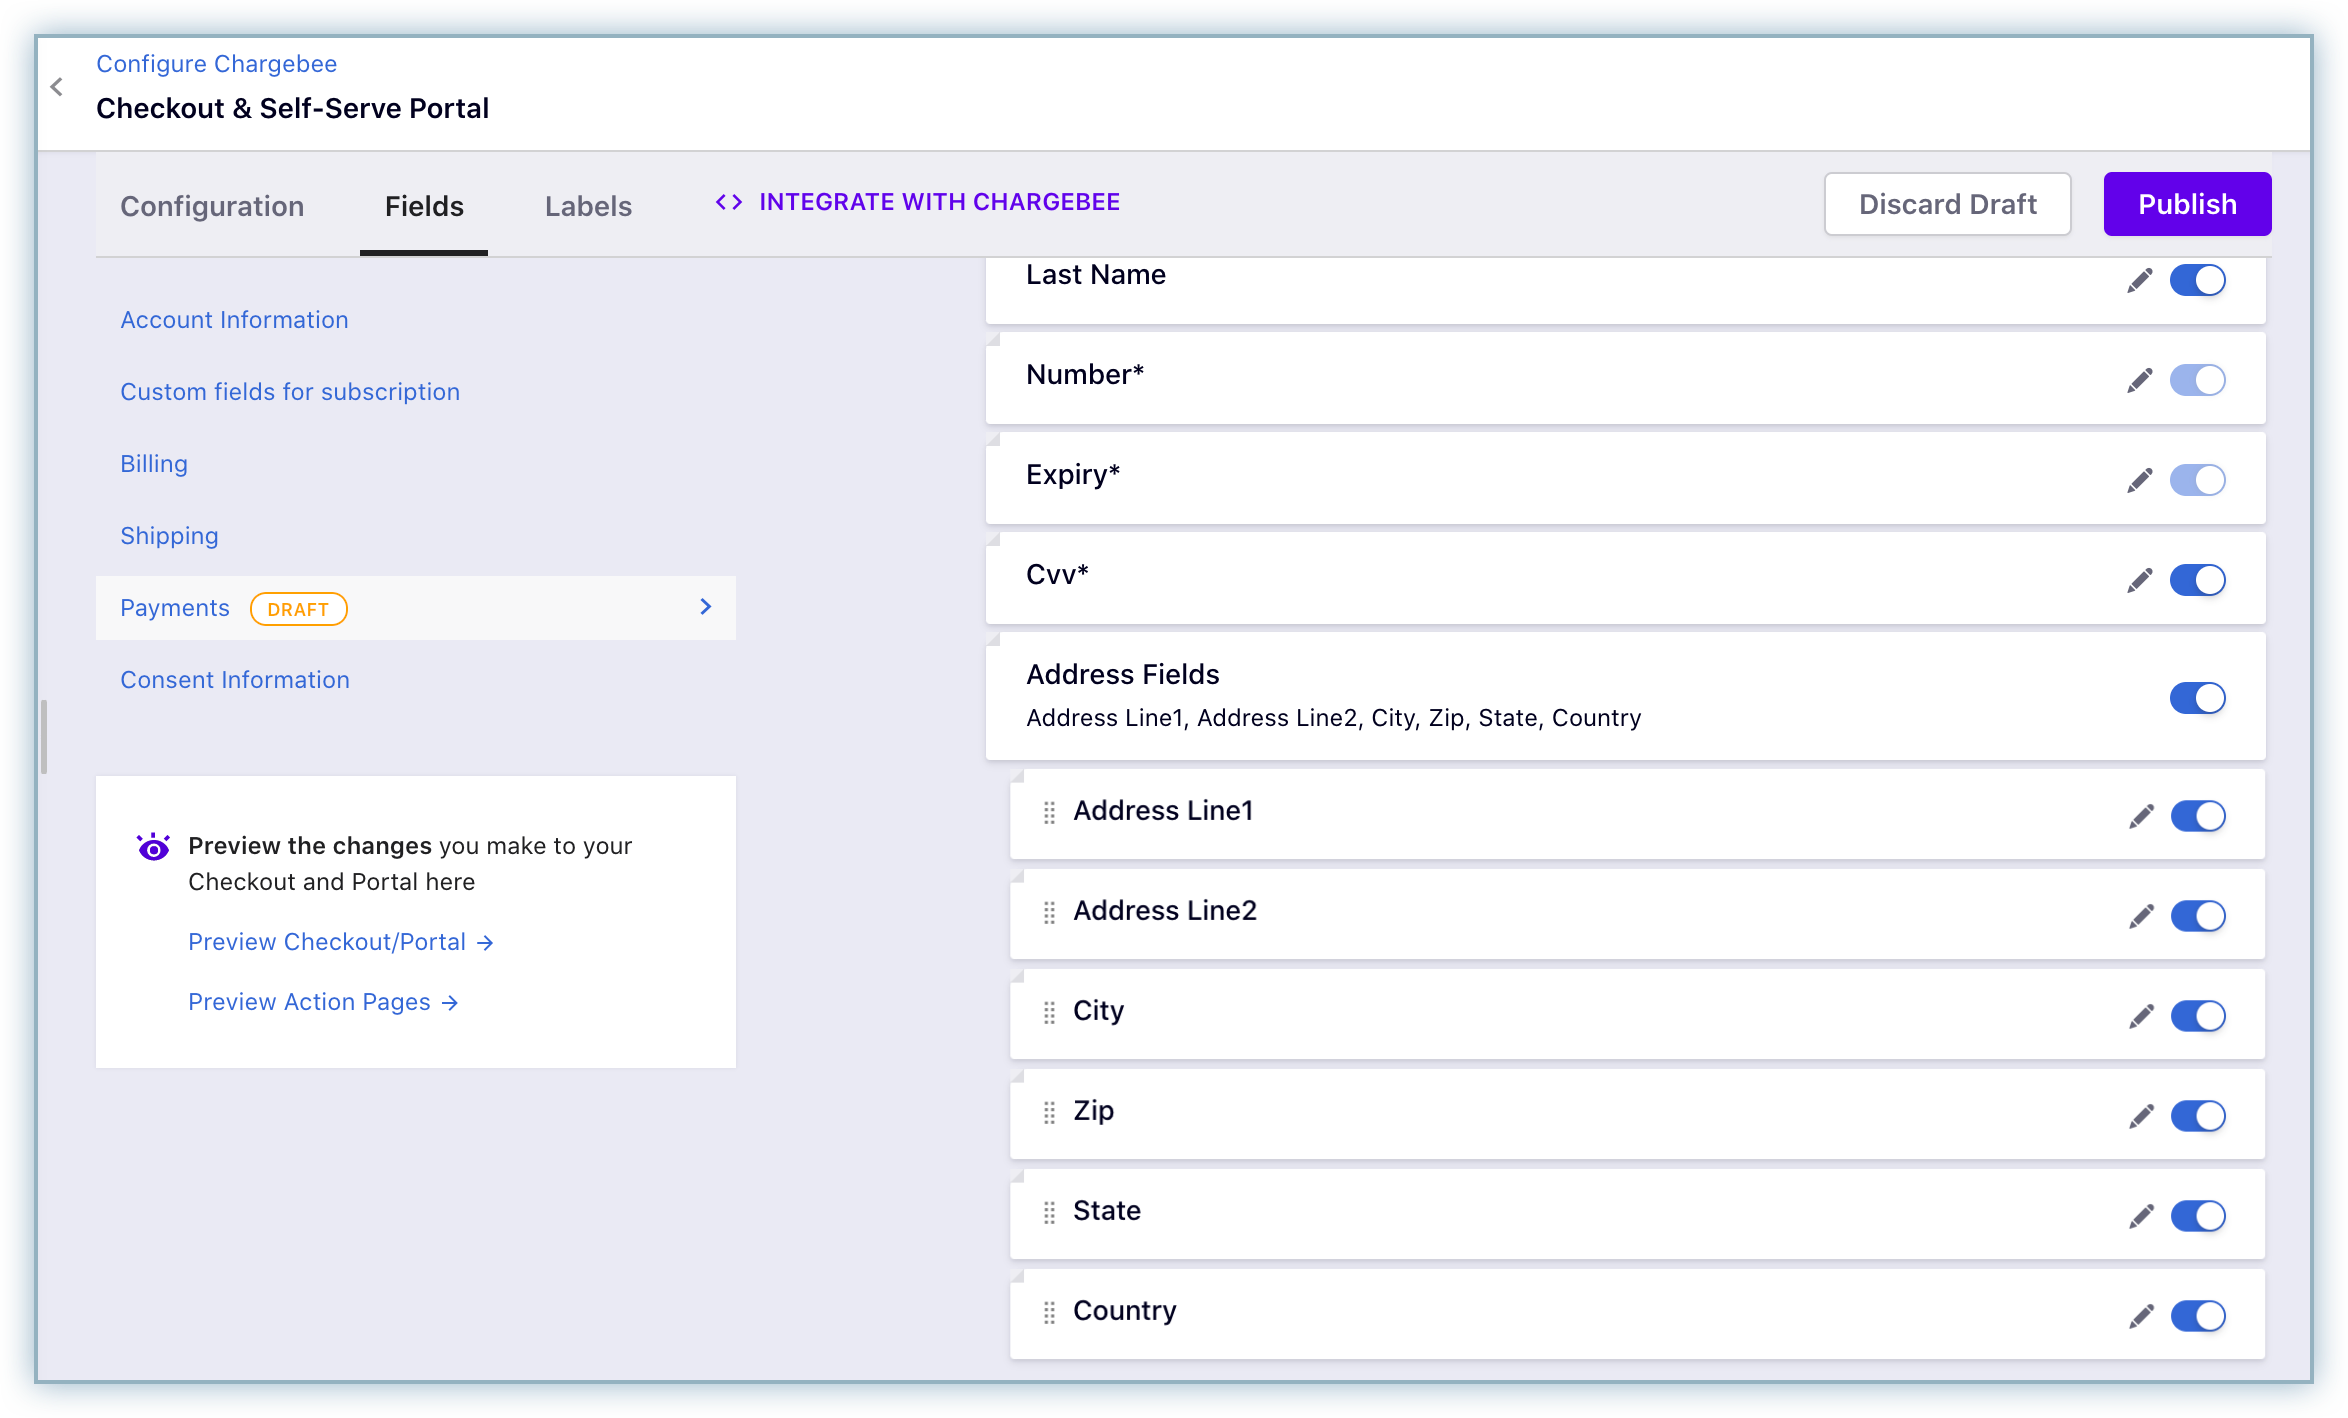
If you intend to use Chargebee's Hosted Pages for your integration the First Name and Last Name must be configured as mandatory on Chargebee's checkout settings.
Follow the steps below to complete this:
If you intend to use Chargebee's Hosted Pages for your integration then the First Name and Last Name must be configured as mandatory fields on Chargebee's checkout settings.
Follow the steps below to complete this:
3D Secure(3DS) with Adyen
If you choose an integration option that supports 3D Secure (3DS) authentication. Review the checklist below to implement 3DS for your Adyen payment gateway on Chargebee:
Click here to access the tutorial to implement card payments with 3D Secure flow and create a subscription in Chargebee, using Adyen's Web Components, integrated through Chargebee.js and Chargebee APIs.
Having trouble with your Adyen integration? Review the FAQs below for a solution that best suits your issue. Please contact [email protected] if your query isn't listed below or need additional assistance.
1. What should I do if my payment status displays "in progress" and does not reflect on Chargebee even after a long time?
Configuring the webhook/notifications hold the key to making sure that your Adyen and Chargebee accounts communicate with each other. We recommend you review your notifications configuration.
2. I have configured my notifications/webhooks.What should I do if the the payment source still displays "Pending Verification".
The recurring_contract feature must be enabled on your Adyen account as a prerequisite. Since this cannot be self-enabled, you must contact Adyen's support to enable this for your account.
3. What happens if I don't enable the recurring_contract webhook on Adyen?
The payment source will continue to be in a pending_verification state and any transaction initiated against this payment source will result in a "Payment details not found" error.
4. How I can resolve the "Payment details not found" notifications?
Failure to enable the recurring_contract webhook on Adyen results in the payment source being in a pending_verification state. Any transaction initiated against this payment source will result in the "Payment details not found" error.
5. Should I configure the notification/webhook for each of my Adyen accounts associated with my Chargebee site?
Yes, you must configure the webhook/notifications for each of your Adyen accounts individually with Chargebee.
6. What should I do for transactions that were processed prior to the correct configuration of the webhook/notifications?
Contact [email protected] for further steps to guide you resolve this concern.
7. What happens if the API PCI Role is not enabled?
Enabling the API PCI role in your Adyen account is a prerequisite to integrating your Adyen gateway with Chargebee. Failure to complete this will result in restrictions to submit payment requests with raw card data.
8. Why must I enable roles within the Adyen Roles and Account settings?
The roles when not enabled within your Adyen configuration lead to the following errors:
9. Why should I configure only the Webservice user type in Adyen?
Adyen has two user types, the Web Service User and Report user
Webservice users will provide permissions to make payments and vault payment methods in Adyen (which is required for Chargebee integration).
Report users are able to generate reports from Adyen and do not have access fields required to configure the integration with Chargebee.
10. Can I choose other options apart from Manual in my Capture Delay configuration?
11. How long does it take for funds to reach my bank account?
A transaction goes through different statuses before reaching your account. Payment method type also plays a major role when it comes to settlement time. You can refer Adyen's Merchant Manual for more info.
12.When can I perform a refund for a transaction?
It is not possible to initiate a refund for an In-Progress transaction. You need to wait for the transaction to transition to Success state to initiate a refund.
13.Is there any time after which I cannot perform a refund?
Refund period varies with the payment method type in case of Adyen. You can contact Adyen's Support Channel for more info.
14.How is dunning handled when Adyen is configured?
For every recurring invoice, dunning is carried over using the setting configured in Chargebee's Settings > Configure Chargebee > Dunning for Online Payments/Dunning for Offline Payments. Unlike normal payments, Adyen processes payments in asynchronous manner, the dunning is initiated only after the transaction has transitioned to Failure state.
Removing payment from an invoice during the dunning period:
If you remove an in-progress transaction from an invoice in dunning, then dunning will be stopped.
15.How is Payment Method Status managed in Adyen?
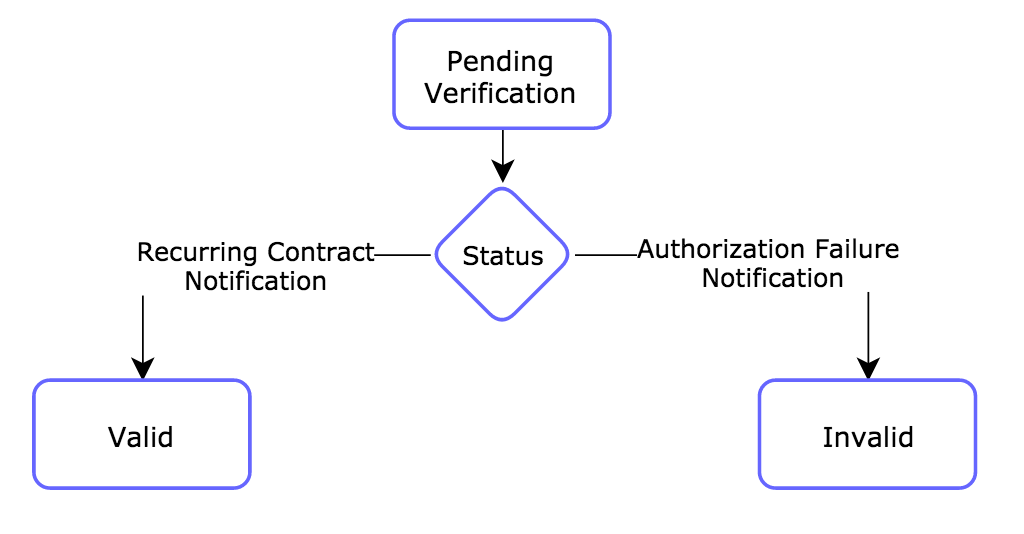
Adyen's API is totally asynchronous, Chargebee makes a request to Adyen and Adyen responds with the result of the action.
When you add/update a payment method by passing either the payment details or checkout parameters, the payment method will move to Pending Verification state, and will move to either Valid or Invalid state based on whether the authorization was successful or not.
Only payment methods in Valid state can be used for future payments.
16. How is Transaction Status managed in Adyen?
When you initiate a payment/refund, the transaction will be verified in Adyen. Transaction status will move to in-progress state when verification begins, and will transition to either Success or Failure state based on the notification received from Adyen.
17. Why should ‘Capture Delay' be set as ‘Manual' in Adyen?
Payment processing with Adyen occurs in two steps:
The advantage of setting the Capture Delay to Manual is that your customer won't be charged twice in the case of an authorization timeout.
18. How Chargebee can help in leveraging Adyen's RevenueProtect Engine?
Chargebee will send the shopper reference and billing address to Adyen as part of every transaction request. This helps you leverage the following RevenueProtect rules: