Businesses are continually exploring opportunities to grow and generate higher profits. Business expansion strategies include expansion to new markets, locations, product offerings, or mergers & acquisitions. To meet regional requirements based on compliance, taxation, and legal guidelines or internal operational criteria, most businesses choose to establish independent entities.
Let's review this example, ABCFarms a farm-tech company headquartered in Texas, USA decides to operate from India, Singapore, and Australia. To ensure compliance with the legal and taxation guidelines established by each of these countries, it is recommended to set up independent entities. In addition to the benefits associated with compliance, each entity will cater to its unique market needs and help measure performance separate from its parent organization.
Chargebee's Multi-Business Entity solution enables you to manage such multiple businesses as independent entities from a single Chargebee site. This solution is built to ensure you can manage each of your entities as you would an independent Chargebee site. This feature aims to improve the overall functionality of your Chargebee site with the following benefits:
Login to your Chargebee site.
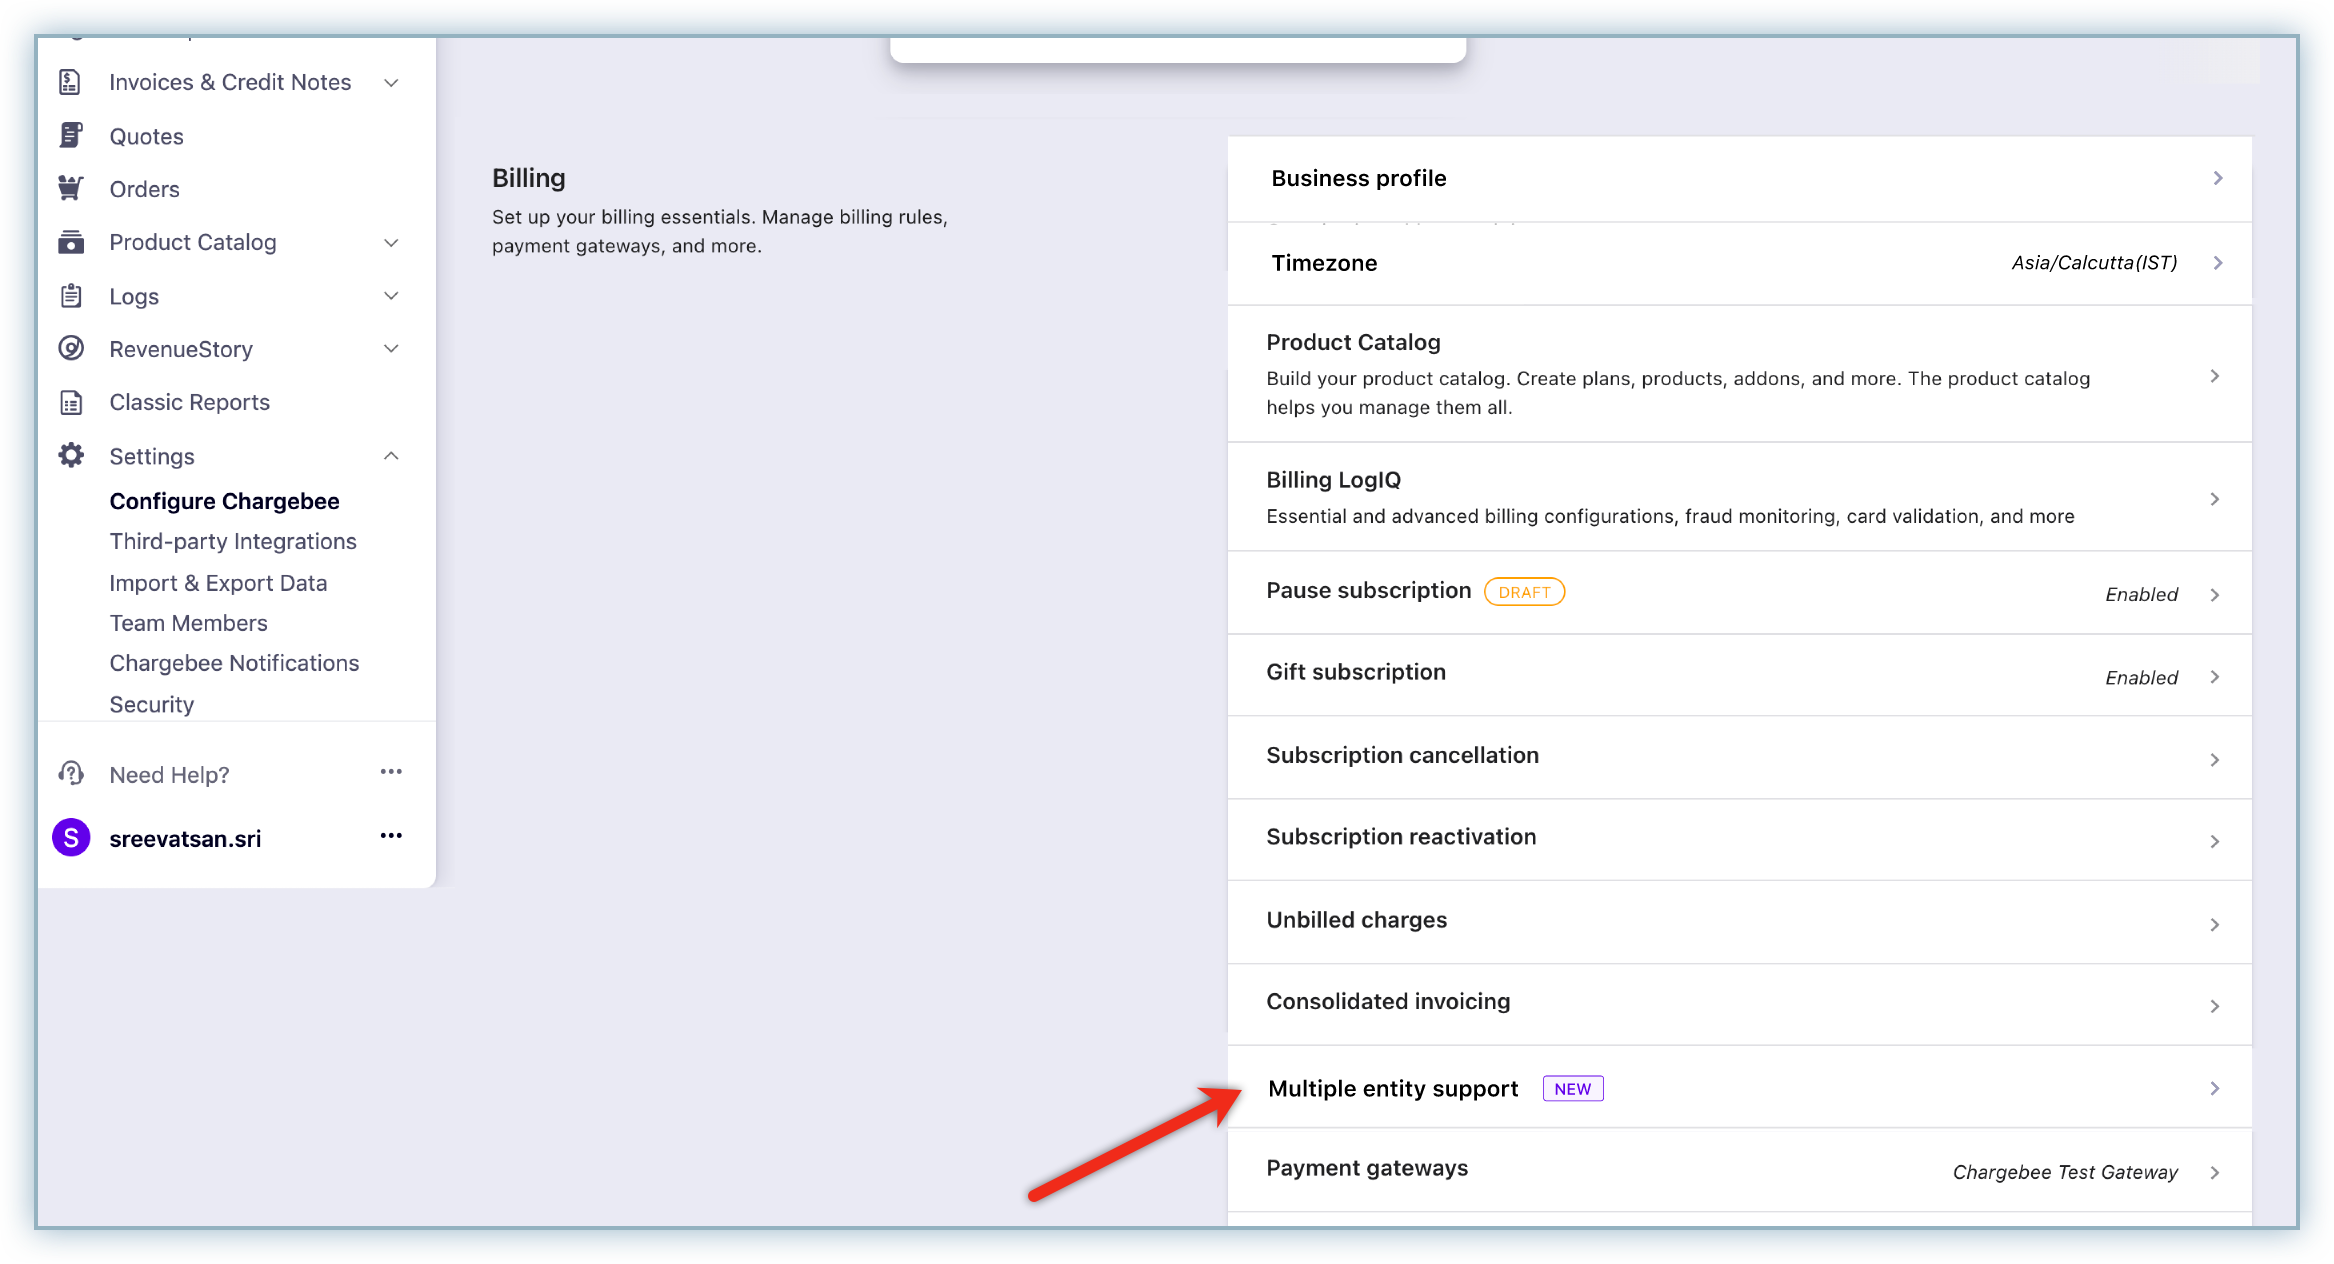
Click Settings > Configure Chargebee > Multiple entity support.
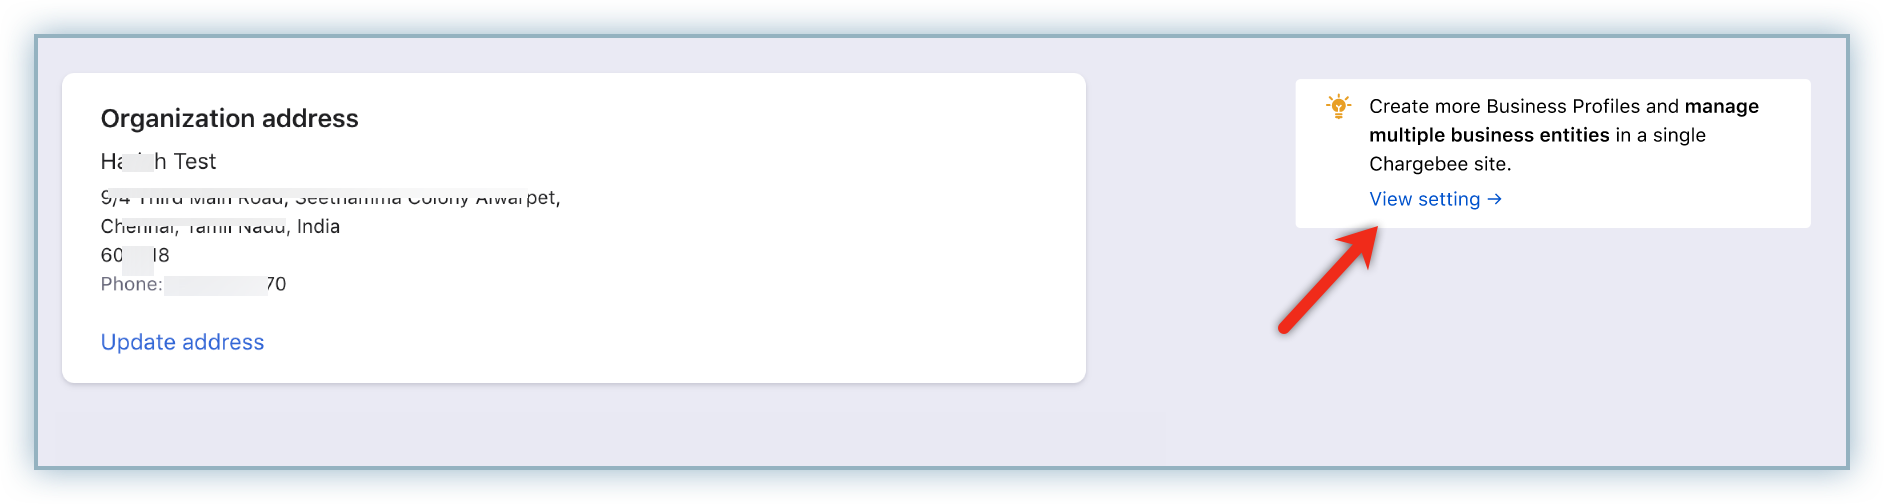
Click Update Address to make edits to the organization's address. (This address is mapped to the site organization)
Click View setting to manage settings for Multiple Business Entities.
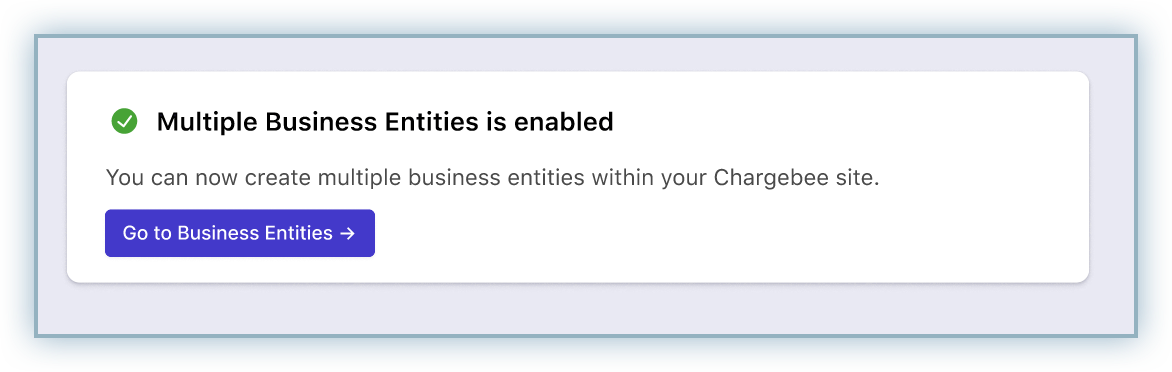
Click Enable to activate the addition of new entities.
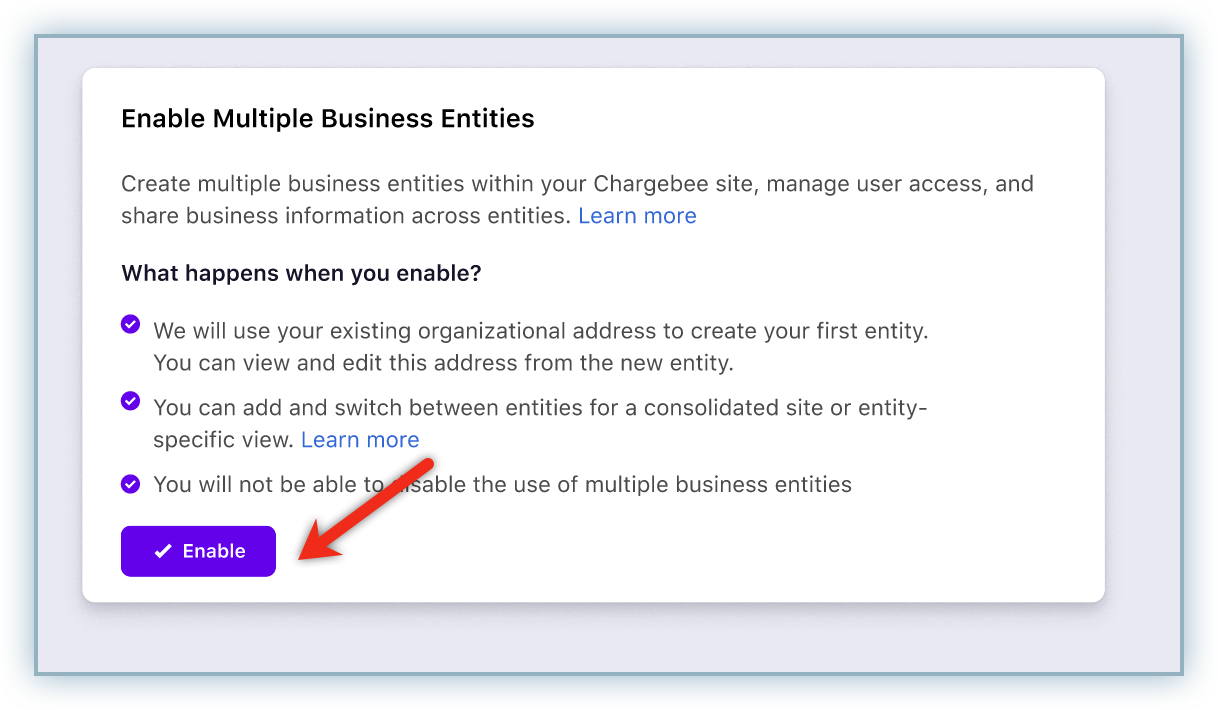
Outcome: The pop-up window to create a new entity displays.
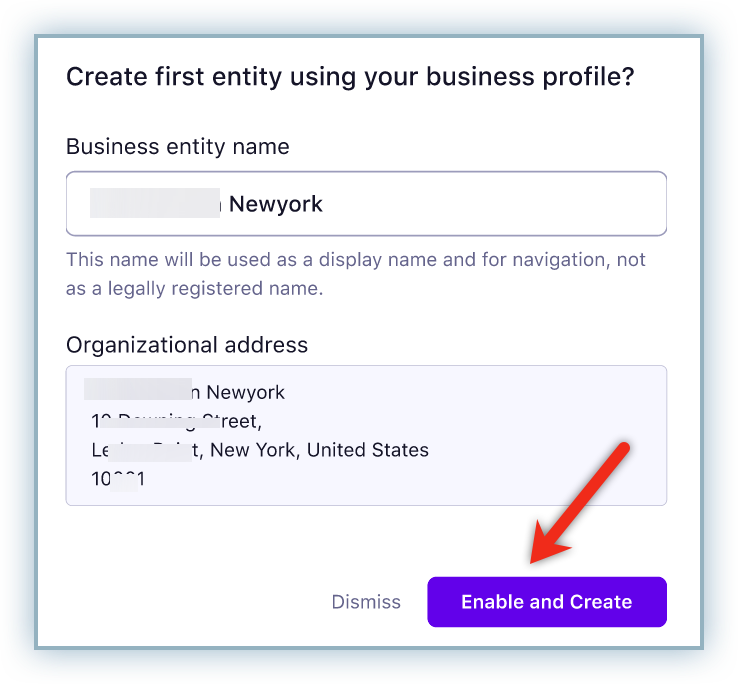
Type the name in the Business entity name field and click Enable and Create.
Click Go to Business Entities to view all entities created and enabled.
The page view updates with the newly added entity details.
Click Create Business Entity to add additional entities.
Note: You can add upto 30 business entities currently.
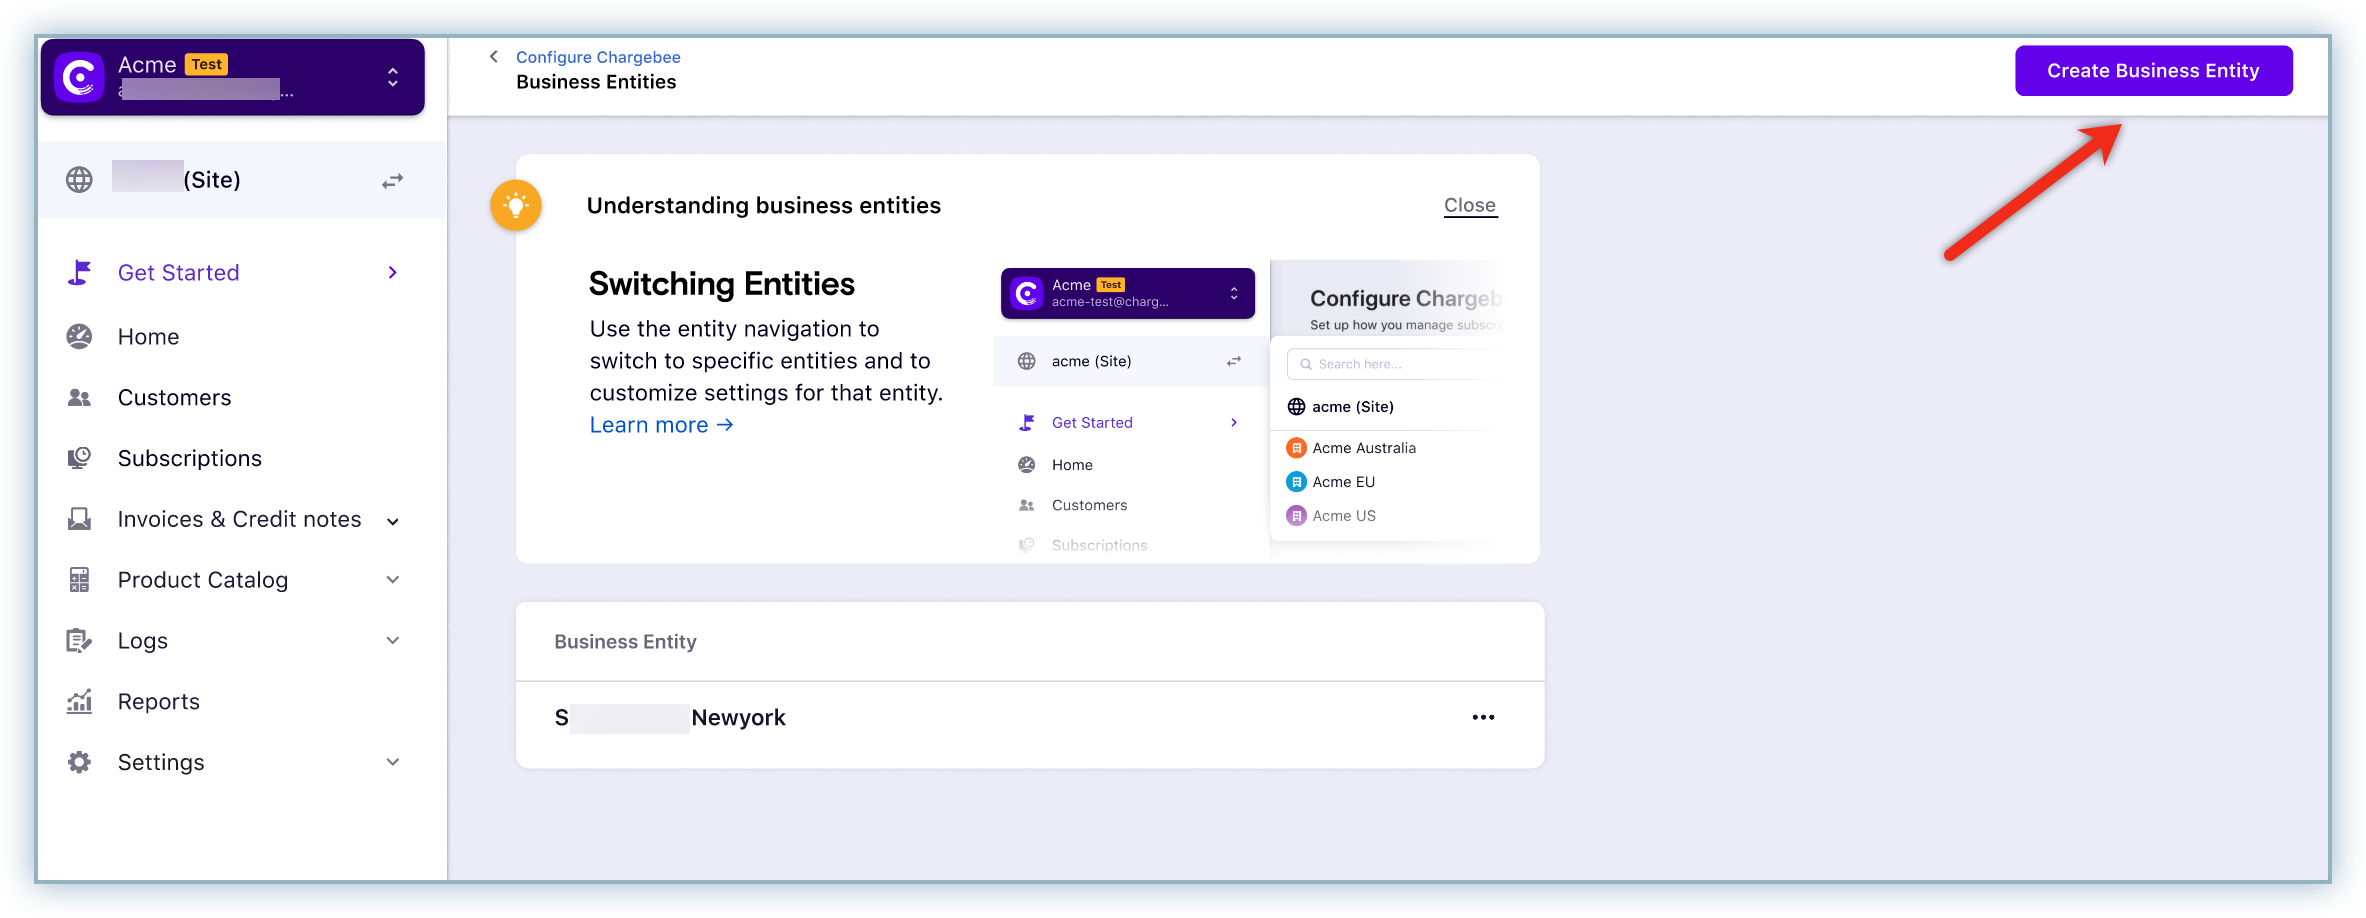
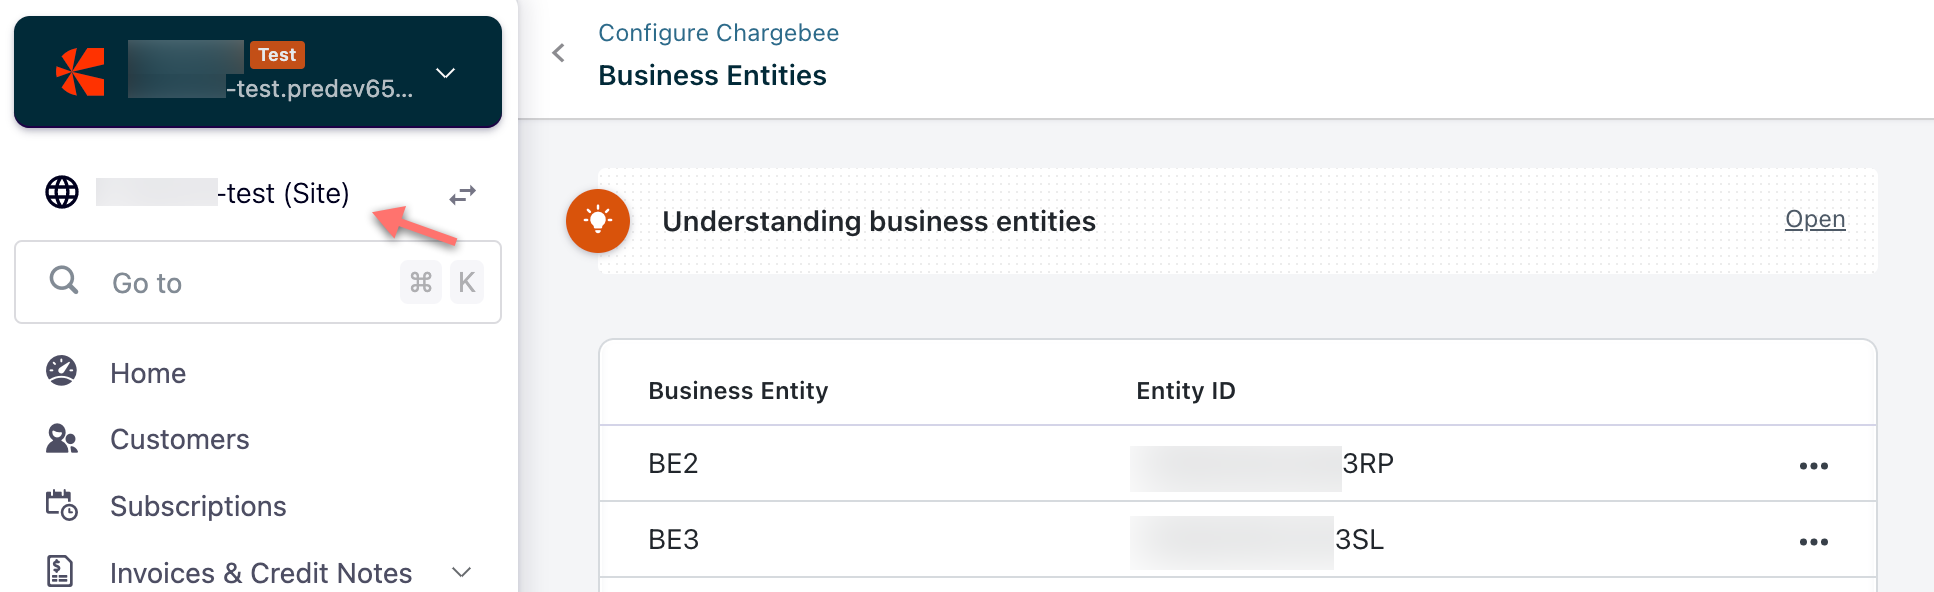
A list of all added entities is displayed in the Business Entities pages as shown below.
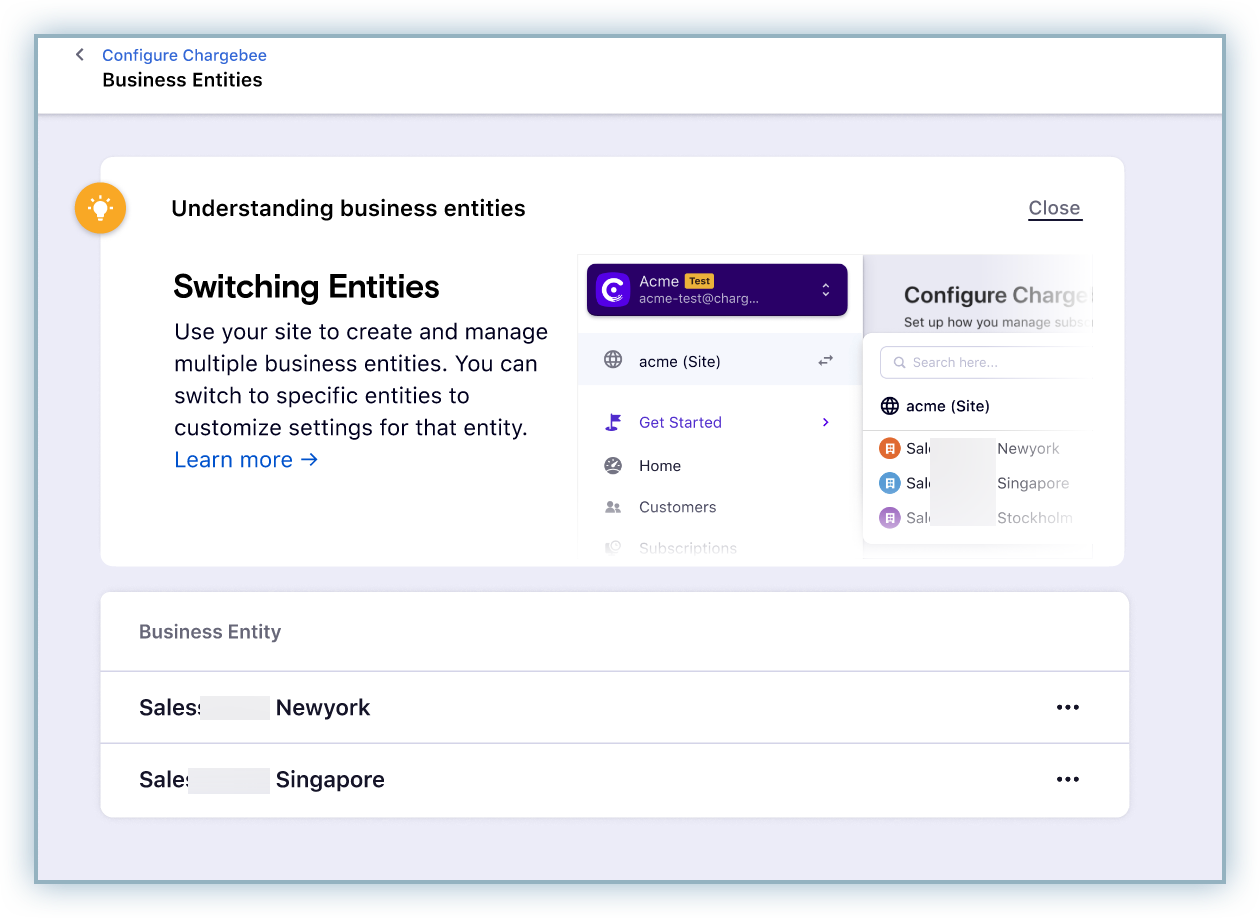
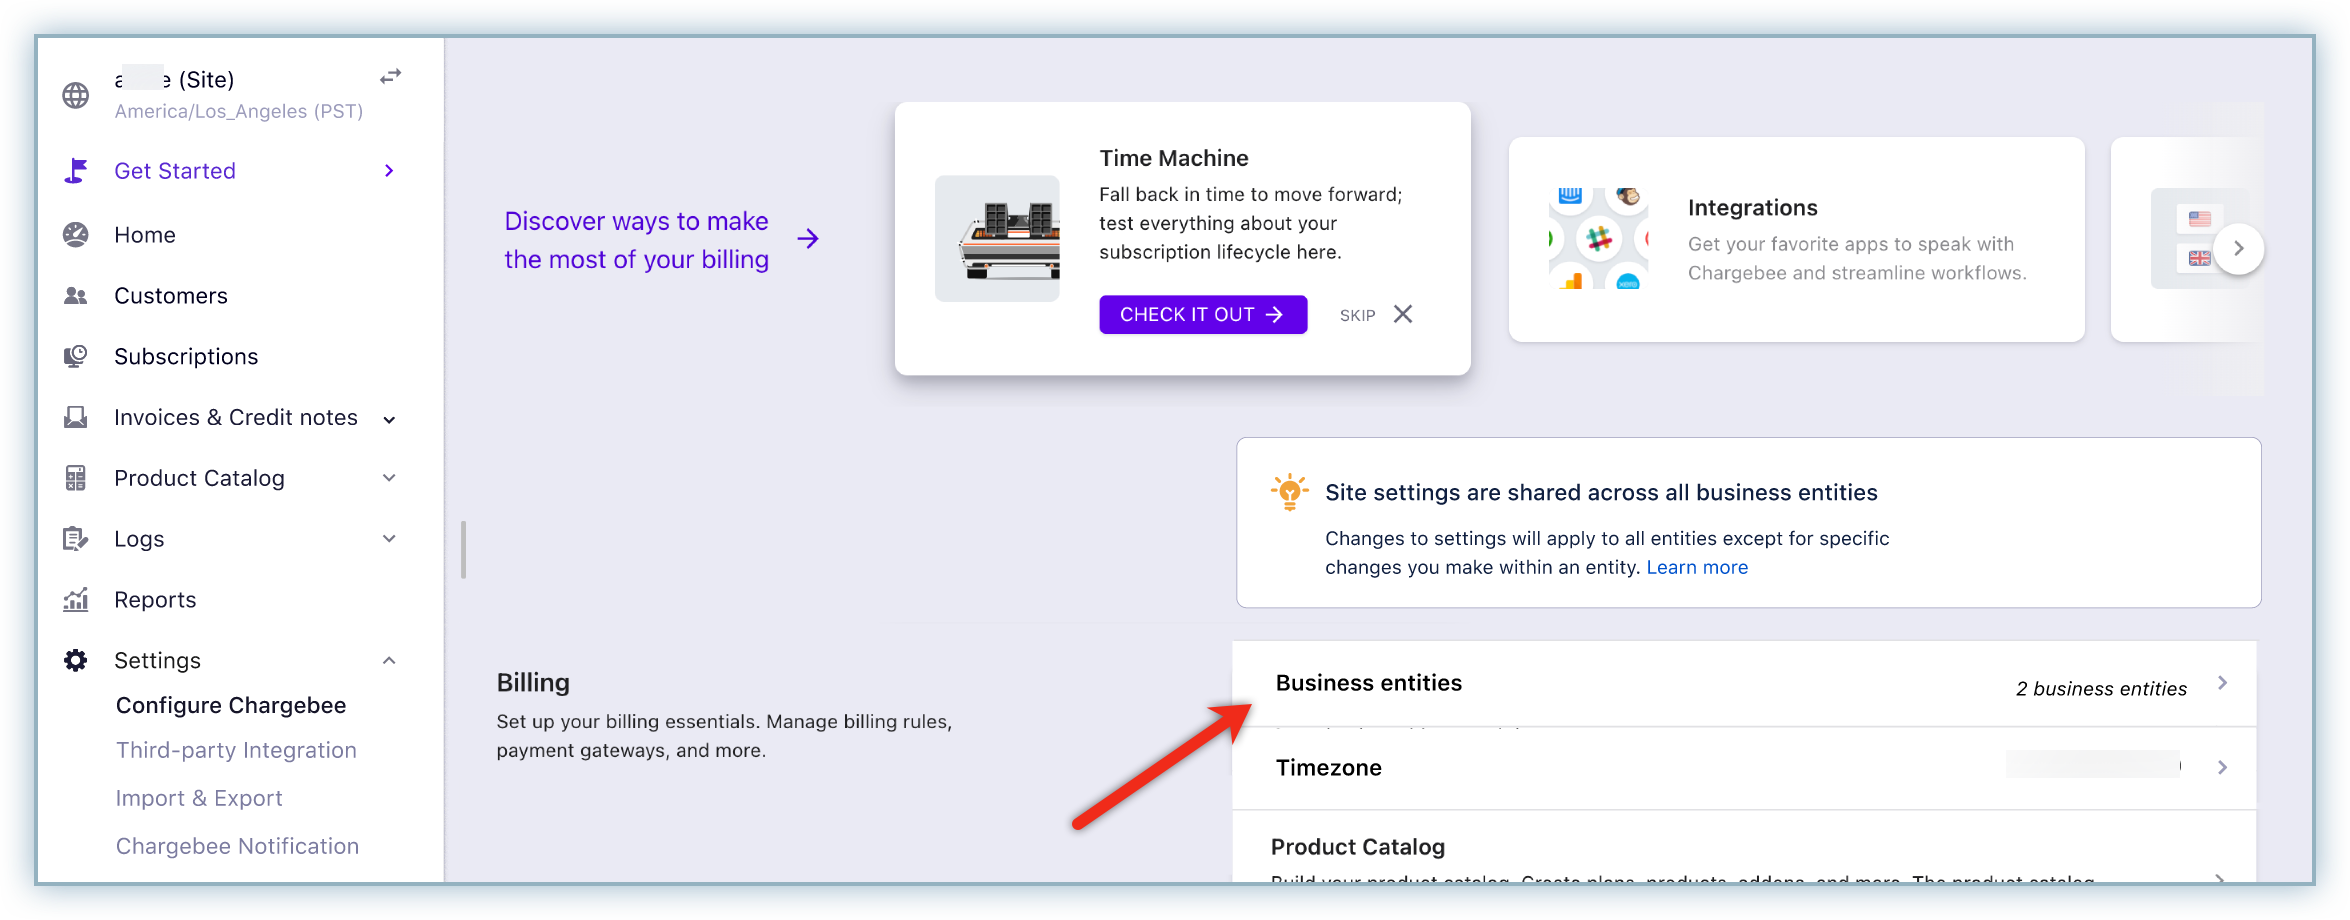
Alternatively, you can also click Settings > Configure Chargebee > Business entities to view all of the entities associated with the site.
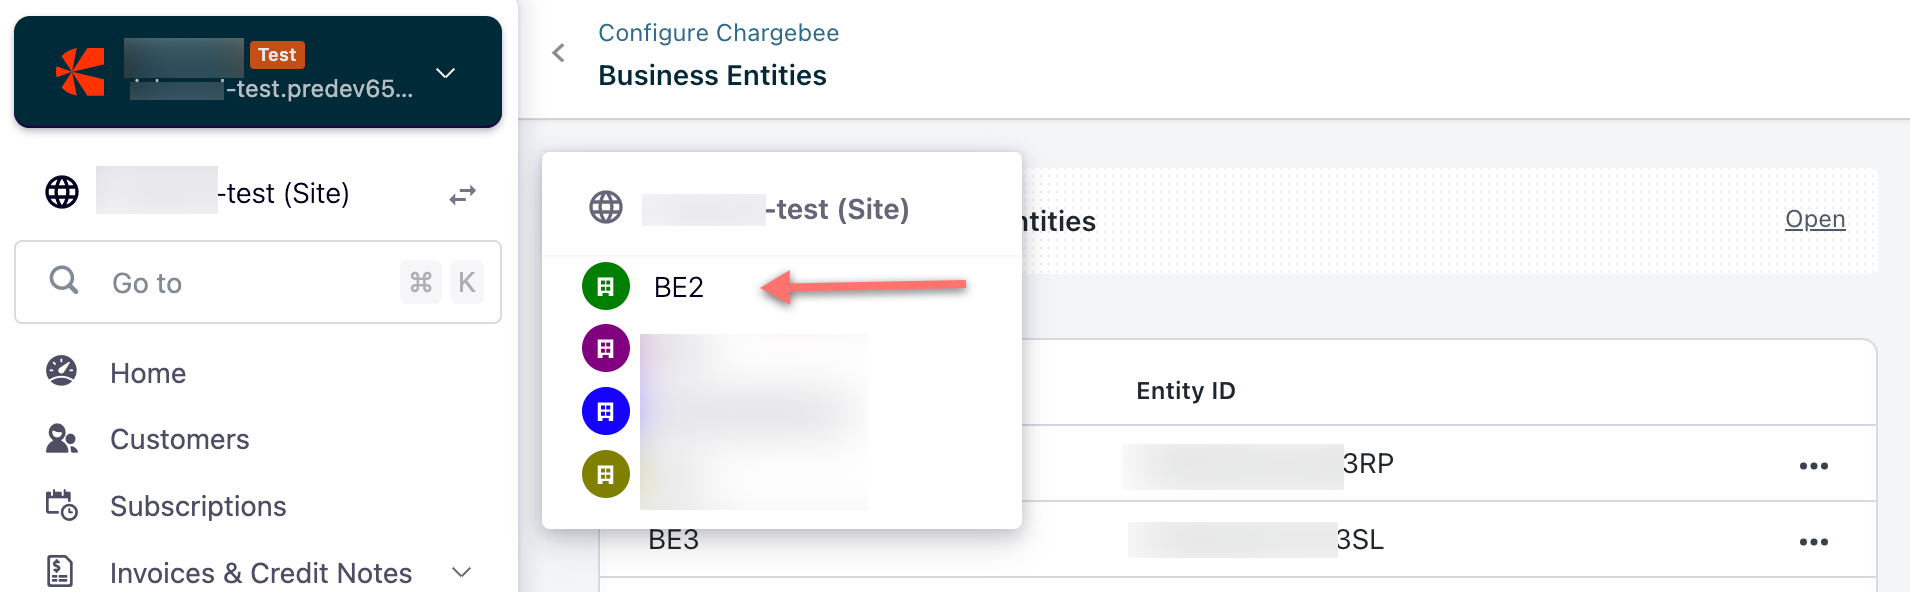
Once the business entities are created, your left navigation pane includes an additional option that allows you to switch between your entities.
Follow the steps below to switch between entities:
Click the switch icon in the left navigation menu to view a list of entities.
Select the entity to access from the list that displays.
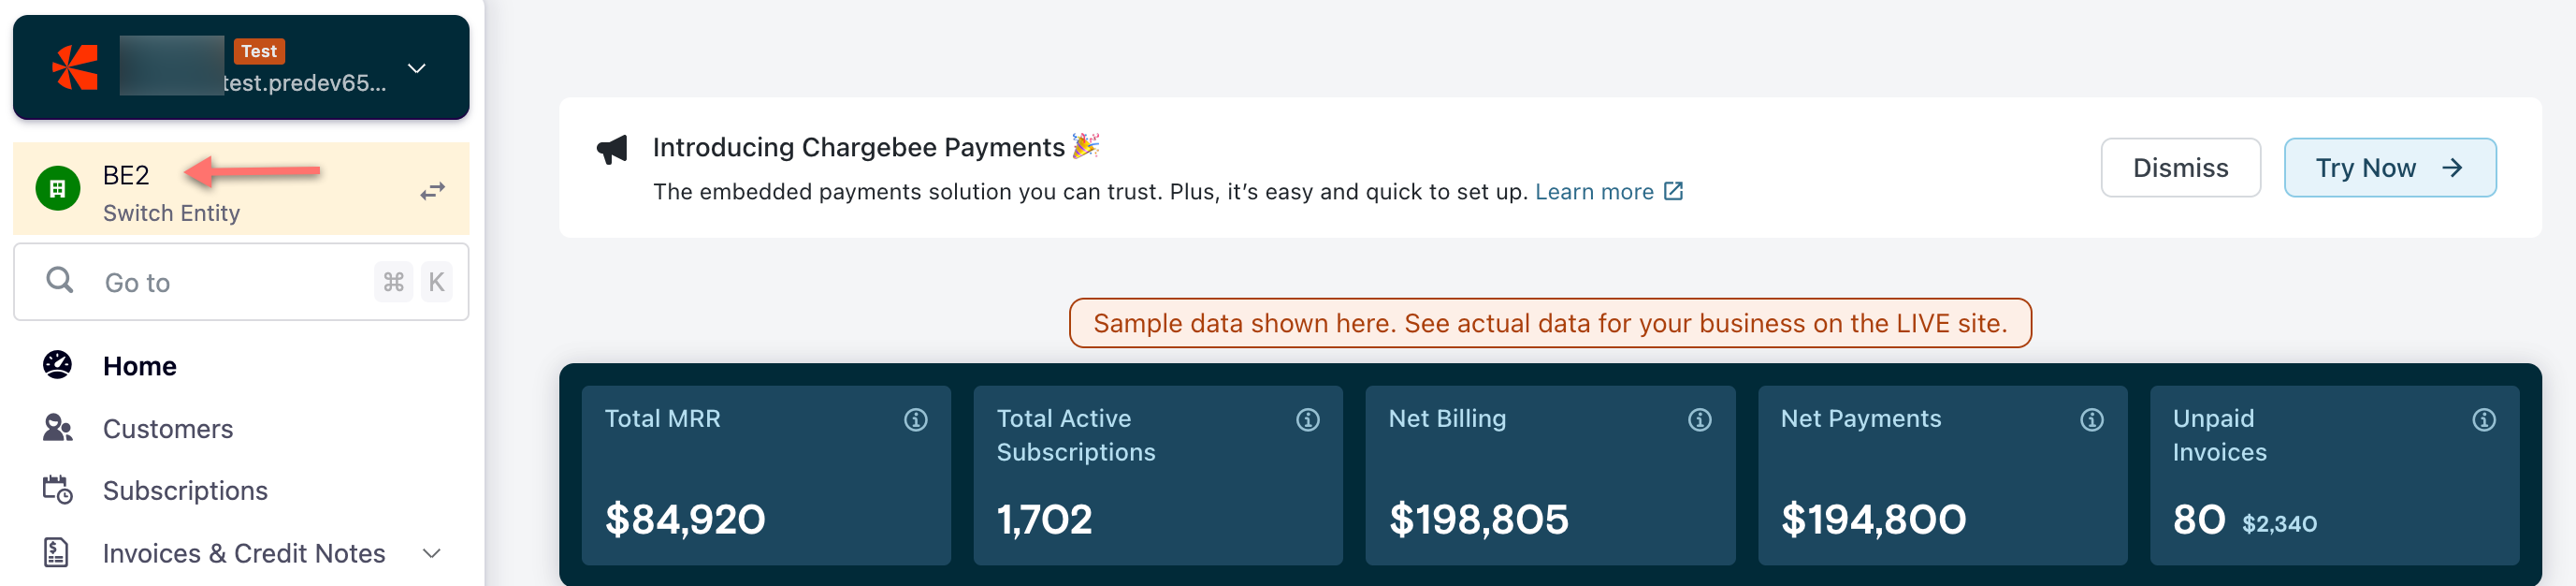
Review or update necessary details associated with Business Entity.
The ability to switch between entities is dependent on the access assigned to the user. Users can only view entities for which they are assigned access.
The configuration of your site and the addition of business entities are now complete. It is now imperative that you add team members and assign them access to the site or entities created.
The access levels are categorized based on the access to business entities and would define the actions that are accessible by the users. Review the table below to review the access levels that can be assigned to a user:
| Category | Select Entities | Assign Roles |
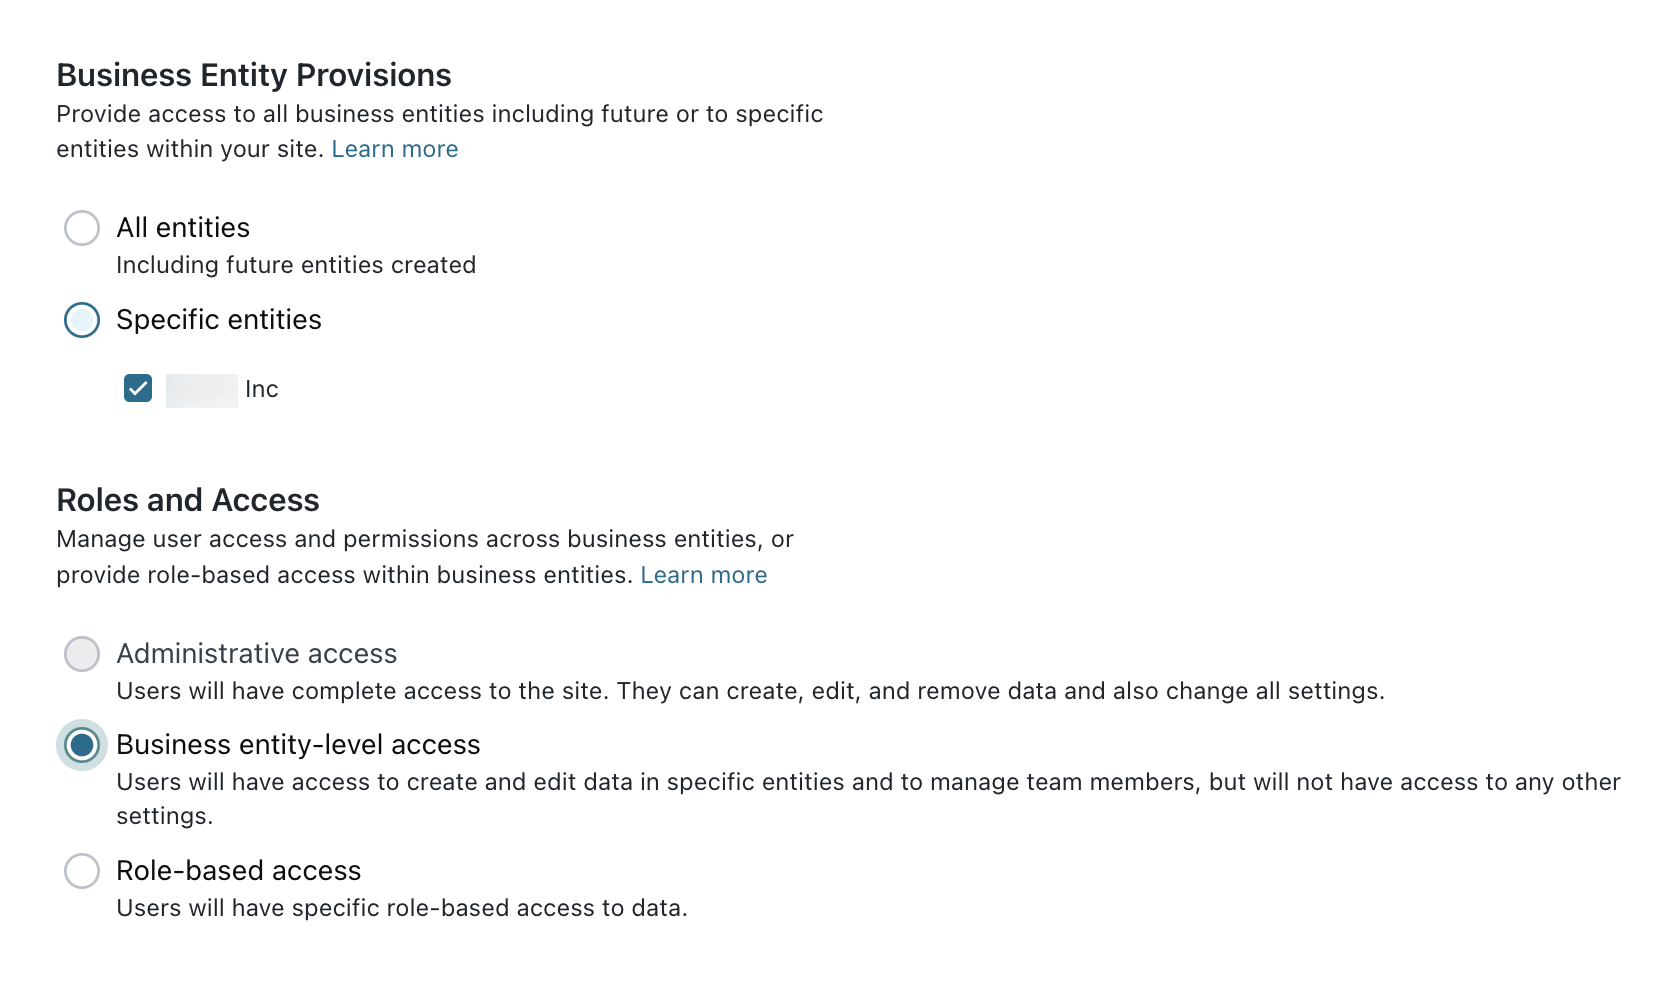
| Business Entity | All Business Entities | Full Access: Users will have complete access to the site. They can create, edit and remove data and change settings. |
| Business Entity level Access: Users will have access to create and edit data in specific entities and to manage team members, but will not have access to settings. |
||
| Role-Based Access: This allows you to assign access based on the roles configured on your site. |
||
| Specific Business Entities | Business Entity level Access: Users will have access to create and edit data in specific entities and to manage team members, but will not have access to settings. |
|
| Role-Based Access: This allows you to assign access based on the roles configured on your site. |
It is important to note that the access level that a user can assign while inviting a new user is limited to their own access or lower.
Follow the steps below to invite team members to a site or entity and assign access levels:
A Site admin user can invite another user to have the same access as themselves or lower. In this example, we will review a Site Admin providing Entity Admin access to a user.
Login to your Chargebee site.
Ensure you have selected the site view from the switch icon.
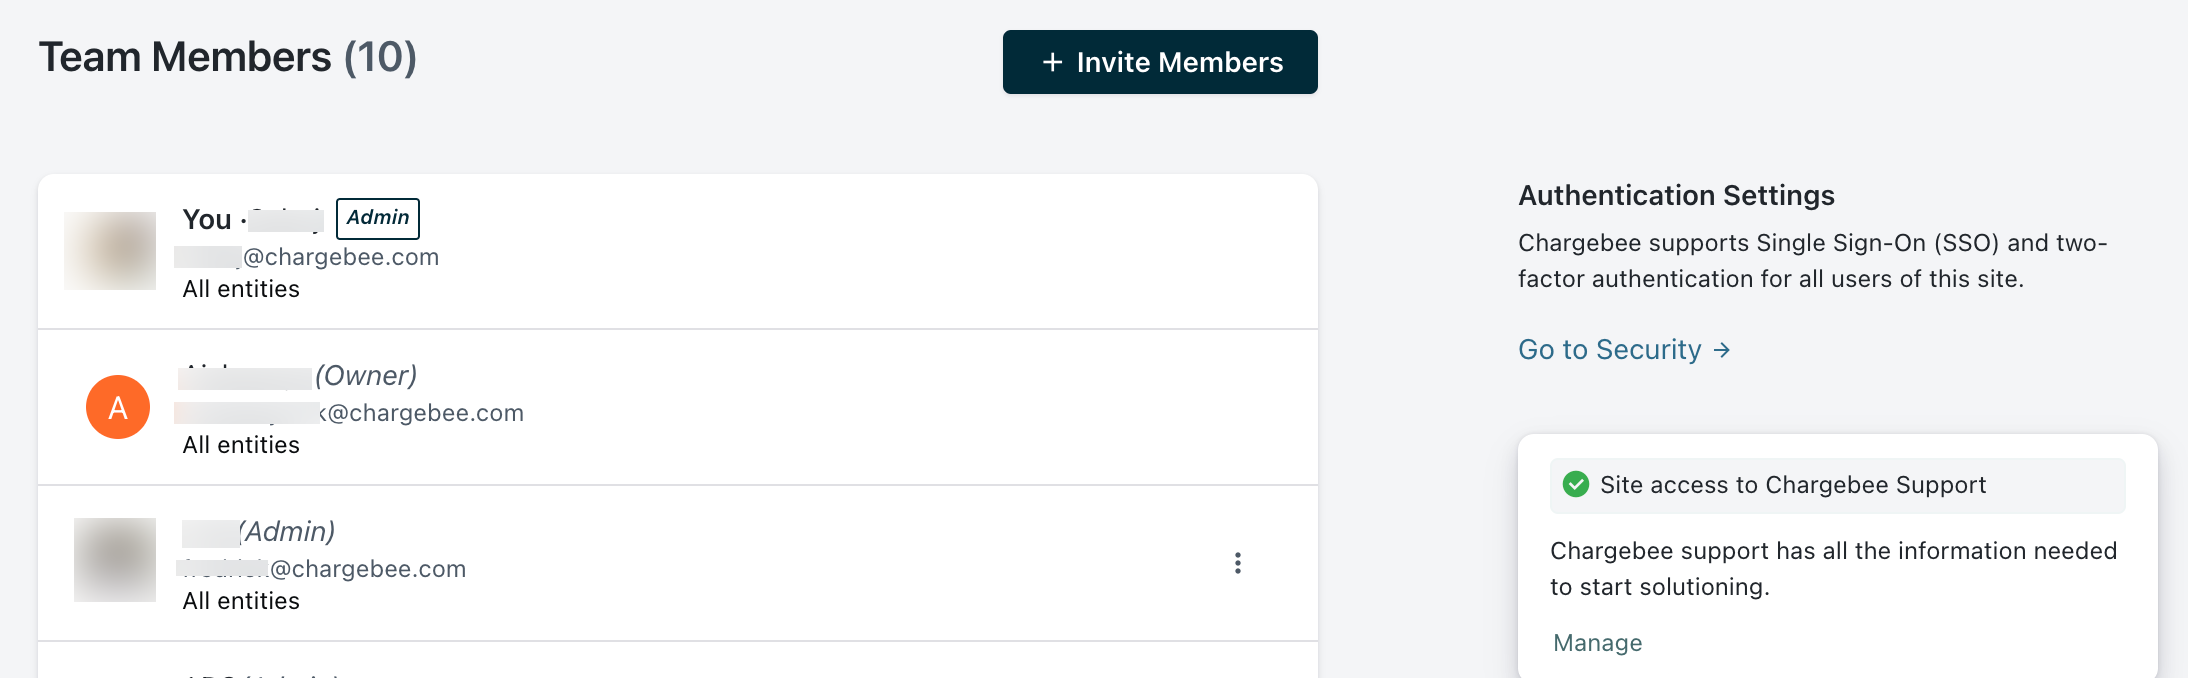
Click Settings > Team Members to invite new users.
Click Invite Members to assign access levels and send email invites.
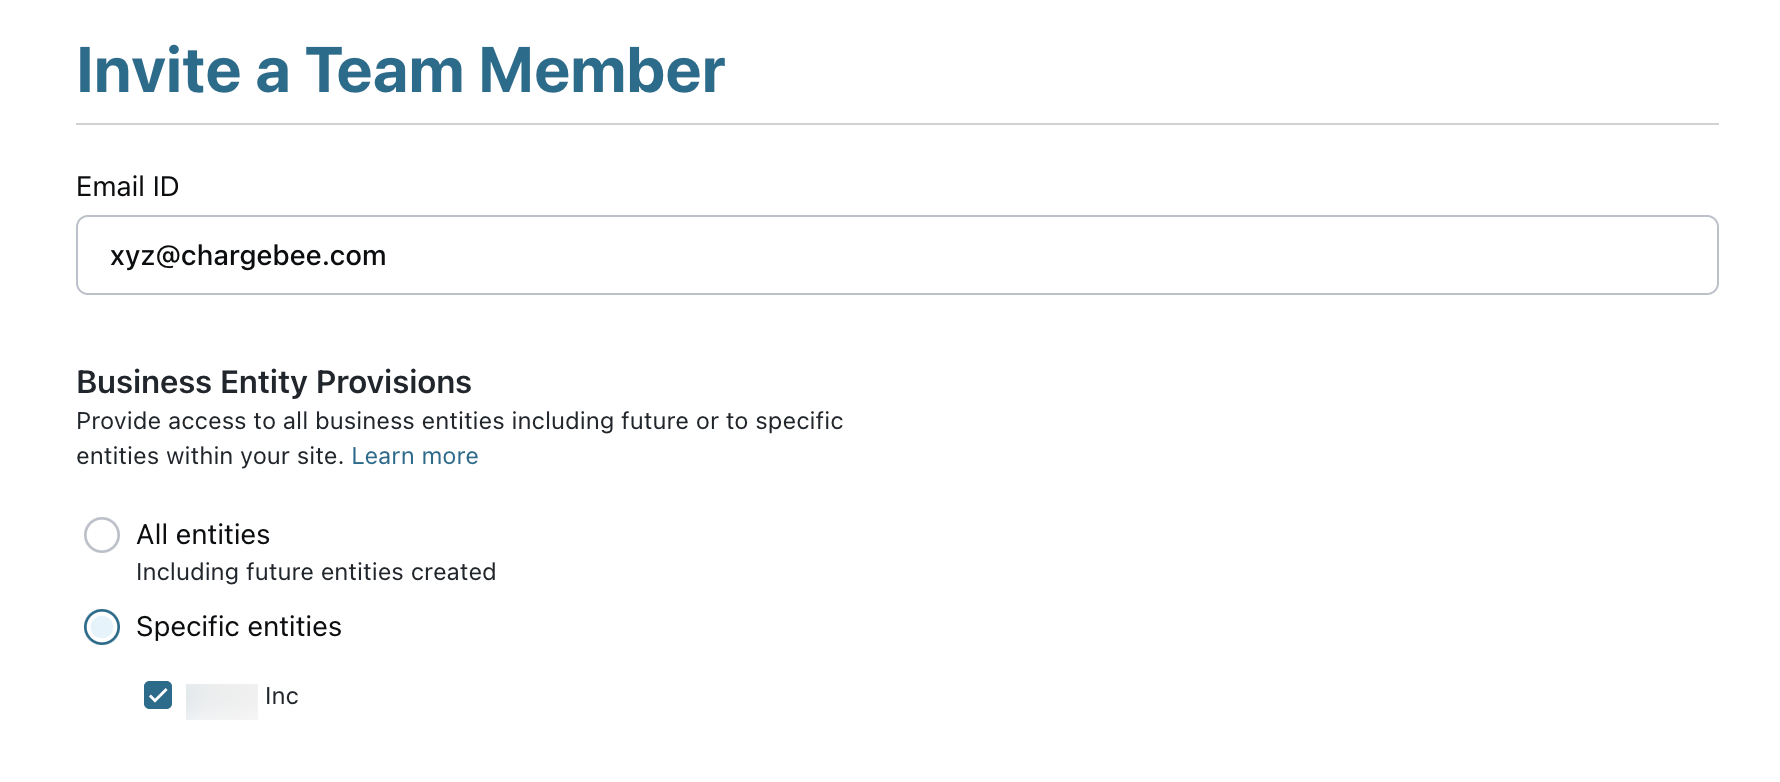
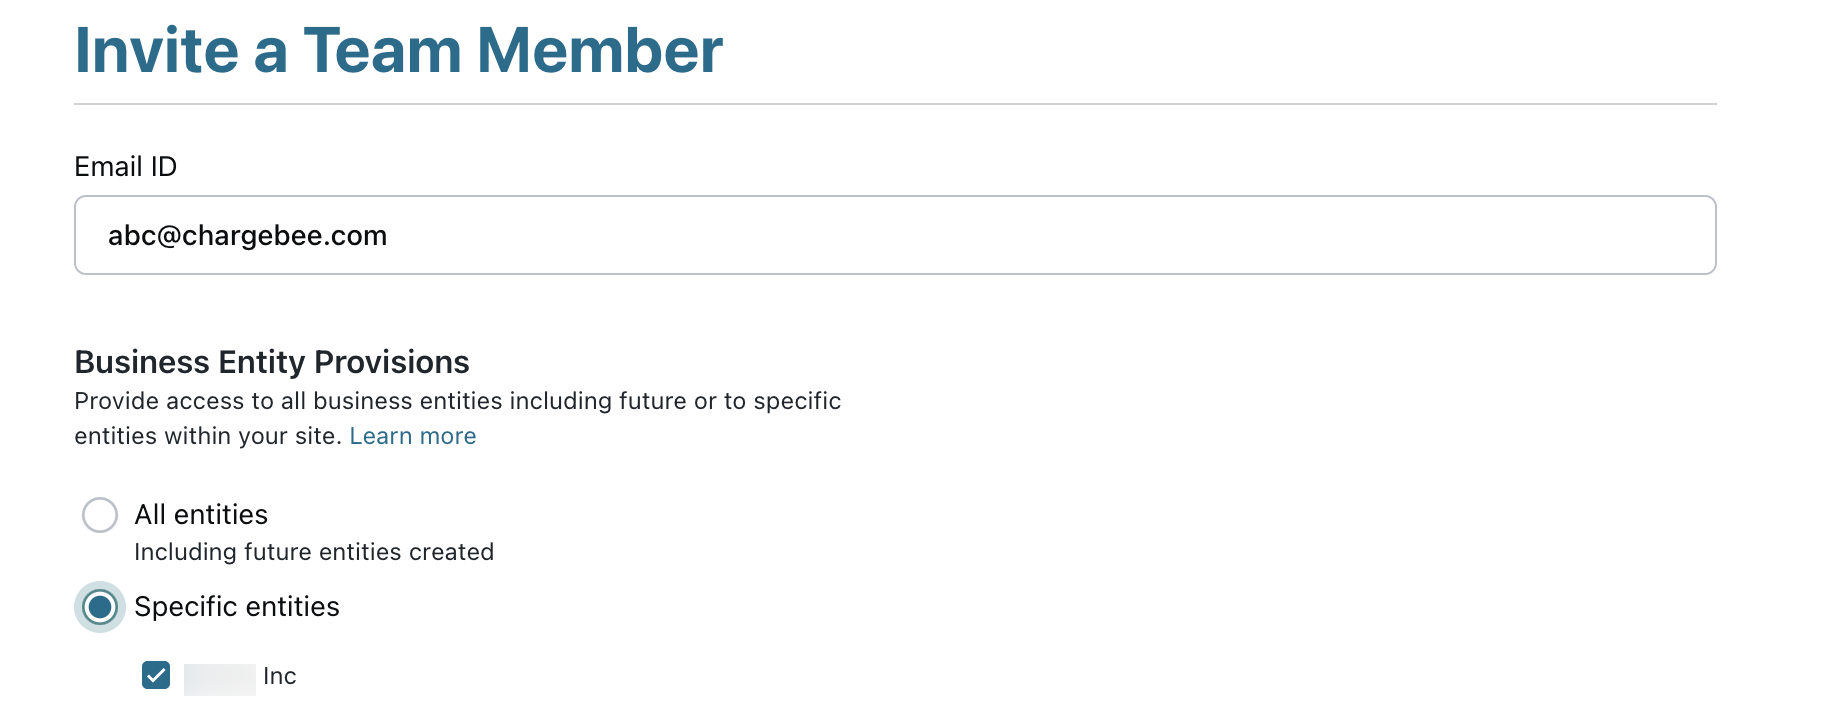
Enter the email address of the invitee in the Email field and select the applicable radio button to give access to business entitie and click Add Entities to select entities.
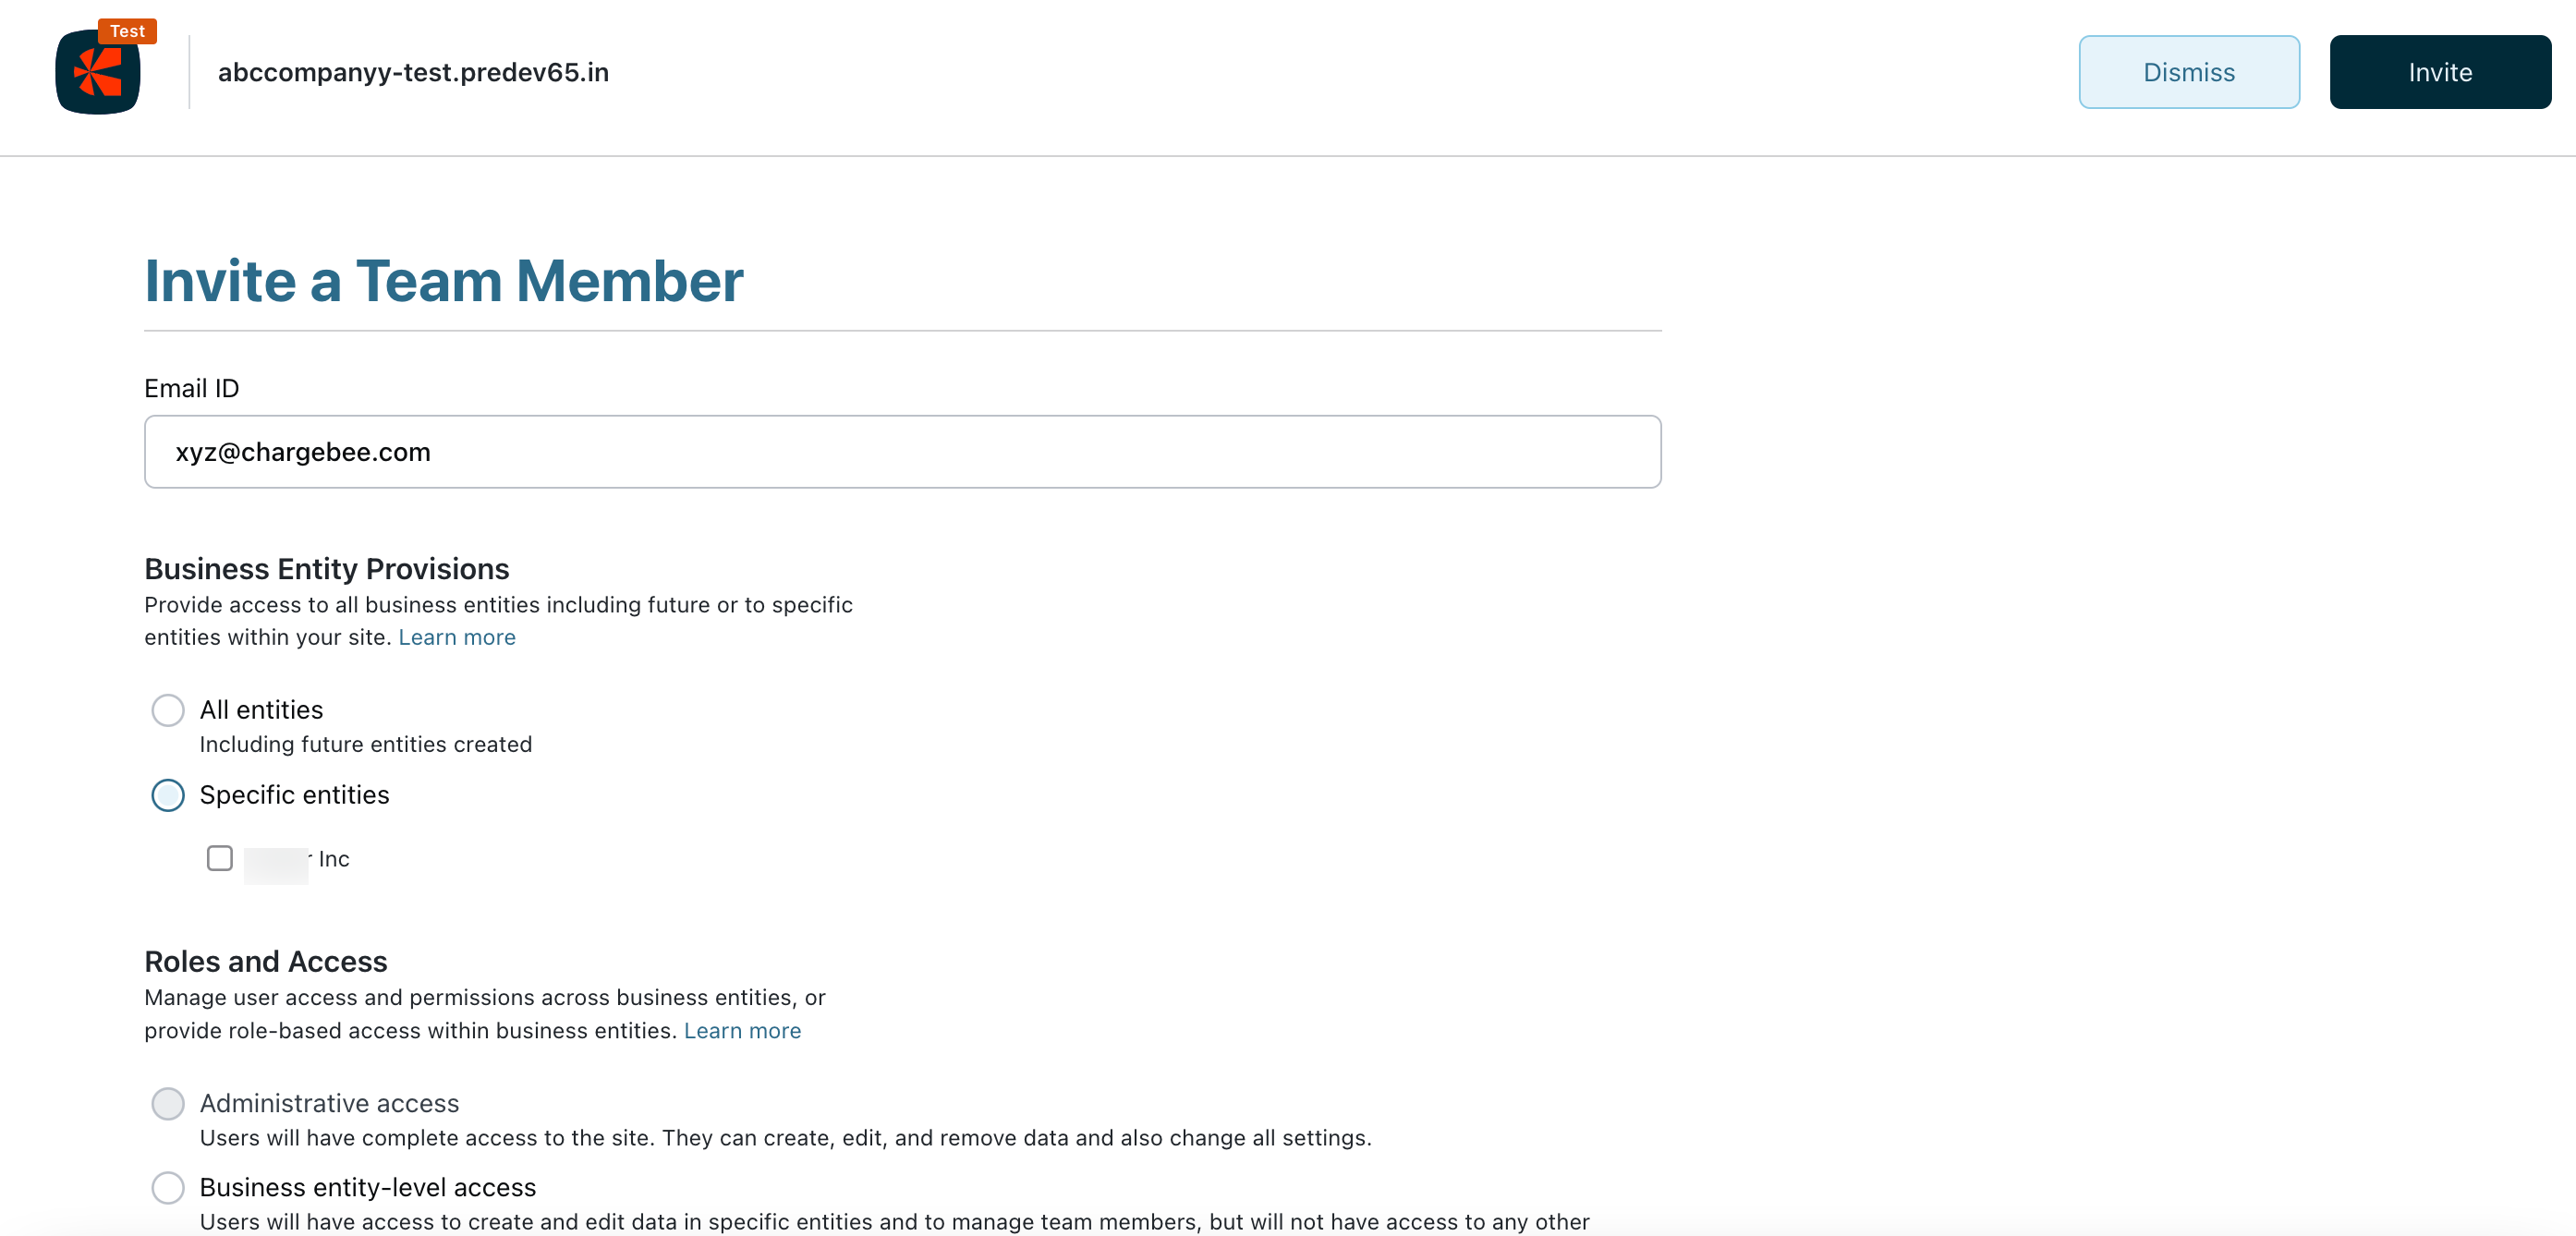
Select applicable entities and click Add.
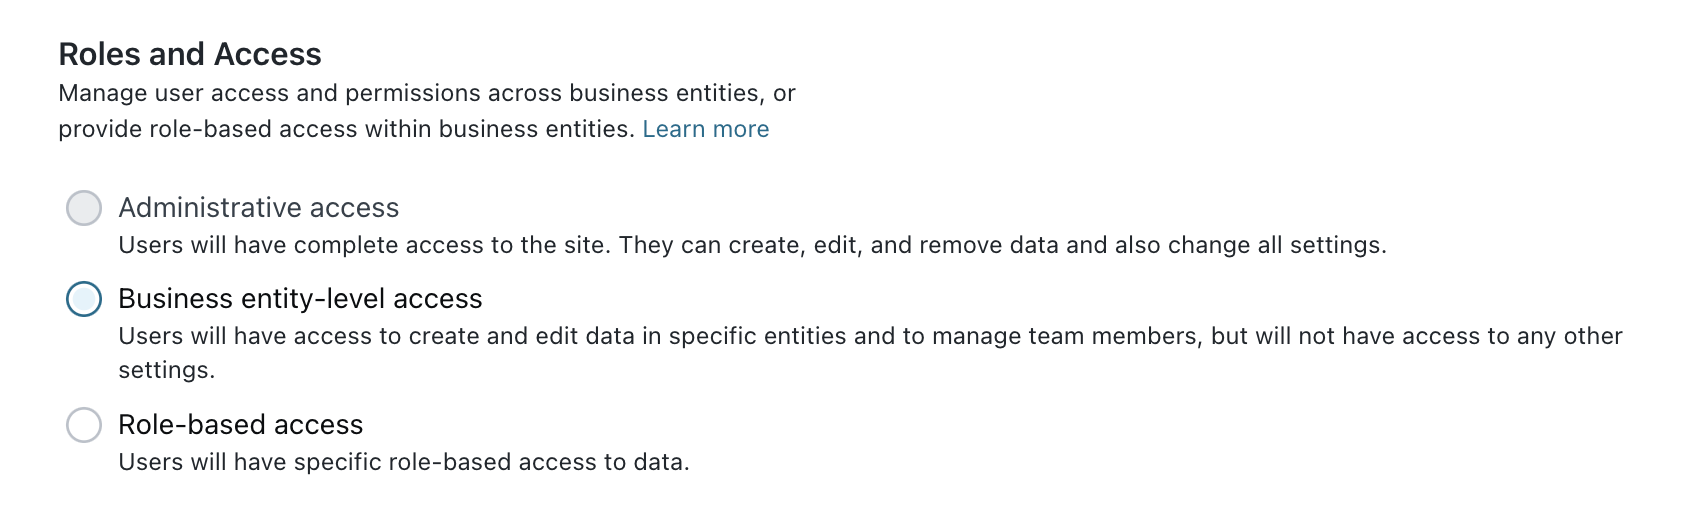
Click the applicable radio button to assign Roles and Access.
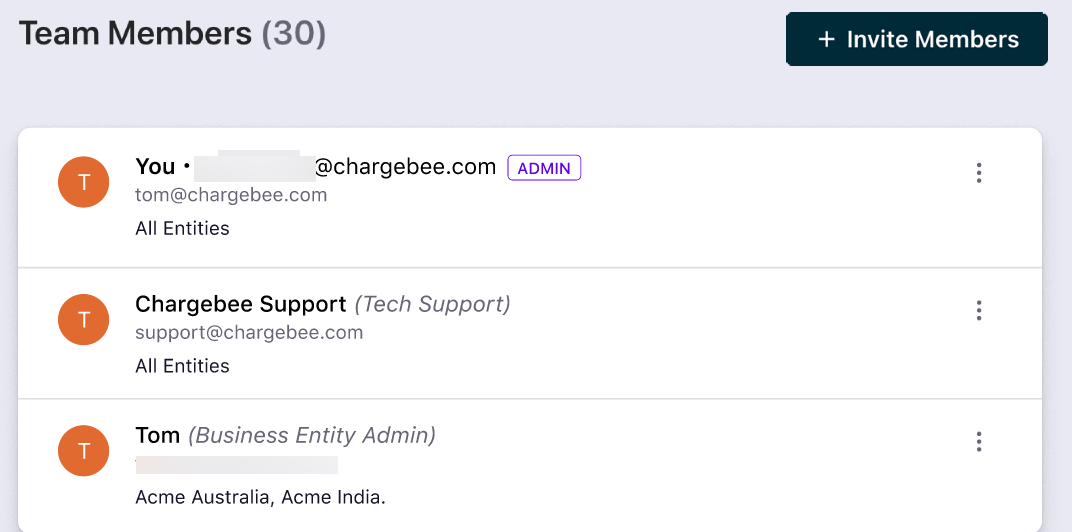
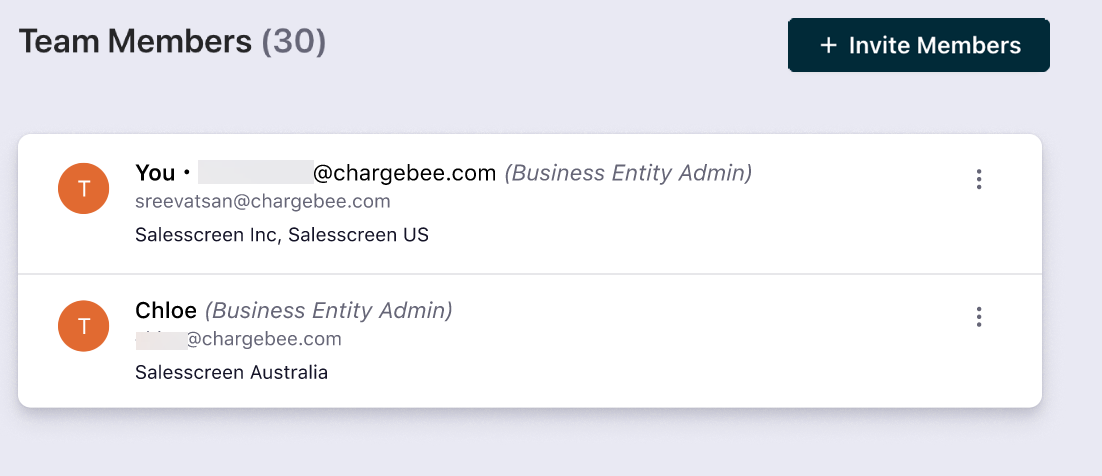
Click Create to send the email invite and review the access view page that lists current users and their access levels.
An Entity Admin user can invite users to have the same access or lower. In this example, we will review an Entity Admin providing Entity Admin access to a user.
Login to your Chargebee site.
Ensure you have selected the site view from the switch icon.
Click Settings > Team Members to invite new users.
Click Invite Members.
Enter the email address of the invitee in the Email field and select the entities the user would access.
Select the applicable radio button to assign Roles and Access.
Click Create to send the email invite and review the access view page that lists current users and their access levels.
Advise your team members to review the receipt of an email and click Accept Invite to be added to the Chargebee site.
The creation and management of customers can be fulfilled by users based on the access that is assigned to them.
To elaborate, a site admin can add customers to any of the entities while an entity-level user can only add customers to the entity to which access is provided.
In this example, the site admin user with access to multiple entities is creating a customer for the Australian entity:
Login to the Chargebee site.
Click Customers from the left navigation menu.
Click Create Customer to add a new customer.
Select the applicable option from the Business Entity drop-down list.
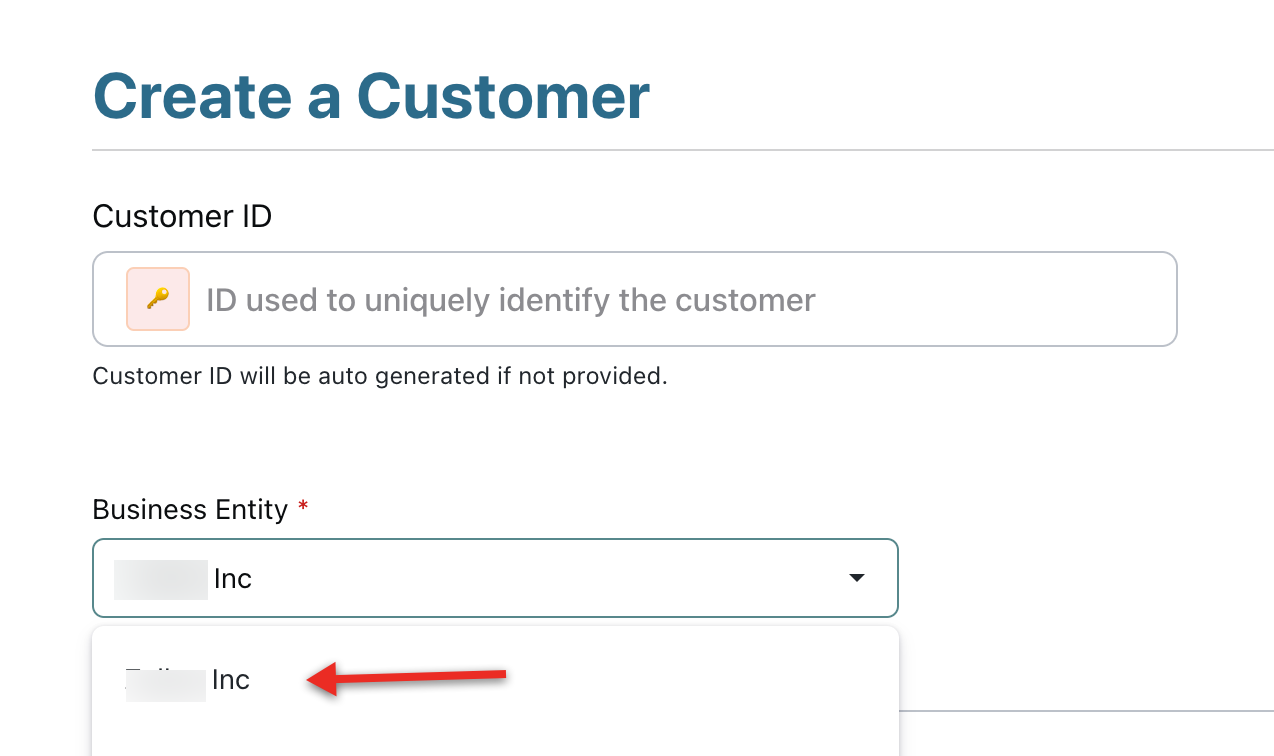
Type the required details into other fields and click Create.
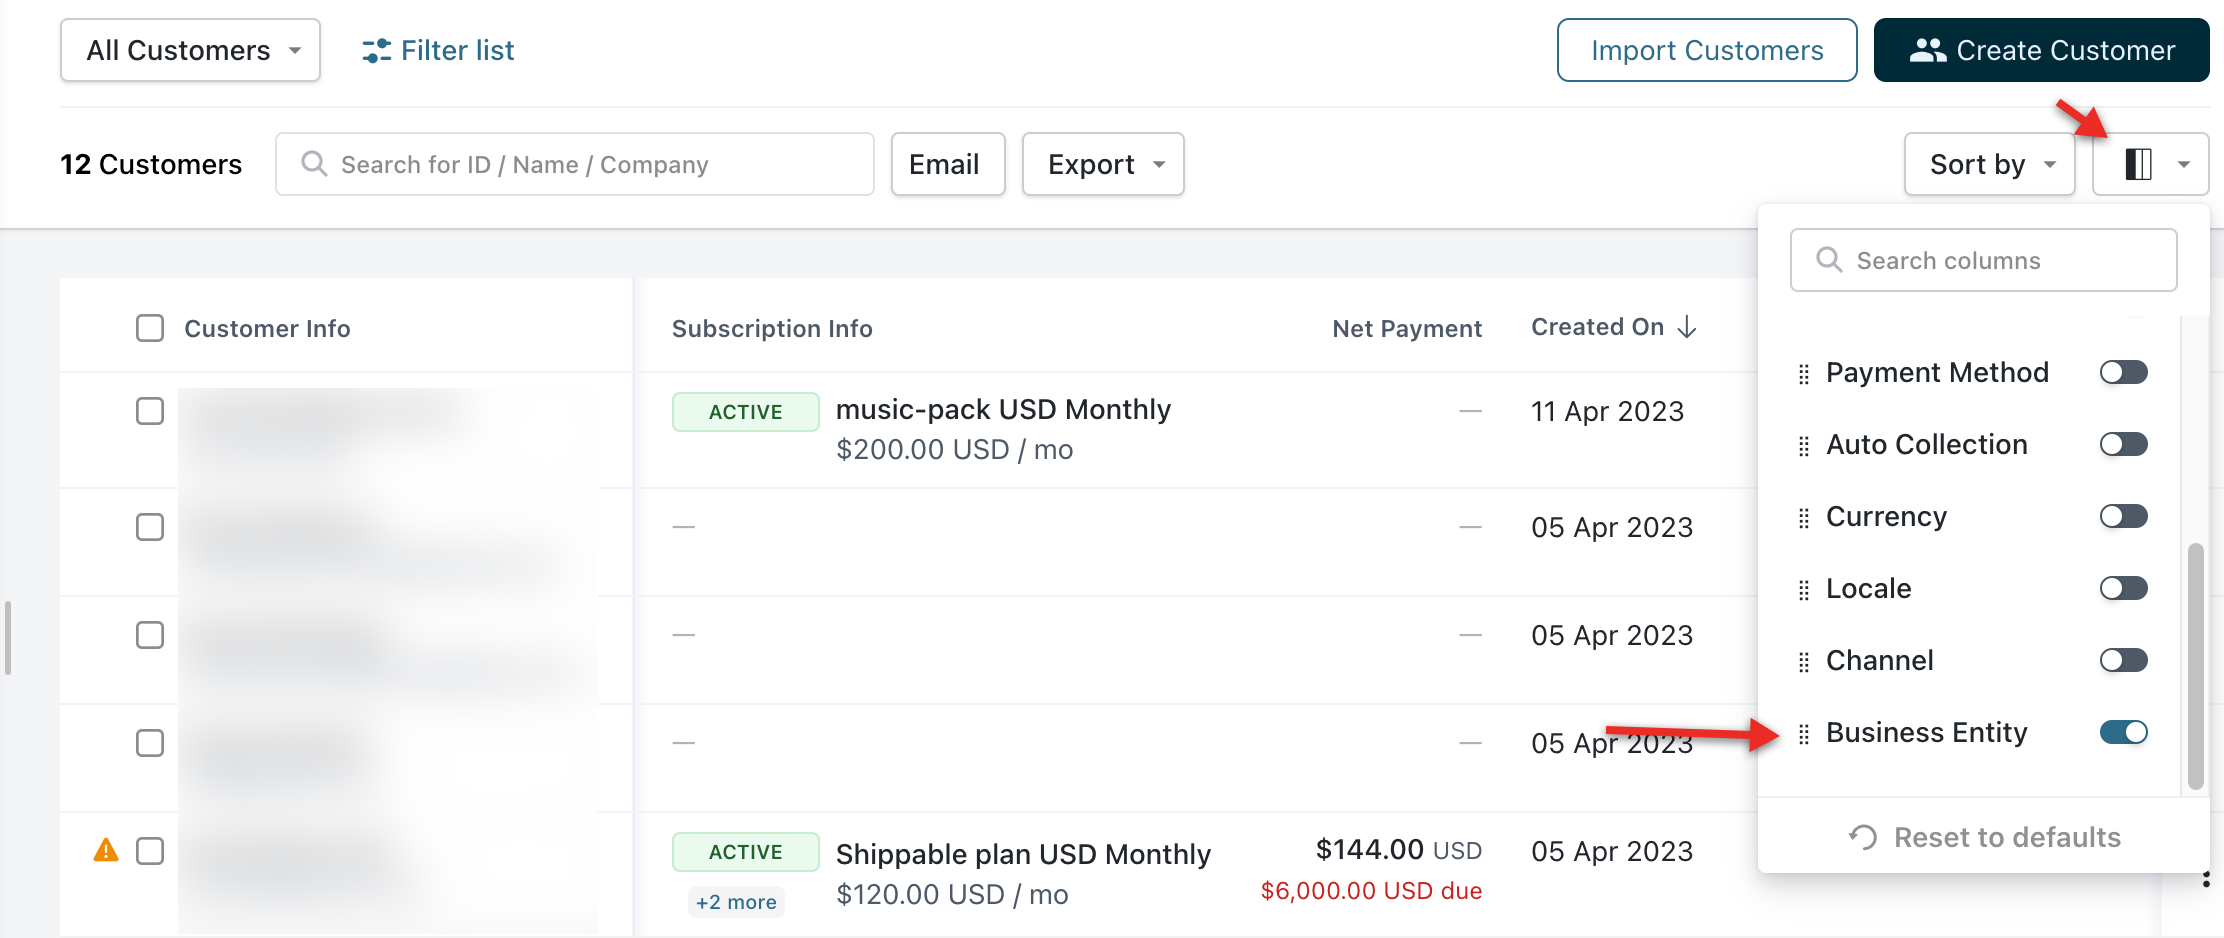
When using the site view, the All Customers list is an effective way of viewing all customer records associated with the site and/or entity.
However, the increased number of entities may result in additional records making it harder to navigate and locate a required customer record. The filter options have been optimized to now include Business Entity allowing you to view customers associated with a business entity.
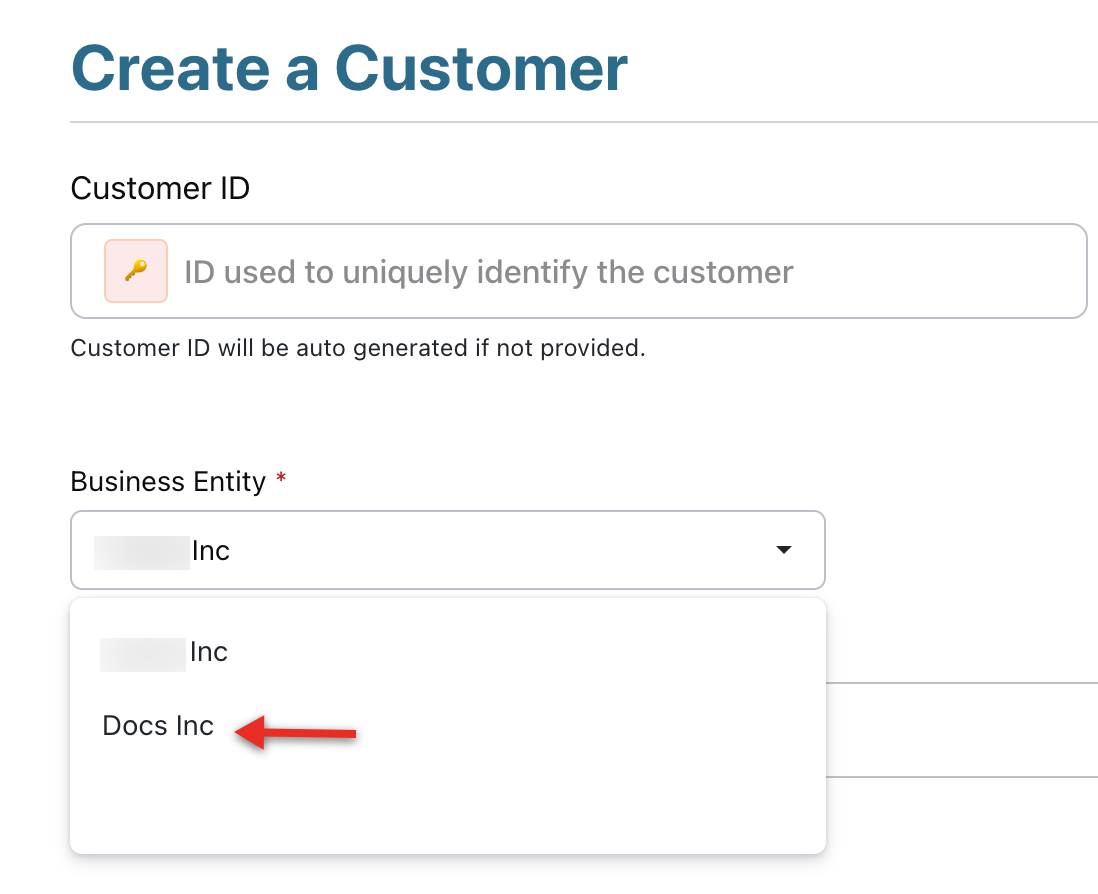
An entity admin can create customers, however, the customers can be created only for entities that the user has access to. Review the screenshot below for user limited to creating customers for associated entities only.
Subscriptions are created based on the access levels that are associated with the user. Follow the steps below based on the access level assigned to you:
A site admin user may have access to multiple entities and can create a subscription using the customer base from all entities. However, it is important to note that the entity of the customer determines the entity of the subscription too.
Follow the steps below to create a subscription for a customer:
Login to your Chargebee site.
Click Subscriptions.
Click Create New Subscription.

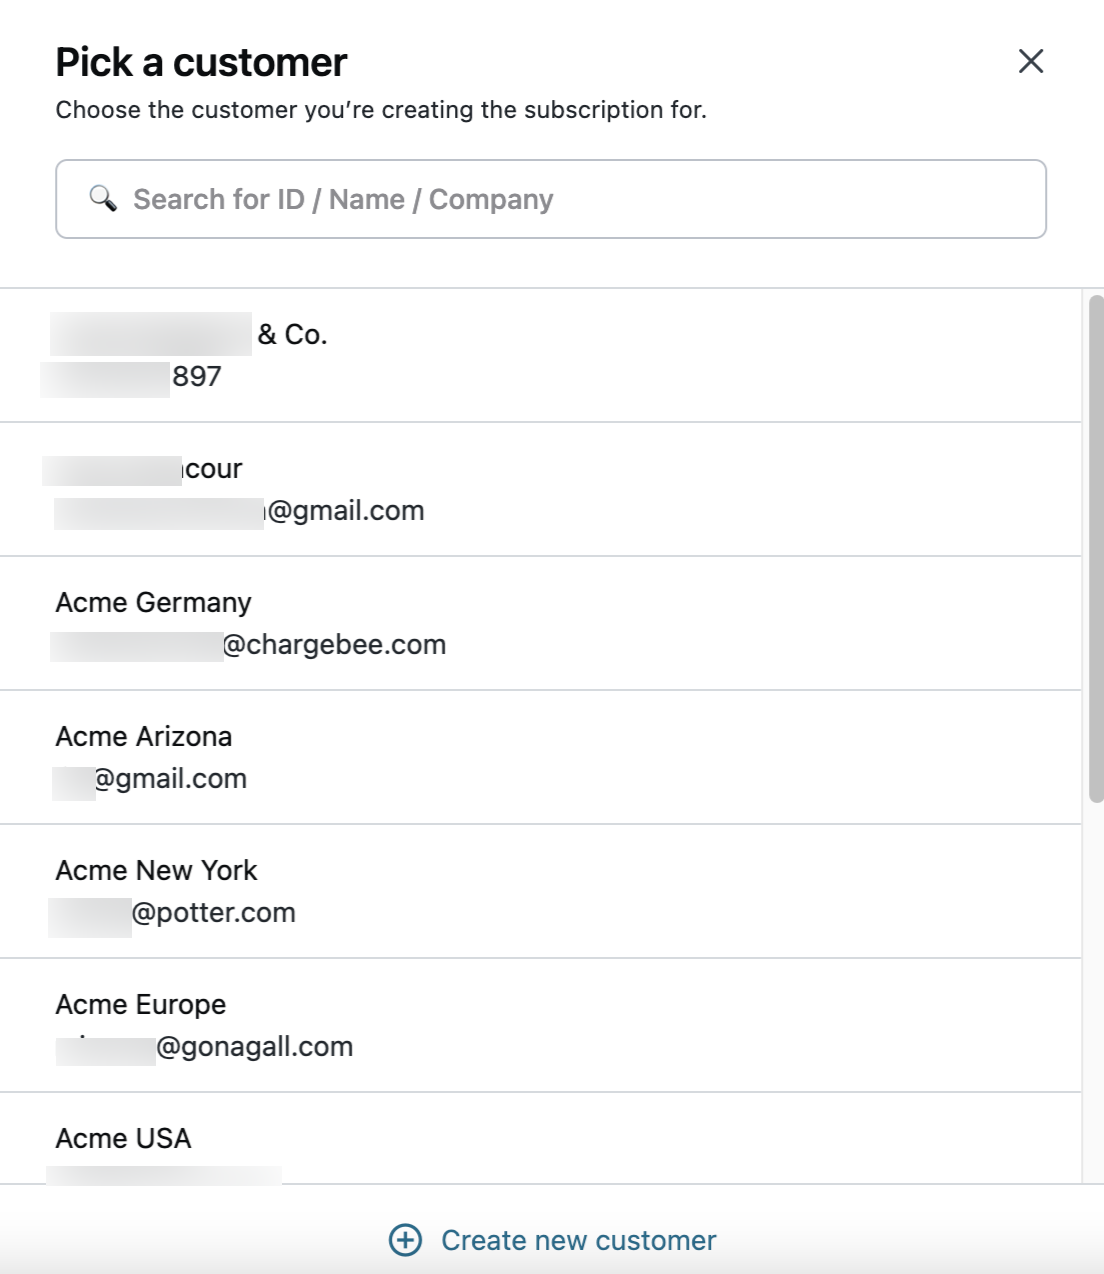
Select an applicable customer from the Customer List or click Create new customer.
A business entity admin can only create subscriptions for entities assigned only. Follow the steps below to create a subscription for a customer associated with an entity.
Login to your Chargebee site.
Click Subscriptions.
Click Create New Subscription.
The associated with the customer displays at the top, enter the subscription details required, and click Create.
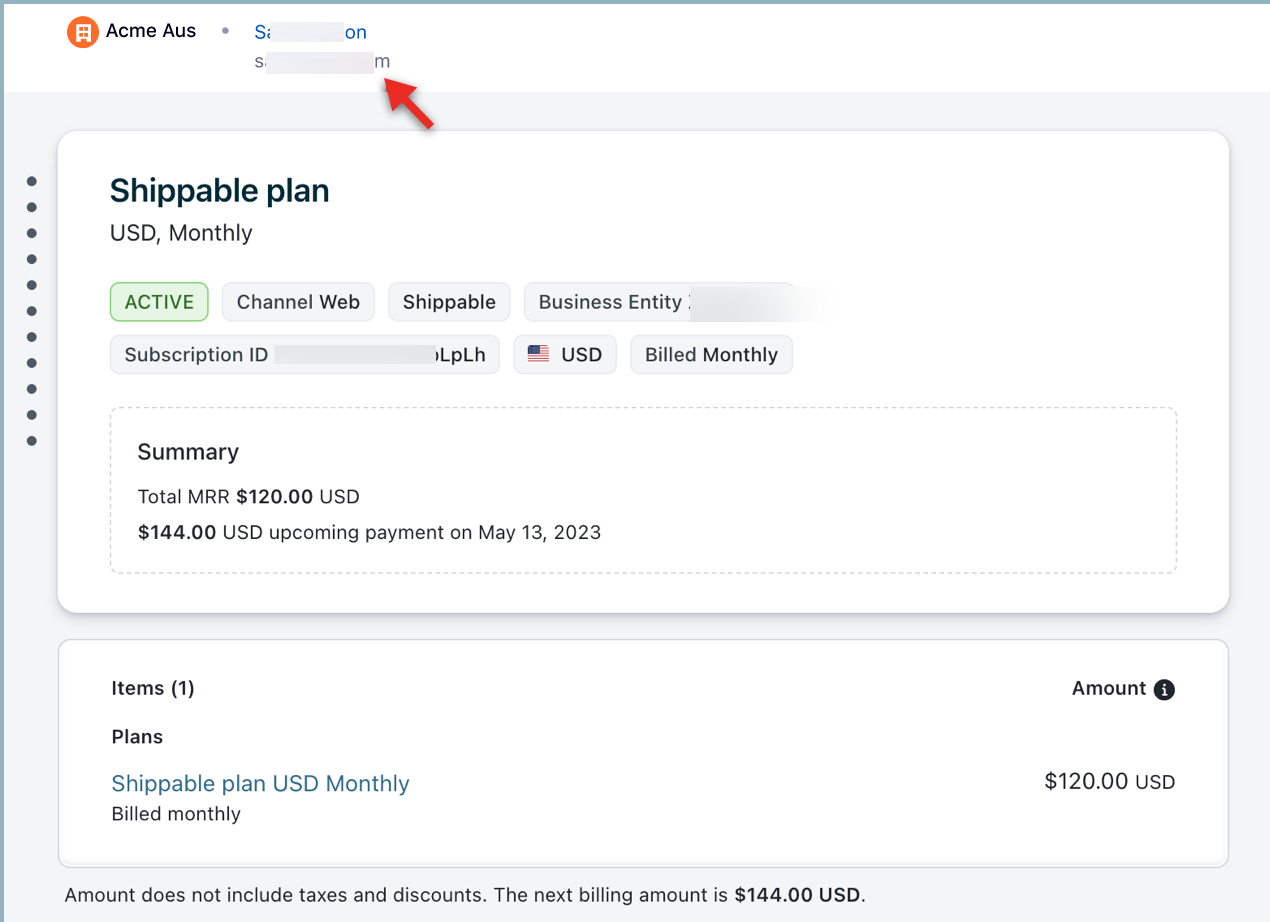
The entity associated with the subscription displays at the top of the subscriptions page with the subscription details.