In-app is a intuitive pop up style checkout. On clicking the Subscribe/Checkout button, a pop up would open where your customers will have to enter their account and payment details. You can choose to configure your brand elements, fields, display charges, taxes, a thank you message and play around with multiple workflows to suit your business needs!
Here is a sample of the In-app Checkout.
In case you are using the Single Page Checkout and intend to try In-app Checkout, take a look at this video .
Steps mentioned in the above video is only applicable in Chargebee Test site. Contact [email protected] to enable it in the Chargebee Live site.
Before configuring In-app Checkout, make sure to do the following in your Chargebee user interface:
As a merchant, depending on your business model, you can choose how you intend to set up the Checkout. Chargebee provides you with three options to choose from:
Pre-requisite: This integration is feasible only if your website accepts JavaScript.
Developer effort needed: Low. Significant developer effort needed for using Dynamic Cart Modification feature.
Drop in Script is an easy to use plug-in type integration. You can create a checkout page by adding a script generated for the plan in your HTML page. When integrated using Drop-in Script, the In-app checkout window opens on the same browser tab. A more advanced feature is also available when integrating through Drop-in script — Dynamic Cart Modification based on user action. Complex business logic such as price override, user authentication and so on, are not possible through this integration.
Checkout pages generated using drop in script are Level 1 PCI compliant and all that you have to do is fill in this questionnaire.
Note:
Per compliance team, the merchant should review the following documents from the above link:
1) SAQ Instructions and Guidelines
2) Understanding SAQs for PCI DSS
The SAQs have to be filled out based on the applicability as per the guideline document and shared with the payment gateway. No document needs to be submitted to Chargebee.
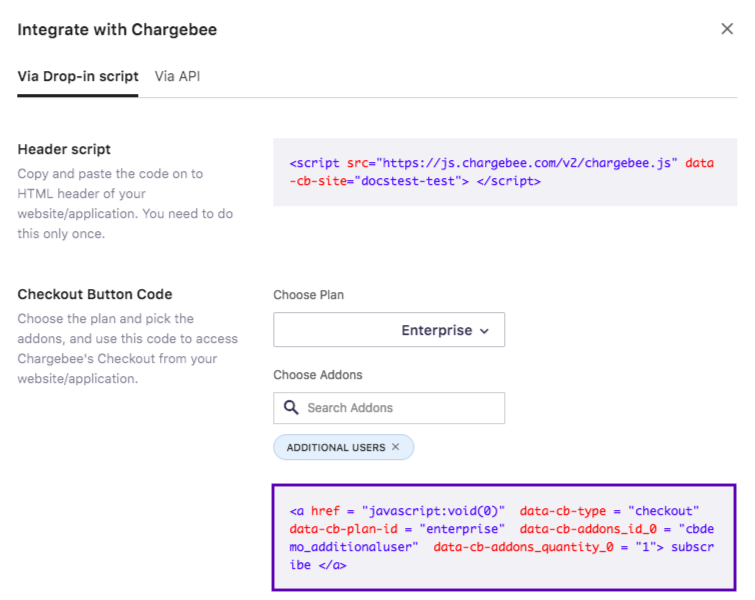
To integrate In-app Checkout using Drop-in Script,
<head> tag of the HTML page.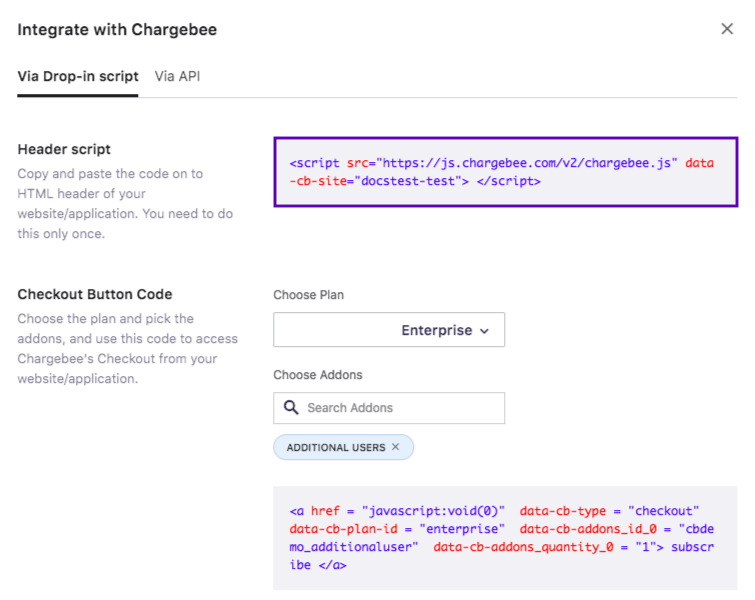
Here is a sample checkout.

Pre-requisite: None
Developer effort needed: Low
You can manually create a checkout URL and embed it in your application/website's checkout button. On click of the checkout button, In-app Checkout is displayed.
This approach is the easiest. Through this integration, the checkout window opens in a new tab. Products in the Checkout URL cannot be altered during checkout since the integration does not support dynamic modification. Complex business logic such as price override, user authentication and so on, are not possible through this integration.
In this integration approach, if user clicks the checkout link when on a WebView tab the checkout window would not work. This is because the integration only supports opening the checkout window in a new tab.
Here's the syntax to create a plan specific URL:
https://<site-name>.chargebee.com/hosted_pages/plans/<plan-id>
Replace the "site-name" and "plan-id" placeholders with your Chargebee site name and Plan ID. For example if the site name is ‘docstest-test' and plan ID is 'sapphire' then this is how the URL would look:
https://docstest-test.chargebee.com/hosted_pages/plans/sapphire
This approach is recommended if your application/website's code does not accept JS scripts.
Pre-requisite: None
Developer effort needed: High
Integrating using API is extremely useful when you want to have a user management or authentication system at your end.
Here is a quick example on when you would want to prefer Hosted Pages API over Drop in script.
Let us assume that James runs a digital weight loss and fitness app. He wants to collect user information such as the client's height, weight, food habits etc along with his address, email and store it in his database instead of Chargebee. But, he would still like to use Chargebee's checkout as he does not want to get involved in the nitty-gritty details of PCI Compliance.
James can choose the API integration as this would allow him to collect partial information at his end and then use Chargebee Checkout API to collect the remaining information (Specifically payment details for example). Chargebee will take care of the PCI Compliance, all that James has to do is fill in this questionnaire.
For additional information on API and Drop-in script integration options, take a look at this flowchart in our developer docs.
Benefits of using API integration:
Integrating using APIs would require developer efforts from your end. Take a look at this documentation to learn more.
In-app Checkout supports 3DS payments. All you need to do is complete our SCA checklist, and Chargebee will start handling 3DS payments via In-app Checkout.
For scenarios which do not involve immediate payment like Update Payment Method, Subscription with trial etc., a minimum amount 3DS authorization is performed by Chargebee. This ensures that subsequent payments can mostly go through without customer intervention. The authorized amount will be voided automatically.
For scenarios which involve immediate payment as in Subscription without trial, Upgrade Subscription etc., Chargebee takes care of initiating the 3DS flow and allowing 3DS verification to happen.